How to Recover Deleted Text Messages on iPhone and iPad

Did you accidentally delete important text messages from your iPhone? Worry not. Most of us have done it at some point or the other. So yes, we can feel your pain.

Fortunately, there are many ways to recover deleted text messages from an iPhone or iPad. So, you may now stop cursing yourself for the mistake and go through this detailed guide to learn the most reliable ways to restore deleted iPhone/iPad text messages.

Image credit: iPhone Backup Extractor

Restore Deleted iPhone/iPad Texts Using iCloud Backup

One of the most reliable ways to retrieve deleted iPhone/iPad messages is through the iCloud Backup. Yes, you read it right. If you had an iCloud backup before the accidental deletion of the messages then you can get them back with ease.

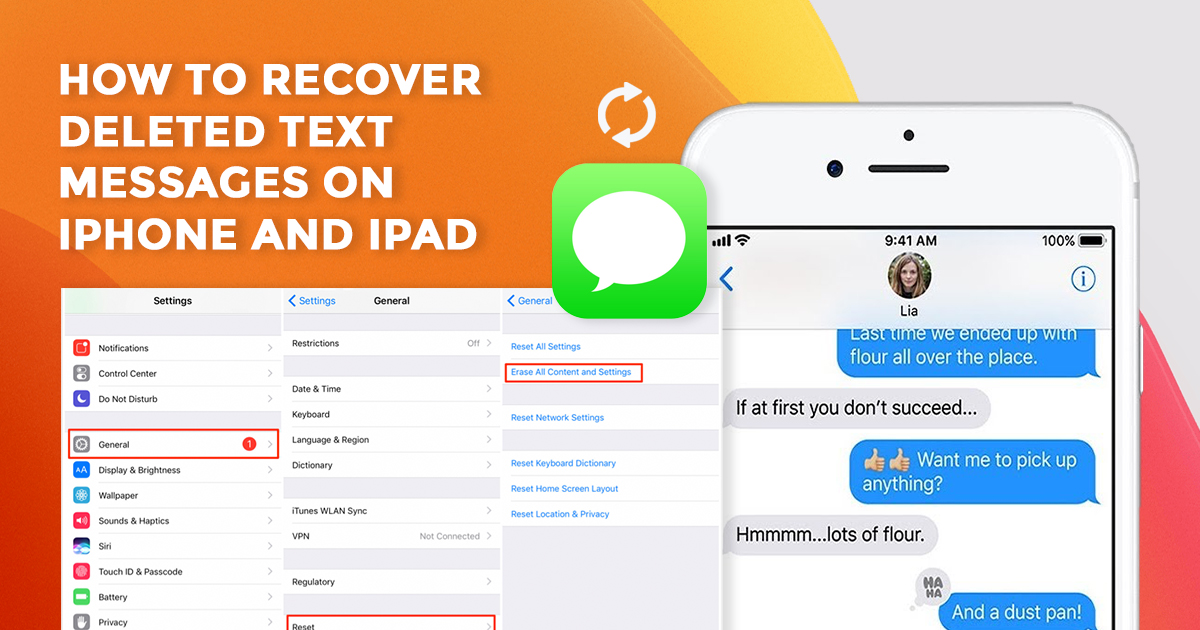
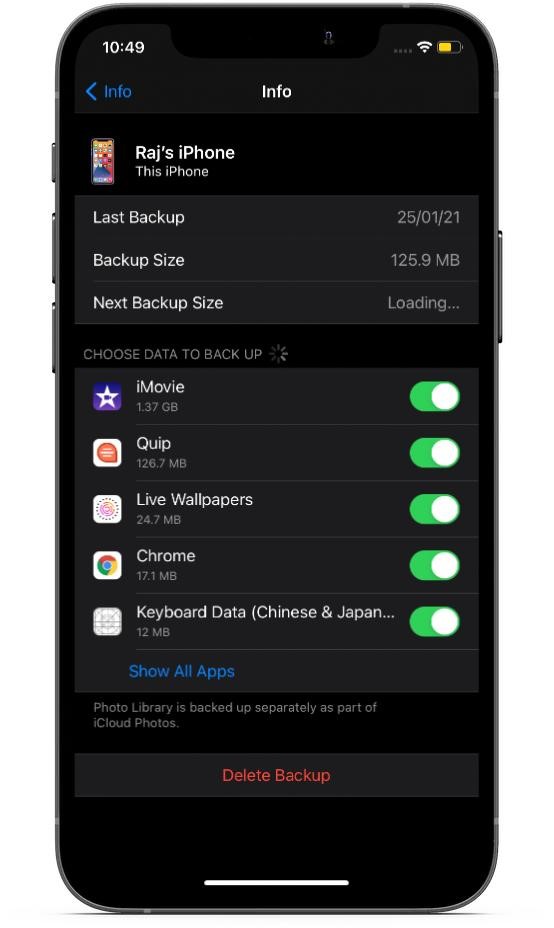
First, navigate to the Settings > Profile > iCloud > Manage Storage > Backups. Now, check the date of the iCloud backup to ensure you have the right back.

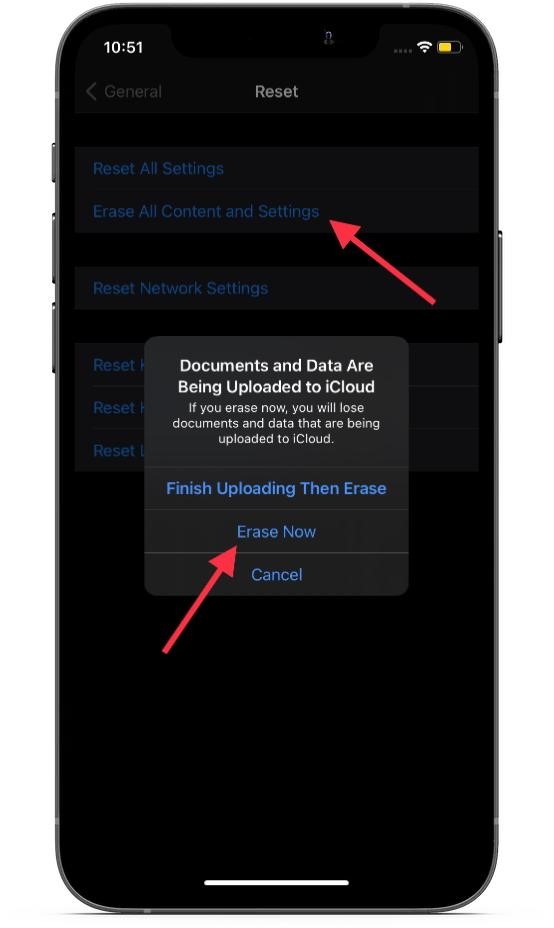
After that, head over to Settings > General > Reset. Now, tap on Erase All Content and Settings to wipe off all the existing data on your device.

Next, set up your device as usual. During the setup, restore your device from the iCloud backup. Once your device has been successfully restored, the deleted messages will be back on your iOS/iPadOS device.

Restore Deleted iOS/iPadOS Texts Using iTunes/Finder Backup

Another easy way to restore deleted texts is by using iTunes or Finder backup on your iPhone. Again make sure you have the backup before the messages were deleted.

It is worth noting that you will need iTunes on your Mac running Mojave or earlier or Windows PC. And if your Mac is powered by macOS Catalina or later, you will need to use Finder to restore your device from the backup.

Connect your iPhone to your computer and fire up iTunes/Finder. Then, select your device and hit Restore Backup. After that, select the preferred backup to restore your device.

Image credit: OSXDaily

Recover Deleted iOS/iPadOS Text Messages By Using Third-Party Data Recovery Software

Last but not least, you can recover deleted texts on your iPhone by using third-party data recovery software. Most of the time, a deleted message remains in the flash storage of the device until it is overwritten by new data. Hence, data recovery software can retrieve data.

Keep in mind that the iPhone/iPad data recovery software requires you to spend some bucks before being able to retrieve your lost data, including the text messages. Some of the tools that we have tried and found quite reliable are Tenoshare UltDataWondershare Dr. Fone, and PhoneRescue.

Notably, most data recovery tools offer a free trial so that you can try them without having to dole out any money. And, if the freemium version lives up to your expectations, you may even upgrade to the premium version.

Bottom Line:

So, here are some viable ways to recover accidentally-deleted text messages on iOS or iPadOS. Now that you know how this hack works, make the most of it and never lose any important messages.

Based on several years of expertise in dealing with Apple devices at Rapid Repair, we can tell you that iTunes/iCloud backup often works in restoring the deleted data. That is why we always recommend our readers keep the latest backup of the device.

Though rarely, but still iPhone is not immune to hazards or sudden crashing that may result in data loss. Therefore, it is apt to go for the additional layer of safeguard in the form of a timely backup.

Retrieving deleted data seems quite straightforward when you have a backup. As for using third-party data recovery tools, you should try them as last resort. And that too after giving a close look at the freemium offerings.

Mac Won’t Update: 7 Best Tips to Fix macOS Update Issues

We all detest lengthy and heavy software updates but let’s just be honest, there’s no life to your Mac or iPhone device without these updates. But the real problem starts when the mac won’t update. A large number of macOS users have recently reported that their Mac won’t update and there’s a buzz for search words on search engines for ‘how to update mac?’ trending, asserting that the software installation seems to either get stuck in the middle of the update or simply fail to kick in right off the bat. Having experienced and fixed this issue multiple times, we have come up with a handful of reliable solutions to troubleshooting the ‘Mac won’t update’ issue. If the problem has gripped your computer as well, give these trusted tips and tricks a shot.

Ensure There’s Enough Storage

The very first thing that you do to resolve the macOS update issues is to check whether or not you have enough space to accommodate the software update.

Click on the Apple menu and choose About This Mac. Now, click on the Storage tab. Next, you should see the total available storage on your Mac. If your Mac is cluttered for space, delete all the redundant files and apps that have clogged up a lot of space. You need ample space, first to download the update files and then for the updates to install. Once installed, the original files are deleted, but for the whole process, you need enough space for both steps. Hope this aids your macOS update or you move to the next steps.

Restart Your Mac

If you are unable to update your Mac even after you clean up the storage, restart your Mac. A normal restart often fixes random issues. So, give it a try. Once your Mac has rebooted, head to the System Preferences > Software Update and try to install the update.

Turn OFF/ON Wi-Fi

Software updates often fail or tend to come to an abrupt halt due to poor Internet connection. So, make sure your Mac is connected to a stable internet connection.

Click on the Wi-Fi menu and turn it off. Now, wait for some time and then turn it on. After that, kickstart the software update, as usual, to check if you have finally got the better of the issue. You can also try to restart your router once, if simply turning Wi-Fi off and on doesn’t do the trick.

Check For Server Errors

When Apple’s servers face an outage, many things come to a halt including the macOS update. Hence, make sure Apple’s system status for Mac updates is live and running.

Go to Apple’s system status page and ensure that the circle to the left of the macOS update is green. If it is grey, grab a cup of hot coffee and wait until the outage is over.

Reset the NVRAM

More often than not, resetting NVRAM gets rid of many common problems. Thus, if none of the solutions has come to your rescue in troubleshooting the macOS update issue, bring it into action as well. To get started, turn on your Mac. Then hold down the command-Option-P-R keys as soon as your computer powers on. Hold down these keys for about 20 seconds and then release them. On an older Mac that chimes at boot, press and hold the keys until you hear a second startup chime.

Safe Mode – Try Safe Mode Configuration

Another highly reliable solution for fixing a Mac that won’t update is the Safe Mode. By blocking the problematic apps and software, it allows the Mac to boot up securely, which often fixes miscellaneous issues. Having found success with this reliable hack on several occasions, we would recommend you to give it a chance as well. First off, turn off your Mac and then immediately press and hold the Shift key until the login screen appears. After that, let go of the Shift key and log in. Once your Mac has entered the safe mode, try to update it. After your Mac has successfully updated, restart your Mac normally to exit the safe mode.

Try Out Combo Update

If the problem persists and the mac won’t update, go for the combo update. For those unfamiliar with it, a combo update is a combined update that consists of all the changes since the rollout of the original version. For instance, you can use the combo update to jump directly from macOS 11 to macOS 11.4 by skipping the minor updates. Many users who had run into this issue had reported that the combo update was able to fix it. Therefore, you shouldn’t miss out on it as well. Head over to Apple’s combo update site and find the suitable combo update. Then, download it following the instructions.

Set Date & Time To Automatic

If you still have problems with the macOS update, you may try this option too. For one reason, or the other, people set their macbook’s time to display a custom time and that may prove to be a hindrance for mac updates.

Go to System Preferences > Date & Time > Tick the box to “Set Date & Time Automatically”


Set Date & Time To Automatic

There you go! Hopefully, you have taken control of the issue and your Mac is successfully updated. As these solutions have worked for many Rapid Repair–India’s eminent Apple repair centre–customers in troubleshooting the macOS update issues, we don’t see any reason why it won’t work for you as well. But before you dive into the all-new features of the update, be sure to share your thoughts in the comments section below.

Want to learn more about the latest iPhone, OnePlus, and other Apple updates first? Stay connected with the best and quickest repair experts in your city today!

Tips to Fix OnePlus Microphone/Headphone Issue

The stock Android experience backed top-notch hardware at a killer price point is what makes OnePlus smartphones stand out. But then again, random issues are part and parcel of technologies and OnePlus’ offerings are no different.

One of the most common issues that a large number of OnePlus users have reported recently are problems with microphone or headphone. While some users have reported that the microphone doesn’t deliver audio at all, others have complained that their ear speaker or even headphones (when connected with the device) don’t provide audio properly. Whatever could be ailing your device, we have got you covered with some viable tips and tricks to troubleshoot the OnePlus microphone or headphone issue. That said, let’s get started with the guide!

Restart Your OnePlus Device

To get started, let’s first try out the solution that often works in fixing common issues. As you may have already guessed, we are talking about the restart. Whether it is solving the app freezing issues or the sluggishness, a quick restart often comes in handy in taking control of miscellaneous problems.

Press and hold the power button and when the power options shows up, press the Restart option. Once your OnePlus device has rebooted, check out if the microphone/headphone has started to work normally. If it has, you are good to go!

Remove gunk from the microphone hole

Believe it or not, tiny particles of smudge and gunk often tend to sneak into microphones and prevent them from working properly. At times, gunk or debris completely blocks the microphone from delivering sound. Therefore, it’s always recommended to clean them frequently.

You can use a soft ended toothpick to clean the microphones. Be sure to do it gently as the microphones could get damaged due to hard rubbing.

Reset the Headphones

If you don’t get sound through the headphones, try to reset them. The problem might be with the headphones and not the device itself.

In case of wireless Headphones, the process of resetting headphones vary, take the help of the user manual if you need assistance. After that, reconnect them. Once you have reconnected your OnePlus smartphone to the headphones, check out if the audio is back. In case of wired Headphones, try and clean the connector and the jack and then see if you start getting any sound.

Update Software

No solution as yet? Don’t worry as we still have a fairly reliable solution in the form of a software update to troubleshoot the headphone or microphone issues on the OnePlus device. Most software updates come bundled with a range of bug fixes and performance enhancements. So, updating the software on the device may work in getting rid of the issue.

Image credit: OnePlus

Head over to the Settings app on your device and choose System. Now, tap on System Updates. Then, click on Check for updates. If there is any update available, download and install it on your OnePlus smartphone.

Reset Your Device

If the microphone/headphone issue still persists on your OnePlus device, it’s time to go for a radical solution. With a radical solution, we mean erasing the entire data and resetting the smartphone. As the complete cleanup often fixes even complex issues, it often resolves this issue as well as long as it due to a software related problem.

Before erasing the entire content, make sure you have backed your device (Settings > System > Backup). Launch Settings app on your smartphone and choose System. After that, tap on Erase all data. Then, tap on Reset Phone.

Image credit: OnePlus

Next up, enter your password/PIN and hit Next. Finally, tap on ERASE EVERYTHING to confirm the action.

If Nothing Works: Contact a Trusted OnePlus Device

If none of the solutions mentioned above has worked in solving the microphone problem or the ill-fated headphones issues on your OnePlus smartphone, there might be some hardware issues. If you are still facing issues with earphone, headphone or microphone even after trying all the above steps, contact a trusted OnePlus repair centre to fix your smartphone.

Speaking of a trusted OnePlus service centre, Rapid Repair is an eminent name across India. Thanks to the fast and efficient service at a cost-effective price point, we have emerged as the most preferred destination for troubleshooting OnePlus issues. So, reach out to us at the earliest to fix this issue.

whatsapp logo