iPad Factory Reset: Your Complete Guide to Resetting Your iPad

iPad Factory Reset Procedure

Factory resetting your iPad can be necessary for various reasons, whether you are encountering persistent software issues, or simply wanting to start fresh. In this guide, we’ll walk you through the process of Factory Reset  iPad, ensuring a smooth and hassle free experience.

         Source: Chron

Step-by-Step Guide for iPad Factory Reset

  • Backup: Before initiating a factory reset, it’s crucial to back up any important data stored on your iPad. You can do this using iCloud or iTunes, to ensure that your photos, videos, apps, and other content are safely preserved for future use.

            Source: Setapp

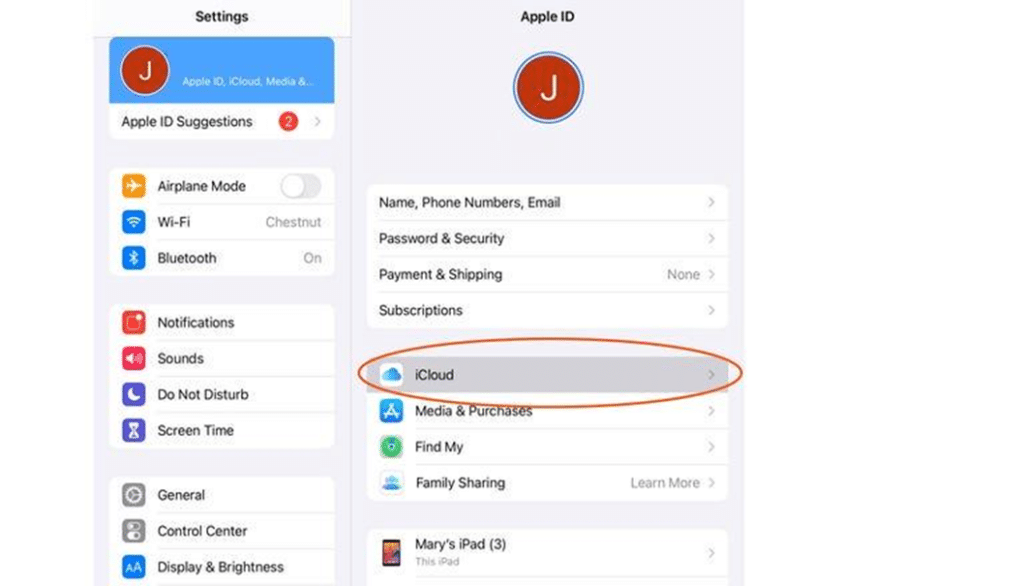
  • Disable Find My iPad: Disable it before proceeding with the factory reset. Go to Settings > iCloud > Find My iPad, and toggle off the switch. Enter your Apple ID password to confirm the action.
  • Erase All Content: Go to Settings app on your iPad > Tap on General > Scroll down and select Reset > Choose “Erase All Content and Settings > Enter your passcode.
  • Reset: Your iPad will begin the process of erasing all content and settings. This may take some time depending on the amount of data stored on your device. Keep your iPad on charge and check the internet connection.
  • Set Up: After the process is done, your iPad will restart and display the initial set up screen. Follow the instructions to set up your iPad as new or restore the data from the previous backup. Sign in with your Apple ID, reset the settings.

    Read – Is iPad Screen Not Rotating? Try these methods to fix it

If you don’t have access to your Apple ID or iCloud account, you can still go through the process regarding Factory Reset iPad by using the following steps on your device.

               Source: Cnet

  • Power Off: Press and hold the Power button until the slide to power off slider appears. Slide the slider to power off your iPad.
  • Recovery Mode: Recovery mode may vary depending on your iPad model:

iPad with Face ID: Press and release the Volume Up button, then press and release the Volume Down button. Press and hold the Power button until the recovery mode screen appears.

iPad with Home button: Press and hold the Home button and connect your iPad to a computer using a USB cable. Keep holding the Home button until the recovery mode screen appears.

  • Restore: Connect your iPad to your computer with iTunes. Follow the on-screen instructions in iTunes to start the restoration process.
  • Set Up: Once the restoration process is complete, your iPad will restart and display the initial setup screen. Follow the on-screen instructions to set up your device as new.

By following the steps mentioned in this guide, you can complete the process of Factory Reset iPad, and bring your device back to its original factory settings. It can help you to resolve occasional software issues, but can’t deal with internal malfunctions. To ensure the safety of your iPad, connect to the Nearest iPad repair provider, and get a bright solution for all the woes.

iOS 17 – What’s New for you, Compatibility, Feature Do Update or Not?

iOS 17 Update: Features and Supported Devices

The news of the release of the iPhone 15 series is not new anymore. It’s been a week, yet the buzz is still around. But that’s not all. With the launch, Apple also introduced the iOS 17, and oh boy! There are some cool features in it. Last June, during the Apple WWDC event, it was the first time we heard about this new version of iOS. Rumours started roaming in the air since then, and it’s finally here. But even that’s not all. Some bugs were reported in this latest iOS, and people faced issues like rapid battery drainage. To address these problems, Apple released iOS 17.0.1 and iOS 17.0.2 within a few days from the launch date of iOS 17.

Source: Techzle

Now, what’s up with that?

The tech giant claimed that they have addressed three security glitches in the latest updates, that were prevalent in versions of iOS prior to iOS 16.7. And what are those? The first one was a Kernel issue, where, to quote Apple, “a local attacker may be able to elevate their privileges.” The second was a security issue that recognized the risk of bypassing signature validation by malicious apps. The third one involved a WebKit fix, to prevent arbitrary code execution while processing web content. Sounds scary? Well, we have to admit that these things are inevitable in the tech world. Gaps will be there and efforts will be made to cover them.

Now, you might be wondering who can update to these latest versions of iOS and more importantly, why should they? Also, how is it done?

We will get to the answers, one by one. So stay tuned as you are about to witness a detailed discussion on everything related to the 17th-generation iOS.

Who can upgrade to iOS 17.0.1 and 17.0.2?

If you are using any iPhone released in 2018 or after that, you can update your iOS to 17.0.1. That means it is for the users of the iPhone XR, XS, XS Max and later models till iPhone 14 Pro Max. Whereas, as of now, iOS 17.0.2 is only for iPhone 15 series models, i.e. iPhone 15, iPhone 15 Plus, iPhone 15 Pro and iPhone 15 Pro Max.

The fun part is, that even if you are not planning to buy an iPhone 15 series model right now, you can get some taste of it by simply upgrading to iOS 17.0.1. How? Simple, through some of its outstanding features. Let’s see what are those.

Read – All About iPhone 15 Series: Features to Look for

Features to look for in iOS 17

If we go on to explain all the new features of iOS 17, it will fill up a novella! So here, we are covering a few of the game-changers, that will enhance your iPhone using experience. The rest, if you wish, you can find out by exploring your gadget after the update. So let’s see what’s exciting in the bucket.

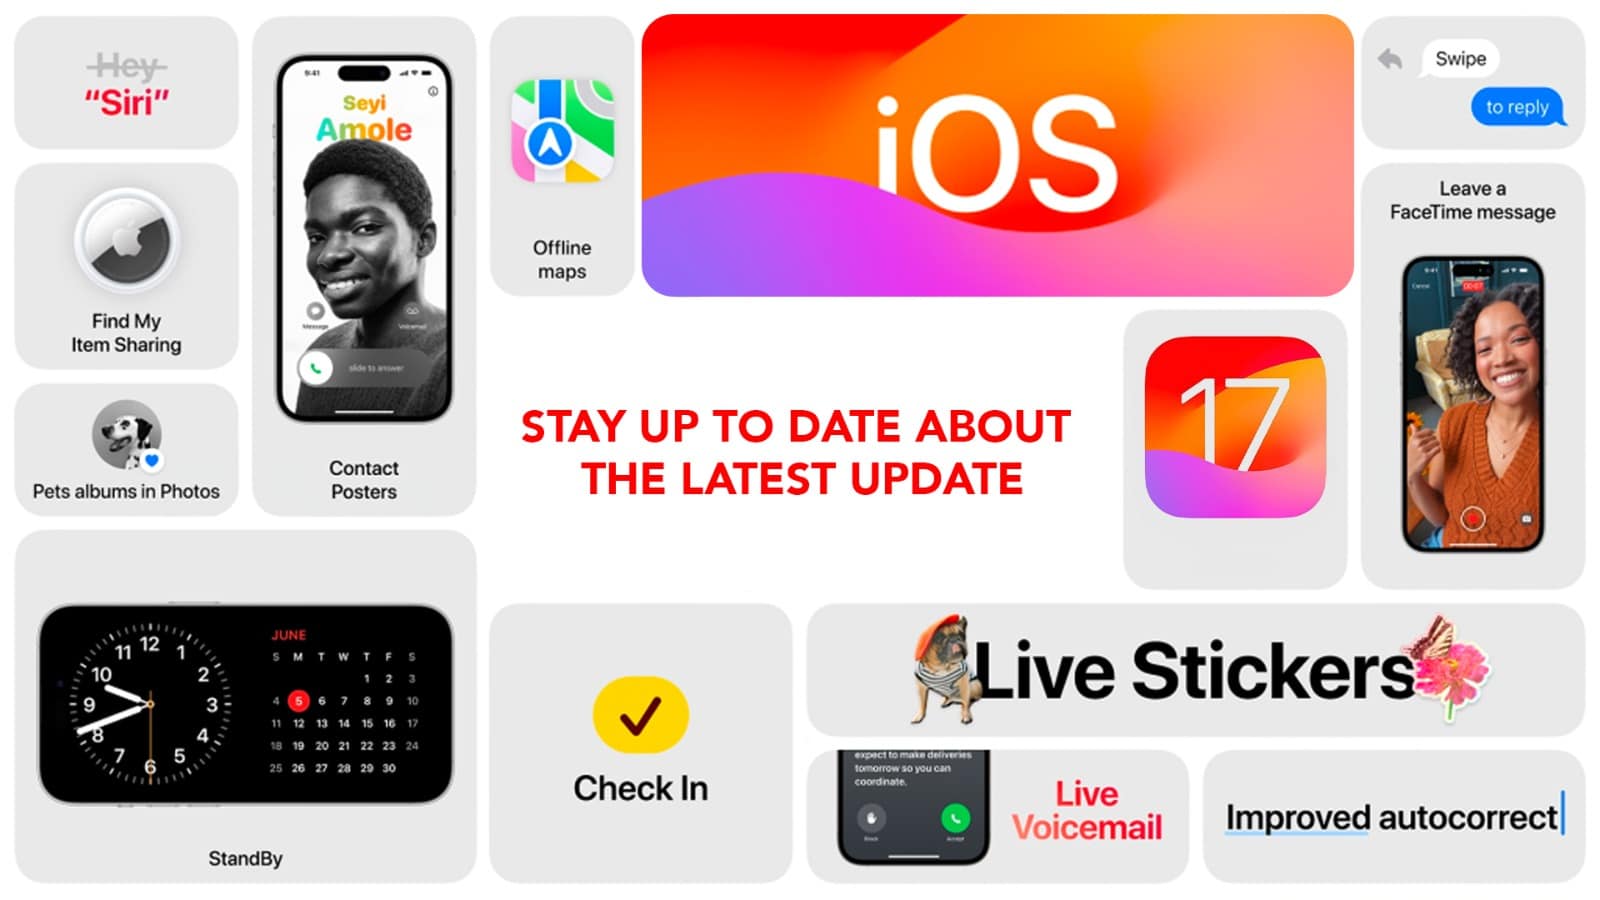
Contact with a personal touch – iOS 17 will allow you to customize your appearance on other people’s devices when you call them. This can be done through a customized poster.

The message of harmony – Get all your stickers in one place in the iMessage app. And if you want more, you can create your sticker from any image or video, with added effects. Not just this, you will also get a real-time transcription of received audio messages, in case you are not in a position to hear a voice note. Even finding a previous message will be easier by using multiple search filters.

A darling to stand by you – I am not kidding, this feature is a darling! So, while charging your iPhone, you can keep it on its side and opt for the StandBy mode. There, you can set a clock, a calendar, or any photo album from your gallery. And it will be there on your screen. Undoubtedly, the coolest bedside clock you can get.

FaceTime with added fun time – If your FaceTime call is not received, you will get the option to record and send your message in audio or video format. You can also enjoy your FaceTime calls on Apple TV 4K 2nd generation and later, by using your iPhone’s camera. Sounds fun.

Widget with wizarding power – For a few minor tasks, like ticking off a reminder, you don’t have to unlock your iPhone any more. With an interactive widget, you can perform simple tasks by simply tapping on the widget while your gadget is locked or in StandBy mode.

Source: Mac Life

Come closer and share via AirDrop – In this latest iOS, you will be able to share content via AirDrop from one iPhone to another by simply bringing them closer. After all, even our gadgets deserve some good company.

Get more friendly with Siri – After years of acquaintance, finally, you can be more informal with Siri. To activate Siri, just call her name, no need to say Hey anymore. In iPhone 11 and later models, you can even make back-to-back requests to Siri without reactivating her in between. Looks like finally, the ice can break in between you and Siri.

So, how to install iOS 17 on an iPhone?

To say the least, it’s a cakewalk! Just go to the Settings app, click on General and then on Software Update. Here, you will get the details about the update. Next, select Download. Then click on Install and wait for the magic.

Once you install iOS 17 on your iPhone,chances are high that you will spend the next few hours immersed in the wonders of this latest version of iOS. And in case you are still doubtful about whether to install iOS 17 or not, just ask yourself, why not?

Read – Apple Carplay in iOS 17 – What’s New, Trending & The Latest for Your Car From Apple?

MacBook Pro Keep Restarting? Here’s what to do

Imagine you are on that one big meeting of your life. Your team has made a brilliant presentation. You are all set to present. And suddenly, your MacBook Pro gets into the mood for a game of ‘Restart Roullete’. Embarrassing? Well, we have all experienced similar embarrassment, with, of course, different levels of frustration. Now, this needs action! We can’t let our beloved MacBook Pro keep restarting again and again!

Source: Beebom

So, what’s the solution? Patience, my friend. Before getting into the solution, let’s understand the problem.

The frustrating loop of rebooting

Remember that college junior who initially used to sing at request, which was impressive, then started an overdisplay of his talent, and redefined the term annoying? In a rare mood, your MacBook can adopt this habit of rebooting itself randomly.

Once the device is switched on, the rebooting starts after a while. And it keeps on repeating.

After restarting, it shows the message below:

Now, in the world of tech, nothing happens without a reason.

And here, you will find two.

Why MacBook Pro keeps restarting? Hardware and software troubles

Understand this, there can be two roots to the problem of why your MacBook Pro keeps restarting. On one side, there are a few hardware-related issues. Like, a fault in the battery. On the other side, there are software-related issues, for instance, an outdated MacOS.

So, to get the issue fixed, you have to find its root.

Let’s see how.

Hardware Related Issues: Troubleshooting tips

Now, if this issue is occurring due to faulty hardware, there’s a wonderful way to figure it out. You see, your MacBook Pro keeps a complete record of when your system was rebooted. So, if the repeated automatic rebooting is due to faulty hardware, say a battery that is no longer capable of supplying continuous power to the device, or a faulty cooling fan, which is causing the device to overheat, and hence reboot repeatedly, the time and date will be recorded in the Kernel log. So, how to access this Kernel log? Simple,

  1. Click on the Apple icon at the top left corner of your home screen
  2. Then select About This Mac

3. There, you will find the option of System Report

4. You will find the Kernel log there

If the Kernel log is empty, then be assured, that the hardware components are innocent. If there’s a date and time recorded in the Kernel log, then you can be sure, a rebel hardware component is forcing your loyal MacBook Pro to reboot itself repeatedly. You can contact an Apple repair expert to get the issue fixed.

Software Related Issues: Troubleshooting tips

There can be one simple reason behind this entire ‘reboot’ drama. You might have missed to update your MacOS. Though we often don’t realise its importance, failing to update your device’s operating system is a big crime in the computing world. Here’s how you can check if your MacOS is updated.

  1. Click on the Apple icon at the top left corner of your home screen
  2. Then select System Preferences
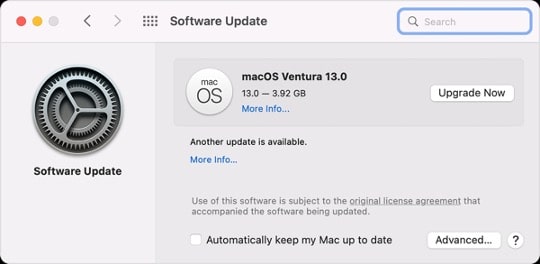
  3. Click on Software Update
  4. If Software Update finds new software, click the button to install it

But what if your MacOS is up to date and still your MacBook Pro keeps rebooting? Well, there can be some corrupted data behind this whole fuss. It’s better to check it yourself, before going to an expert. Here’s how,

  1. Take a backup of all your data.
  2. Then shut down your MacBook Pro.
  3. Press and hold the power button to start your device. Continue to hold the power button, and your device will turn on and load the startup options. When you see Options, release the power button.

Source: Apple Support

4. Select Options, then click the Continue button.

5. Select the user, click Next and enter the administrator password.

6. Select the option to reinstall MacOS.

7. Click on Continue and follow the instructions.

Once the operating system is reinstalled without any prior data, use it and check if the issue is reoccurring. If the issue persists, then the fault is not in your data. You better take your MacBook Pro to a service centre.

Either way, prevention is better than cure they say. So check out some tips to prevent the issue of MacBook Pro repeatedly restarting. At least, this can reduce the harassment.

Source: PCtipp

How to prevent MacBook Pro keeps restarting issue

Update your MacOS from time to time

To prevent the issue, it’s better to ensure that your MacOS is updated.

  1. Click on the Apple menu.
  2. Go to System Preferences.
  3. Select Software Update.
  4. Click Update Now to install the updates.

You can even set up your device to automatically update in the future.

Check software & hardware compatibility before installing

This issue can be prevented by simply taking a few steps before installing new software. First, go through the install manual to check for some known issues. Then, check online if there are any reported compatibility issues. Thirdly, ensure that there is no compatibility issue with any other pre-installed software in the device.

Similarly, to check hardware compatibility, follow the same three steps. Read the installation manual, check online, and check with other connected devices.

So now, it can be hoped that the great mystery of MacBook Pro Keeps Restarting is clear to you. Sometimes, the fix is simple. At other times, you can always knock on the door of an Apple wizard.

Got issues with your iPhone, iPad, MacBook or any Apple device? Is a trustworthy repair centre not in sight? Don’t worry, the experts can help you get a free pickup and drop service and provide a bright repair solution for all your Apple woes. Call today for Apple MacBook Pro battery replacement, screen replacement, and other top repair services.

Face ID Issue In iPhone X & iPhone 11 Explained – How To Get Face ID iPhone X Repair?

With the unveiling of the iPhone X, back in September 2017, Apple introduced a new age of iPhones by providing the Face ID feature. Face ID is a sophisticated technology that enables a user to unlock their phone with the use of multiple sensors and algorithms. Usually, Apple’s Face ID recognition feature has been up to mark but there have been several reports where users have reported a Face ID issue in iPhone X.

Highlights of this Guide:

  • Common causes of Face ID not working: physical obstruction, poor lighting, outdated iOS.
  • Software glitches and Face ID settings may cause temporary issues.
  • Face ID registration and appearance changes can affect recognition.
  • Hardware problems with TrueDepth camera may lead to Face ID problems.
  • Expert repair steps for diagnosing and fixing Face ID issues on iPhones.
  • Initial assessment, software troubleshooting, cleaning, and calibration.
  • Hardware inspection, component replacement with genuine parts.
  • Advanced diagnostics and thorough testing ensure proper functionality.

Source: Daily Mail

This is not just limited to iPhone X and XR but also something that has been a problem in its successor models in iPhone 11 and 12. Through this blog today we will see some of the reasons for Face ID not working in iPhone X and provide a step-by-step guide to get it fixed via the iPhone repair experts in your city. Stay tuned!

Face ID Issue iPhone X: What Are The Reasons?

There can be several reasons why Face ID is not working on your iPhone X. Some of the common causes include:

1 – Physical obstruction: The TrueDepth camera and sensors on the front of your iPhone X may be obstructed by dirt, debris, or a screen protector. Make sure the camera area is clean and free from any covering that might interfere with the facial recognition process.

2 – Poor lighting conditions: Face ID works best in well-lit environments. If you are in an area with inadequate lighting, the system may have difficulty recognizing your face accurately.

3 – Outdated iOS version: Ensure that your iPhone X is running the latest version of iOS. Apple often releases software updates that include bug fixes and improvements to Face ID functionality.

Source: World of Tech

4- Software glitch: Sometimes, temporary software glitches can cause Face ID to stop working as expected. Restarting your iPhone X may resolve these issues and a temporary Face ID iPhone X error message.

5 – Face ID settings: Check the Face ID settings to make sure it is enabled for the features you want to use, such as unlocking your phone, making purchases, or accessing specific apps. You can reset your Face ID if you’re persistently facing issues. To reset your Face ID, Go to Settings > Face ID & Passcode > Enrol Face and follow the on-screen instructions to re-register your face.

Source: INDABAA

6 – Face ID registration issues: If you initially set up Face ID in poor lighting conditions or encountered errors during the registration process, it might lead to recognition problems. Consider re-registering your face in different lighting conditions.

7 – Changes in appearance: If you’ve made significant changes to your appearance (e.g., grew a beard, changed hairstyle, etc.), Face ID may have difficulty recognizing your face. Try sitting in good light and take attempts to retry the Face ID unlock feature.

8 – Hardware problem: In some cases, Face ID issues may be caused by a hardware malfunction in the TrueDepth camera or related components.

Read – ‘No Service’ on iPhone? Try These Quick Hacks

Face ID Setup Not Working – Contact The Repair Experts For Step-By-Step Repair

Considering the Face ID issue will arise in older iPhone models – you have very slim chances of getting a repair in warranty from your nearest Apple Store. It is better to find the experts who can provide a free pick up and drop service for your device and provide the best diagnosis before taking any further actions on the device. Independent repair providers (IRPs), thus, solve your problems best by attending to your device with a thorough eye and by using only the best OEM parts in case of any requirement for a replacement.

Source: YouTube

Repair experts typically follow a systematic approach to diagnose and fix Face ID issues on iPhones. The specific steps they take may vary depending on the nature of the problem, but here’s a general outline of how repair experts might address Face ID issues:

A – Initial assessment: The repair expert will start by inspecting the iPhone and talking to the user to understand the exact nature of the Face ID problem. They will ask about when the issue started, any recent software updates or physical damage, and any other relevant information that might help with the diagnosis.

B – Software troubleshooting: Before diving into hardware-related fixes, repair experts will attempt software troubleshooting. This includes checking for software conflicts, ensuring the device is running the latest iOS version, and attempting to reset or reconfigure Face ID settings. They may also try restoring the iPhone to factory settings and setting it up as new to rule out any software-related problems.

C – Cleaning and calibration: If the issue is related to Face ID sensors being obstructed or dirty, repair experts will clean the TrueDepth camera and sensors carefully using appropriate tools. They may also perform calibration procedures to ensure optimal sensor functionality.

Source: The Verge

D – Hardware inspection: If software troubleshooting doesn’t resolve the issue, the repair expert will move on to inspecting the hardware components related to Face ID. This involves opening the device and checking the connections and physical integrity of the TrueDepth camera, sensors, and associated cables.

E – Component replacement: If a hardware issue is identified (e.g., a faulty sensor or damaged cable), the repair expert will replace the faulty components with genuine Apple parts. Apple-certified repair centres typically use original parts to ensure the device’s functionality and longevity.

F – Advanced diagnostics: In some cases, more advanced diagnostics tools may be used to pinpoint specific issues with Face ID or related components.

G – Testing: After performing the necessary repairs or replacements, the repair expert will test the Face ID functionality thoroughly to ensure it’s working as intended.

H – Final checks: Once the issue is resolved, the repair expert will conduct final checks on the device, ensuring that all other features and functionalities are working correctly.

These are the consistent steps taken to ensure the right service and repair of all Apple products and you must get the same care for your device whether for Face ID iPhone X repair or for any other issue.

Read – The iPhone 11 Auto-Restart Issue: Why It Occurs & Ways To Fix

Got issues with your iPhone, iPad, or MacBook device? A trustworthy repair center not in sight? Don’t worry, the experts can help you get a free pickup and drop service and provide the bright repair solution for all your Apple woes. Call today for iphone screen replacement, battery replacement, Face ID issue iPhone 11 and other top repair services.

Apple Carplay in iOS 17 – What’s New, Trending & The Latest for Your Car From Apple?

Whenever we talk about the legacy of Apple products we surely ignore the feature of carplay in an iPhone or in general otherwise. This might be because of the limited use or because of the fact that some people simply don’t own cars or use the feature in their cars when they actually get down to the business of driving or taking a faraway journey. But today in this blog we shall talk about Apple CarPlay in iOS 17, the new features and everything that’s going on with the design and behind the design. Stay tuned folks!

Source: App Gefharen

Apple Carplay in iOS 17 – A Worthy Update or Not?

As we know CarPlay did not receive much attention in Apple’s WWDC keynote event but that doesn’t mean the company has no plans for developing new features. Let us first talk about the Apple carplay on iOS 17 features that were not there to be seen before.

  1. SharePlay Support

First things first, Apple has made it a bit simple for users to play songs, control the car’s music output and use maps and other features without the use of Apple Music or any other authorised application from Apple. You just need to have the SharePlay support to play music from your phone without having to worry about iTunes, Apple Music, or any such subscription in your kitty. Simple isn’t it?

Source: Team-BHP

To primarily use SharePlay you must make use of the new CarPlay feature and if you do not find the option you must update to iOS 17 to get the latest version in your iPhone or iPad. This is the most convenient of all updates you get with the Apple CarPlay iOS 17 new updates and there are bound to be more in the remaining months of 2023.

  • Real-time Charging Info for Electric Drivers

There is no dearth of electric car owners in the country and the number has started to increase substantially in the past year or so in India. Owing to this development, Apple has introduced the help they could provide using Apple Maps that will allow electric vehicle drivers with real-time charging availability information for their preferred charging network.

The feature extends to the Maps app on CarPlay making it super convenient for drivers to find an available charging location while driving. This feature may get better utilised in the country as more and more electric vehicles and charging stations will be made available in the days and months to come.

  • New Interface

Talking of the Apple CarPlay iOS 17 design we can start with the all-new interface that takes away most of the attention. Carplay includes a new interface for replying to messages, as seen in the picture below. This conveniently allows passengers or even the drivers to communicate using the least number of taps in a super easy to navigate interface.

Source: Arm Mac

Tip: the new CarPlay features are automatically available after updating an iPhone on iOS 17. The software update is mandatory and will bring along the said changes, updates, and new features that we just mentioned above. The first thing you would notice is the brand new design that captures the user’s attention and it is now easier to navigate across all the available options on Apple CarPlay post the iOS 17 design upgrade.

Things To Know – Apple CarPlay in 2023

Here are some of the common uses of CarPlay in iPhone that you must take the advantage of in 2023:

  1. App Integration: CarPlay supports a range of apps that have been optimised for in-car use. These apps include Apple’s own apps such as Phone, Messages, Apple Maps, Apple Music, and Siri, as well as third-party apps like Spotify, Waze, WhatsApp, and more. App developers can integrate their apps with CarPlay to provide a seamless experience for users.
  2. Siri Integration: CarPlay offers hands-free control through Siri, Apple’s virtual assistant. Users can activate Siri by pressing a button on their car’s steering wheel or using a voice command, allowing them to make calls, send messages, play music, get directions, and perform other tasks without taking their hands off the wheel.
  3. Navigation: CarPlay provides a simplified and familiar mapping experience through Apple Maps. Users can get turn-by-turn directions, search for points of interest, view real-time traffic information, and receive proactive suggestions based on their calendar, contacts, and previous locations. CarPlay also supports third-party navigation apps like Google Maps and Waze.
  4. Communication: With CarPlay, users can make and receive calls, send and receive messages, and access their contacts through the integrated Phone and Messages apps. Siri can read out incoming messages and allow users to dictate responses, ensuring a safer and hands-free communication experience.

Source: Autocar

This was all the information that was available about the latest Apple CarPlay iOS 17 features, design, and new upgrades. Stay tuned for everything in the techlicious world of Apple and Apple products.

Got issues with your iPhone, iPad, or MacBook device? A trustworthy repair centre not in sight? Don’t worry, the experts can help you get a free pickup and drop service and provide the bright repair solution for all your Apple woes. Call today for Apple screen replacement, battery replacement, and other top repair services.
whatsapp logo