How To Identify A Swollen iPhone Battery and What to Do:

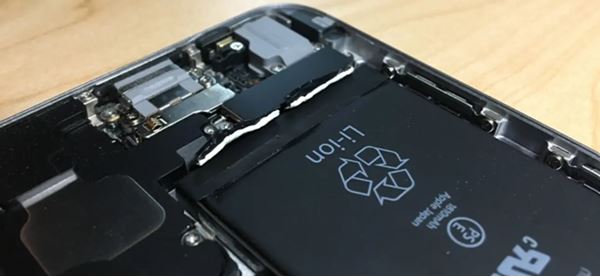
Have you ever noticed your iPhone looking a little puffed up or the screen lifting from the frame? This could be a serious sign of a swollen iPhone battery. A swollen battery is not just a small issue it can be dangerous. It can damage your phone and even put your safety at risk. In this blog, we will talk about what causes a swollen iPhone battery, how to spot the warning signs, and what you should do next. Keep reading to stay safe and protect your device.

                            Source: Reddit

How to fix a bloated phone battery?

A swollen battery is a serious problem that can damage your phone and even be dangerous if not handled properly. But many people don’t know why it happens. In this section, we will explain the main reasons behind a swollen battery in a very simple way:

  • Physical Damage: If you drop your phone or it gets hit hard, the battery can get damaged. Even if the damage isn’t visible, it can still cause problems inside the battery. A broken battery can start to swell days or weeks after the damage. If your phone was dropped and you notice it looking a little puffy, it might damage the battery.
  • Old Battery Life: Every iPhone battery has a limited life. Over time, the battery gets weaker because it has been charged and used many times. When a battery gets old, the chemicals inside it start to break down. This can lead to gas build-up, and the battery begins to swell. If your iPhone is more than 2–3 years old, the chance of getting a swollen battery becomes higher.
  • Using the Wrong Charger: Not all chargers are safe. Cheap or fake chargers can send too much power to your iPhone, which puts stress on the battery. This stress can lead to overheating and swelling. Always use original or trusted chargers.
  • Overcharging the Phone: Many people leave their phones plugged in overnight or keep charging even when the battery is already full. This can hurt the battery. Overcharging creates too much heat and pressure inside the battery. When this happens often, the battery may swell. To avoid a swollen battery, it’s best to unplug your phone once it’s fully charged.
  • Too Much Heat: Batteries don’t like heat. Leaving your phone in a hot place, like inside a car or under direct sunlight, can cause the battery to get too hot. High temperatures can damage the inside of the battery and create gas, leading to swelling.
  • Battery Defects: Sometimes, the problem comes from the factory. Some batteries have small defects when they are made. These can cause the battery to swell early, even if you take good care of your phone. This is rare but still possible. If your phone is new and the battery swells, it may be a defect, and you should contact Apple support.

Read – How to Guard your iPhone from Malware?

              Source: Mac Business Solutions

How to identify a swollen battery:

Here are the most common signs of battery swelling:

  • Battery Drains Too Fast: If your phone’s battery starts losing charge quickly, and you also notice any of the signs above, it could be swelling inside. A swollen battery often doesn’t work properly and may stop holding power for long.
  • Screen is Lifting or Bulging: One of the easiest ways to spot a swollen battery is to look at the screen. If the screen is not sitting flat or is lifting from the frame, the battery might be pushing it out from the inside. This happens because the battery is swollen and takes up more space than it should.
  • Screen Has Bright Spots or Pressure Marks: When the battery swells under the screen, it can create bright spots, shadows, or lines on the screen. This is because the screen is being pushed out of place. If you see any strange marks on your display, it might be caused by a swollen battery.
  • Phone Feels Thicker: Hold your phone and look at it from the side. If it feels or looks thicker than usual, it might be because the battery has swelled. Sometimes the change is small, but if you look closely, you can notice the difference.
  • Case Doesn’t Fit Properly: If you use a case and suddenly notice it doesn’t fit the phone like before, that could be a warning sign. A swollen battery can push against the phone’s frame, making the case feel too tight or hard to close.
  • Unusual Heating or Smell: Sometimes, a swollen battery gives off heat or even a strange chemical smell. If your iPhone gets hot even when you’re not using it or you notice a weird smell like plastic or chemicals, stop using it immediately.

Addressing a swollen iPhone battery promptly not only protects your device but also ensures your personal safety.

                          Source: Volta

What to do if your iPhone battery is swollen:

  • Stop Using the Phone: As soon as you notice any signs of a swollen battery, stop using your phone. Turn it off right away. Using a phone with a swollen battery can make the problem worse and increase the risk of damage or injury.
  • Do Not Press or Poke the Battery: Never try to push the screen back into place or press on the battery. A swollen battery is full of gas and pressure. Pressing it can cause it to burst, leak, or catch fire. Handle the phone gently and avoid putting pressure on it.
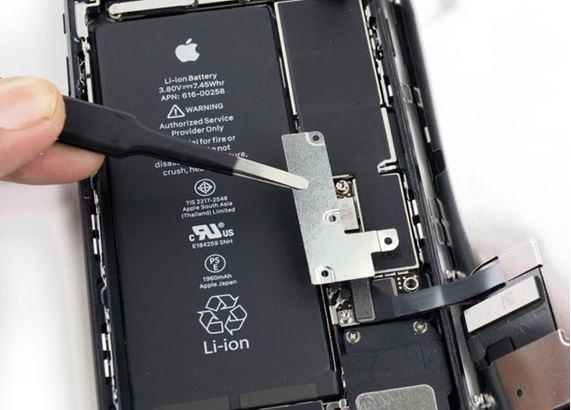
  • Don’t Try to Fix It Yourself: It can be tempting to open the phone and try to fix the problem. But don’t do it. iPhone batteries are very sensitive. Trying to remove or repair a swollen battery yourself can be risky. You could hurt yourself or damage your phone even more.
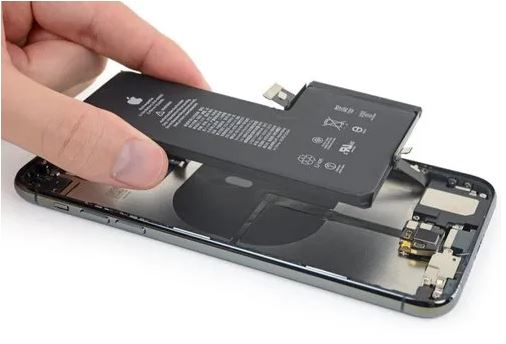
  • Take It to a Professional Repair Service: The safest thing to do is to take your iPhone to a professional repair shop or an Apple Store. Experts know how to safely remove and replace a swollen battery. They also know how to handle it without causing any harm.

Read – How to Repair Cracked iPhone Back Glass?

           Source: The Big Phone Blog

Preventing battery swelling involves adopting good charging habits: use only certified chargers, avoid overcharging by unplugging your phone once it’s fully charged, and keep your device away from extreme temperatures. Remember, a swollen iPhone battery isn’t just a minor inconvenience, it’s a serious issue that can compromise your device’s functionality and safety.

For any issues related to your Apple Watch, iPhone, iPad or MacBook the experts can help you get a free pickup and drop service and provide a bright repair solution. Contact today!

Got issues with your Apple Watch, iPhone, iPad, MacBook or any Apple device? Is a trustworthy repair centre not in sight? Don’t worry, the experts can help you get a free pickup and drop service and provide a bright iPhone repair solution for all your Apple woes. Call today for iPhone battery replacement, screen replacement, and other top repair services.

How to Prepare Your Device for Repair: A Pre-Service Checklist

If your iPhone screen is cracked, the battery is draining too fast, or some internal malfunctions occurred, it can be stressful for any iPhone user. Before you rush to get your iPhone repaired, it’s important to prepare properly. This can help protect your data, save time, and avoid future problems. In this blog, we’ll walk you through easy steps to get your iPhone ready for repair. Whether you’re heading to the Apple Store or a third-party repair shop, a proper iPhone repair preparation will help you to make the process smooth and stress-free.

                               Source: Lifehacker

What to do before giving your iPhone for repair?

Backup Your Data: Before handing your iPhone to anyone, back up everything. This is the most important step. A repair shop might need to reset your phone, and you could lose all your data if you don’t have a backup.

                                    Source: Macworld

How to back up your iPhone?

iCloud Backup: Go to Settings > [Your Name] > iCloud > iCloud Backup. Tap Back Up Now.

Make sure you are connected to Wi-Fi.

           Source: Apple Support

iTunes Backup (on a computer): Connect your iPhone to a computer. Open iTunes and click on your device. Choose Back Up Now.

                                  Source: Apple Support

Steps to take after backing up your device:

Sign Out of Apple ID: The next step in iPhone repair preparation in India is signing out of your Apple ID. This removes your personal info from the device. Go to Settings > [your name] > Scroll down and tap “Sign Out.” Enter your Apple ID password.

             Source: Aiseesoft

Turn Off All Wallets and Payment Features: In India, many users link their iPhones to digital wallets like Apple Pay or UPI apps. To protect your financial data, turn off all wallets before repair. Open Wallet app and remove saved cards > Open UPI apps like PhonePe or Google Pay and log out > Unlink bank accounts if needed.

Turn Off Find My iPhone: Repair technicians cannot work on your iPhone if Find My iPhone is turned on. It’s part of Apple’s security feature called Activation Lock. Go to Settings > [Your Name] > Find My > Find My iPhone > Toggle it off and enter your Apple ID password.

                               Source: iDownloadBlog

Remove SIM Card and Accessories: Take out your SIM card before the repair. You don’t want to lose it. Also, remove your case, screen protector, or any attached accessories like a ring holder or pop socket. This makes it easier for the technician to access your phone.

Getting your phone ready is a simple but important step. By following the tips above, you can make iPhone repair preparation stress-free and safe. If you’re unsure about any step, contact your local Apple support or an experienced repair provider for help.

                            Source: The Fix Phone Repair

Before heading towards the repair provider make sure you have got the device and the accessories needed to fix. Carry your sales receipt and your personal ID like Aadhar Card, Pan Card, Driving Licence.

                               Source: iFix India

Read- Common iPad Problems and How to Fix Them

In case you live in a remote area, before mailing your damaged device contact your service provider to suspend your eSIM if necessary. A little time spent on iPhone Repair Preparation can make a big difference. Doing so will help you to get your phone backup in good shape.

For any issues related to your Apple Watch, iPhone, iPad or MacBook the experts can help you get a free pickup and drop service and provide a bright repair solution. Contact today!

Got issues with your Apple Watch, iPhone, iPad, MacBook or any Apple device? Is a trustworthy repair centre not in sight? Don’t worry, the experts can help you get a free pickup and drop service and provide a bright repair solution for all your Apple woes. Call today for iPhone battery replacement, screen replacement, and other top repair services.

How to Set WhatsApp as Your Default Calling and Messaging App on iPhone?

WhatsApp has become one of the most popular apps for communication around the world. With its free messaging, voice calls, and video chats, it’s no wonder many iPhone users prefer using WhatsApp instead of the built-in Phone or Messages app.

But can you make WhatsApp the default app for calling and messaging on your iPhone? Yes now you can, WhatsApp has finally uploaded the support of the default app feature for iPhone users. With iOS 18.2 update Apple gave the opportunity to select WhatsApp as the default app for calling and messaging. This update will allow you to dial a number directly from the WhatsApp Calls tab. It will let you type in the number and make calls, as long as it’s linked to a WhatsApp account. In this blog post, we’ll guide you step-by-step on setting WhatsApp as the primary communication app for calling and messaging, and how to make it easier and quicker to use every day.

                Source: idownloadblog.com

Here’s What You Need To Do To Change The Default Calling App:

                         Source: techyahoo.com

  1. Update the WhatsApp Version: You must have WhatsApp version 25.8.74 or later for this functionality. Go to the app store, select WhatsApp and click on update.
  • Default Calling App: On your iPhone with latest iOS 18.2 updated, go to Settings, navigate to Apps, select Default Apps.
  • Select Calling App: Tap on calling, it will show you the updated WhatsApp option that’s available on your iPhone. Select WhatsApp as your preferred app for calling.

Change Default Messaging App:

  1. On your iPhone go to the Settings app and go to the App section.
  • Select the Default App section.
  • Tap on Messages and select WhatsApp from the list.

                 Source: techyahoo.com

Read – The All New iPhone 16e Facts, Features and More

These are a few good reasons why you should consider setting WhatsApp as the primary communication app. It can bring security, simplicity and savings all in one place. If you are still wondering why use WhatsApp as the Default Calling and Messaging App, here’s the answer.

  1. WhatsApp uses the internet, so you don’t have to worry about the SMS charges. Also don’t have to wait for 15 seconds to listen to government warnings on spams.
  • WhatsApp works smoothly on both iOS and Android, it makes communication easier than before.
  • WhatsApp keeps your calls and messages private with strong encryption.

                                  Source: croma.com

WhatsApp is a powerful tool for both personal and professional communication. By setting WhatsApp as the primary communication app, you will find it more convenient to stay connected with family and friends. However, for any sort of internal malfunctions get connected to the nearest repair provider. In case you live in a remote area, you have the option to mail your damaged device to the repair provider.

Read – iPhone stuck in recovery mode? Tips to recover data without losing files

Got issues with your Apple Watch, iPhone, iPad, MacBook or any Apple device? Is a trustworthy repair centre not in sight? Don’t worry, the experts can help you get a free pickup and drop service and provide a bright repair solution for all your Apple woes. Call today for iPhone battery replacement, screen replacement, and other top repair services.

iPhone Network IC Repair Cost: Everything You Need to Know

Your iPhone is made up of many small but important parts. One of these is the IC (Integrated Circuit), which helps control different functions like the network, charging, and display. If the network IC gets damaged, your phone may struggle to connect to mobile data or Wi-Fi. When this happens, many people start worrying about the iPhone network IC repair cost. The good news is that this problem can be fixed by a professional repair service. In this blog, we will explain what causes IC damage, the signs to look out for, and how much repairs might cost.

The network IC is a tiny chip that helps your phone connect to your mobile network. If it gets damaged, your phone may struggle with network issues.

What causes network IC damage?

Source: News18

Here are some of the reasons for network IC damage:

Accidental drop: A small impact from a fall can loosen or crack the network IC, causing signal problems.

Water damage: A small amount of water can also cause corrosion inside the iPhone, damaging the network IC and other parts.

Overheating: Overheating can happen due to excessive use or charging problems. If your phone gets too hot, the network IC may become unstable or fail completely.

Manufacturing defects: Some iPhones may have weak network ICs from the start, leading to early failure even with normal use.

Low-quality charger: Using a low-quality charger can send the wrong voltage to the phone, and it may damage the IC.

Poor repair or handling: If the iPhone is repaired multiple times, improper handling can damage the IC or loosen its connection.

Wear and tear: Over time the network IC can wear out from continuous use, leading to poor signal or no service.

Read – Why is the iPhone 16 Pro Max freezing after an iOS 18.3 update?

How to Fix No Signal Issue on iPhone?

Source: Guiding Tech

Here’s a step-by-step guideline to fix the no-signal issue on iPhone.

  1. Enable Automatic Network Selection
  2. Open Settings
  3. Go to Mobile Service
  4. Tap on Network Selection
  5. Make sure the toggle next to automatic is enabled
  • Set 5g for Voice and Data
  • Go back to the mobile data option
  • Tap on Voice and Data
  • Make sure it is set to 5G
  • Set Automatic Time and Date
  • Tap on General 
  • Tap on Date and Time
  • Make sure it is set automatically
  • Turn Airplane mode on and off
  • Update your iPhone
  • Go to Settings
  • Tap on General
  • Look for the option Software Update
  • Click on it if any update is available
  • Reset Network Settings
  • Go to General
  • Tap on Transfer or Reset iPhone
  •  Click on Reset from the menu that appears
  • Click on Reset Network
  • Enter your Screen Time Password
  • Erase all content
  • Go to General
  • Transfer or Reset iPhone
  • Tap on Erase All Content option

Hopefully, this will help you to get back the network signal.

If your iPhone is still showing network IC issues, checking the iPhone network IC repair cost and getting it repaired by a professional is the best solution.

The cost of repair can differ if you book the service online, walk into the nearest Apple Service Center, or consult with a local repair provider. For any such queries get connected to a trustworthy independent repair provider. They have experienced technicians with the proper knowledge and skill to fix the issues within a given time and to use genuine Apple parts in case of replacement. You can always rely on the service provider, as an experienced technician can diagnose and repair any problem that may be affecting your iPhone. At Rapid Repair, one of the largest independent repair providers for Apple products, the iPhone network IC repair cost ranges from ₹5,500/- to ₹7,500/- + GST depending on the model. They offer a lifetime service warranty. In case you live in a remote area, you have the option to mail your damaged device to the repair provider

Got issues with your Apple Watch, iPhone, iPad, MacBook or any Apple device? Is a trustworthy repair centre not in sight? Don’t worry, the experts can help you get a free pickup and drop service and provide a bright repair solution for all your Apple woes. Call today for iPhone battery replacement, screen replacement, and other top repair services.

Read – How to Guard your iPhone from Malware?

Why is the iPhone 16 Pro Max freezing after an iOS 18.3 update?

The iPhone 16 Pro Max is currently the most advanced iPhone ever released. The iOS 18.3 is also the last major iPhone operating software released if we overlook iOS 18.3.1, which was launched to fix a few security issues and bugs. Any tech enthusiast can assume the level of user experience the combination of these two can provide. Yet, many users reported their iPhone 16 Pro Max freezing after iOS 18.3 update. Now why is this even happening? And what are its possible solutions? Let’s try to figure them out in this guide, step by step.

What is the cause?

Several causes can be attributed to the issue ofthe iPhone 16 Pro Max freezing after iOS 18.3 update. However, according to reports on various platforms, we have listed the most prevalent ones.

Bugs in software – The issue can be caused by certain unresolved software bugs in iOS 18.3. After the launch of iOS 18, similar incidences were reported.

Insufficient storage – Insufficient storage space can lead to a disruption in the update process and can result in sudden freezing of the device while or after the update.

Incompatible apps – In certain cases, a few apps may not be fully compatible with iOS 18.3, leading to the freezing of the device.

Malware – A certain malware can cause your iPhone 16 Pro Max to freeze abruptly.

Hardware issue – In rare cases, there is a possibility that certain units of the iPhone 16 Pro Max have hardware defects contributing to freezing and lagging issues. However, this has not been conclusively confirmed.

Source: iDrop News

Now, the root of the cause can be anywhere. Though many users are voicing their grievances regarding this issue, as it is not a widespread problem yet, Apple has not issued any statement addressing it.

Read – What’s New in the Apple iOS 18.2.1 Update?

How to fix it?

As per experts, there are a few ways by which this issue can be tackled. Though it seems as a temporary problem, that will be fixed with the next iOS update, unless of course, it is a hardware-related issue, users can try these methods to fix the issue.

Force restart – A simple Force Restart of your iPhone might solve the issue. To do it,

  • Quickly press and release the volume up button
  • Quickly press and release the volume down button
  • Press and hold the side button until the Apple logo appears on the screen, then release

Once your device restarts, check if the issue is still there.

Keep your iPhone charged – Make sure your iPhone 16 Pro Max’s battery level is at least more than 20% all the time and check if the issue appears. If the battery is not charged enough, the CPU doesn’t get the power it requires to run the iOS, leading to freezes.

Clear iPhone storage – A shortage of storage can lead to your iPhone 16 Pro Max freezing after iOS 18.3 update. Go to Settings > General > iPhone Storage. The bar at the top will indicate how much space is available. If there’s a shortage, delete photos, videos, documents or space-consuming apps to free up storage space. After doing so, check if the issue persists.

Delete suspicious apps – If you notice that your iPhone is freezing after the installation of a certain app, it might be due to a malware infection. Uninstall that app and look for other such suspicious apps.

Turn off Background App Refresh – If there are too many apps enabled with Background App Refresh, it will not only consume a lot of data but can also cause your device to malfunction and freeze. Here’s how to turn it off,

  • Go to Settings > General > Background App Refresh
  • If you want to disable it altogether, tap on Off toggle beside the Background App Refresh option
  • If you want to disable selected apps, use the individual toggle beside each app name

Source: GSMArena

Some will suggest to factory resetting your iPhone. However, there are reports that iPhones restored with iCloud backup to solve the issue were not helpful. As this problem is expected to be resolved with the launch of iOS 18.4, the public beta version of which is already out, it will not make much sense to lose all your data.

Got issues with your iPhone, Apple Watch, iPad, MacBook or any Apple device? Is a trustworthy repair centre not in sight? Don’t worry, the experts can help you get a free pickup and drop service and provide a bright iPhone repair solution for all your Apple woes. Call today for your iPhone battery replacement, screen replacement, and other top repair services.

Read – iOS 18 update – What are we getting?

iPhone stuck in recovery mode? Tips to recover data without losing files

One issue that is often faced by iPhone users is their device getting stuck in recovery mode. There can be multiple reasons behind this error, but to see your iPhone stuck in recovery mode can be horrifying, especially if you haven’t backed up your data. But like any issue with the iPhone, there are remedies for this as well. You can recover your data and fix your iPhone without losing files. But before going to the solution, let’s understand the problem.

Why does the iPhone get stuck in Recovery Mode?

Several reasons can get your iPhone locked in recovery mode. Below you will find out some of the most common roots of this issue.

  • Unsuccessful iOS update: If an iOS update is interrupted in the process or gets corrupted, your iPhone can get stuck in recovery mode.
  • Failed jailbreak: If you try to jailbreak your iPhone, i.e., if you try to remove the restrictions imposed by Apple on the iPhone’s operating system, and some method backfires, the system might force it into recovery mode.
  • Hardware problems: Damage in the battery or a faulty motherboard can cause this issue.
  • Software issue: If an app is corrupted or there is a bug in the iOS, it can cause your iPhone to get stuck in recovery mode.
  • Incorrect restoration: If the iPhone is incorrectly restored via iTunes or Finder, it can end up in recovery mode.

How to recover data without losing files?

To exit recovery mode without losing your data, you can try one of the methods below.

1. Force Restart your iPhone

A Force Restart might sound simple, but it is at times very effective to fix minor glitches and get the iPhone out of recovery mode. To do that,

  • Press and release the Volume Up button
  • Press and release the Volume Down button
  • Press and hold the side button until the Apple logo appears

Source: Hongkiat

2. Use Finder or iTunes to Update instead of Restore

If the above step doesn’t work, try updating your iPhone via iTunes (Windows/macOS Mojave and earlier) or Finder (macOS Catalina and later).

Steps to Update via iTunes/Finder:

  1. Connect your iPhone to your computer using a USB cable.
  2. Open iTunes (Windows or macOS Mojave and earlier) or Finder (macOS Catalina and later).
  3. Your iPhone should be detected in recovery mode. A prompt will appear.
  4. Click Update (not Restore!).
  5. Wait for iTunes/Finder to download and install the latest iOS version.
  6. Once completed, your iPhone should restart normally without data loss.

3. Use iCloud to Restore Data After Recovery

If none of the above methods works and you have no choice but to restore your iPhone, you can recover your files from an iCloud Backup.

Steps to Restore Data from iCloud Backup:

  1. After restoring your iPhone, set it up as a new device.
  2. On the Apps & Data screen, select Restore from iCloud Backup.
  3. Sign in with your Apple ID.
  4. Choose the most recent backup and let it download.

Read – Why your iPhone isn’t Ringing and How to Fix it?

Source: Aiseesoft

How to prevent future Recovery Mode issues?

To avoid this issue in the future, follow these tips:

  • Keep iOS Updated: Regularly update your iPhone to avoid software bugs.
  • Avoid Unstable Jailbreaks: If you jailbreak, ensure you use a stable method.
  • Use Trusted Apps: Download apps only from the App Store to avoid software conflicts.
  • Regularly Backup Data: Use iCloud or iTunes to back up your iPhone regularly.

An iPhone stuck in recovery mode can be frustrating, but you don’t have to lose your data. Follow the measures to prevent a future occurrence of this issue and make it a habit to back up your data on iCloud.

Got issues with your Apple Watch, iPhone, iPad, MacBook or any Apple device? Is a trustworthy repair centre not in sight? Don’t worry, the experts can help you get a free pickup and drop service and provide a bright repair solution for all your Apple woes. Call today for your iPhone screen replacement, battery replacement and other top repair services.

How to Guard your iPhone from Malware?

It might have been a few days since you started observing some suspicious activities on your iPhone. The consumption of data is giving the consumption of power tough competition in the race of exhaustion, pop-up ads are coming from nowhere, and apps are crashing frequently. Unable to bear the burden of all these, as a cherry on the top, your iPhone is overheating. Well, these are a few signs of a virus on an iPhone. Whether or not you are facing this conundrum, you must know how to protect your iPhone from malware.

What is a malware?

A malware is a malicious software that can infect your iPhone and disrupt its usual functioning. The harm can range from underperformance of your device, hacking into your password-protected accounts, or data stealing. Malware has several forms, including viruses, trojans, spyware and ransomware. They can get into your iPhone through malicious websites, untrustworthy apps, fraudulent messages, and unsecured wi-fi networks, among other ways.

Can malware infect an iPhone despite its strong security measures? The answer is yes. Even though iPhones are designed to operate within a set parameter, making them much more secure than their Android counterparts, nothing is foolproof in the ever-evolving world of the internet.

Source: SlashGear

Read – How to fix the No SIM Card Installed Error on iPhone?

How to check for malware on iPhone?

If you have any doubt that there’s a virus in your iPhone, you can quickly check these points.

Check power and data consumption – Malware often run in the background consuming more battery and data. Check if your iPhone is draining out of charge faster than usual, and observe if your device is consuming more internet data than your usual average.

Look for pop-up ads – Pop-up ads are common while surfing the internet. But if they are coming more frequently than ever, and that too of things that you can’t relate to, there’s a high chance that your iPhone is infected by adware.

Look for malicious apps – Sometimes malware can nest in your iPhone masquerading as an innocent-looking app that is hard to detect. Take out some time and check all the apps. Inspect any app that you don’t remember installing and uninstall them if necessary.

Use third-party antivirus software – Though Apple doesn’t provide any built-in antivirus program with iPhone, you can install any third-party iPhone antivirus app from the App Store and scan your device through it.

How to remove malware from iPhone?

Source: BankInfoSecurity

Even if an iPhone is vulnerable to malware attacks, there are several methods to free your device from the terror of malware. You can try any of these methods as required.

Clear the browsing history – Clear the browsing history and data of the web browsers you are using to access the internet.

Remove suspicious apps – If you identify any app that bears a resemblance to a legitimate app but can be spotted as a fake app, uninstall it then and there and remove all data related to it. Removing apps that are not frequently used or that you don’t remember installing is a healthy practice in itself.

Update your iOS – Apple keeps on upgrading its security from time to time with new versions of iOS. Hackers often exploit the security flaws in an outdated version of iOS. Update your iOS by going to Settings > General > Software Update and the latest version might remove the malware from your device.

Restore your iPhone – The iPhone gives you the feature to backup the content of your device in the iCloud. You can restore your device to an iCloud backup made before the malware infection.

Factory reset your iPhone – As a last resort, you can factory reset your device. It will remove all the apps and content of your iPhone along with the malware. Your device will retain its original configuration.

Read – Why your iPhone isn’t Ringing and How to Fix it?

Source: 91mobiles

The steps above will help you to identify signs of a virus on an iPhone and remove them. But to guard it from any malware, don’t click on any suspicious links and avoid installing apps that Apple doesn’t recognize. Keep frequent data backups and enable automatic updates of iOS and iTunes. And most importantly, don’t jailbreak your iPhone. Jailbreaking is removing Apple’s software restrictions on an iPhone to prevent it from installing unauthorized apps and customize its interface.

Got issues with your Apple Watch, iPhone, iPad, MacBook or any Apple device? Is a trustworthy repair centre not in sight? Don’t worry, the experts can help you get a free pickup and drop service and provide a bright iPhone Repair solution for all your Apple woes. Call today for your iPhone battery replacement, screen replacement, and other top repair services.

iPhone App Crashes – How to fix frequent App problems

When iPhone apps crash, it can be due to various reasons such as software bugs, memory issues, or compatibility problems with the operating system. This often results in the app closing unexpectedly, freezing, or becoming unresponsive. Troubleshooting typically involves updating the app or iOS, freeing up memory, or reinstalling the app. Understanding and addressing these causes can help improve app stability and user experience.

Quick Fixes for iPhone App Crashes:

  • Update Apps/iOS → App Store & Settings.
  • Force Close → Swipe app away in App Switcher.
  • Reinstall App → Delete, then redownload.
  • Clear Cache → Offload app (Settings → iPhone Storage).
  • Free Up Storage → Delete unused files/apps.
  • Reset Network → Settings → General → Reset → Network.
  • Disable Background Refresh → For glitchy apps.
  • Cool Down → Avoid overheating.
  • Factory Reset → Backup first! (Last resort).

Why do my apps keep crashing on iPhone?

Source: iMobie

From a glitchy app to an outdated iOS, there can be several reasons behind iPhone apps closing abruptly. Below we have listed a few common reasons behind this issue.

  • The iPhone is not connected to the internet.
  • The iPhone is running on a low battery.
  • There’s not enough storage space to run the app.
  • The iPhone’s processor is unable to handle the workload.
  • There’s a glitch in the app.
  • The iOS is outdated and needs to be updated.
  • The app that is crashing needs to be updated.

So these can be the probable cause behind the issue that your iPhone is facing. Now, the problem can arise in two faces. Either a particular app in your iPhone is crashing repeatedly or all the apps are crashing. There’s a fix for them both.

iPhone app crashes troubleshooting tips

Here are a few troubleshooting tips that will help you to resolve the issue. Before trying any of these, make sure your iPhone is connected to the internet and have enough charge.

  1. Close and relaunch the app

This should be the first method that you must apply. Try to force the app to close and then reopen it. To close the app,

  • Swipe up from the bottom of your home screen and stop midway.
  • Scroll through all of the open apps preview by swiping sideways.
  • Swipe up the app preview that you want to close.
  • Then open the app again by tapping on its icon.

Note that, if you are using an older iPhone model with a home button, click it instead of swiping up in the first step.

  • Update the app

Close the app and then check if any updated version is available for installation. Go to the App Store’s search bar and type the name of the app. If an updated version is available, you will see the Update button. Tap on it to update the app. Once updated, open it by tapping on its icon.

Source: CNET

  • Remove the app then reinstall it

One possible solution is to uninstall the problematic app and then reinstall it. For that, you have to go to the Home Screen, find the app icon and long-press it. You will see the Remove App option. Tap on it and choose Delete App to confirm. Once the app is deleted, go to the App Store and search for the app. To reinstall it, tap on the Cloud icon beside the app’s name.

  • Force restart your iPhone

Try to force restart your iPhone by pressing and releasing the volume up button followed by the volume down button. Then press and hold the side button until an Apple logo appears on the screen. Once your iPhone restarts, try to open the app again.

  • Update your iPhone iOS

Check if any iOS update is available for your iPhone. To do that, go to Settings > General > Software Update. Install if you see any available iOS update and then try to open the app again.

  • Check your iPhone’s storage

Low storage space can be a reason behind an app crashing issue. Check the available storage space on your iPhone by going to Settings > General > iPhone Storage. There you will get the information about the available space in your iPhone. If you see there’s not enough space, you can delete large apps that you don’t use regularly. Once enough space is available, try opening the problematic app.

One of the above troubleshooting tips must help you to resolve the iPhone app crashing issue. But if nothing works out, you have to understand that the problem is something bigger and your iPhone is in dire need of professional help.

Got issues with your Apple Watch, iPhone, iPad, MacBook or any Apple device? Is a trustworthy repair centre not in sight? Don’t worry, the experts can help you get a free pickup and drop service and provide a bright iPhone Repair solution for all your Apple woes. Call today for your iPhone battery replacement, screen replacement, and other top repair services.

How to Check if Your iPhone is Original or Not: Let’s Verify:

Buying an iPhone is exciting, but it can also be tricky if you don’t know how to confirm if it’s real. Many people end up with fake or counterfeit iPhones because they don’t check carefully before buying. The good news is that there are simple ways to make sure you’re getting an original iPhone. In this blog, we’ll explain how to check if the iPhone is original step by step. Whether you’re buying a new or used iPhone, this guide will help you avoid scams and make a smart purchase. Let’s get started!

Methods to ensure an iPhone is original

Source: iDrop News

Below you will find all the methods for iPhone real or fake checks. Each methods contain multiple steps that are explained in details. Whether you want to enquire about a new iPhone or a used one, you can check as many methods as you want.

Check the IMEI Number

 Every cell phone has a unique IMEI (International Mobile Equipment Identify) number. It’s kind of an ID proof of your cell phone. Go to Settings > General > About > Find the IMEI number.

You can also dial *#06# to check the IMEI number on your screen. Verify if the number on your phone matches the number on the original packaging. There is also another option to Verify. Log in to Apple’s Coverage Page, enter the IMEI number and Apple will confirm if it is a valid product.

Check the Serial Number

To check the Serial number, go to Settings > General > About > Check the Serial Number. If Apple recognizes it then it’s a genuine one.

Check iOS Version

If your iPhone is running on Android or any other operating system, it’s fake. To check it, go to Settings > General > About > Verify if the operating system is iOS.

Source: Apple Support

Read – Why your iPhone isn’t Ringing and How to Fix it?

Connect it with iTunes or Finder

To figure out if it’s original, connect it to a PC with iTunes or connect it to a Mac with Finder. An authentic iPhone will start to sync and the software will recognize it. Whereas, a fake one might create some trouble.

Check the Parts and Service History

Even a repaired or refurbished iPhone can also look brand new. To check it go to Settings > General > About. Here you will get the details of the parts and service history. In case any low-quality parts are installed in it, it will be highlighted as unknown parts.

Check if it is Refurbished

Many refurbished phones are changing owners, so it’s safe to verify. Go to Settings > General > About > Check the first character of the model identifier.

If it starts with M – it’s brand new.

F – Apple-certified refurbished. This device was used before but underwent Apple’s certified refurbishment to make it brand new.

N – Replacement. The owner received this device through an Apple service request as a replacement for their original purchased unit.

P – This is a new retail device that was ordered online and personalized with Apple’s custom laser engraving option at checkout.

Google Play Store

A genuine iPhone only uses Apple’s App Store for downloading apps. In case your iPhone lands you on Google Play or any other marketplace, it’s not real.

Voice Assistant

Ask the voice assistant ‘Who are you?’. To do that, press the side of the home button to activate the voice assistant. If it’s real the voice assistant will reply “Hi I’m Siri”.

Source: Wccftech

Features

Airdrop a photo or web link from this iPhone to another Apple device. If it works it’s good. Check the AirPlaying media as well.

Animations

Refurbished or fake iPhones can’t perform animation as smoothly as a real one, as they are slow and laggy. Use the phone for some time to figure out.

Apple Support

If all the points mentioned above are not enough to clear your doubts, then you can head to the Apple Store. They will verify and confirm whether the device is real or fake.

Read- iPhone Screen Freezes & Won’t Respond to Touch – What to do?

Source: WeSellCellular

There are so many easy steps to give you a proper answer regarding how to check if the iPhone is original. However, for any sort of internal malfunctions get connected to the nearest repair provider. In case you live in a remote area, you have the option to mail your damaged device to the repair provider.

Got issues with your Apple Watch, iPhone, iPad, MacBook or any Apple device? Is a trustworthy repair centre not in sight? Don’t worry, the experts can help you get a free pickup and drop service and provide a bright iPhone Repair solution for all your Apple woes. Call today for your Apple Watch battery replacement, screen replacement, and other top repair services.

iPhone 13/14 Green Screen Issue: Causes and How to Fix

If your iPhone 13 or 14 has a green screen issue, consider it a red flag. Don’t think that the iPhone green screen issue came out of the blue. There must be some glitch affecting the OLED display of your device. And as you know, if there’s an issue in the tech world, there is a fix. But before going to the solution, let’s understand the problem.

A few software glitches or hardware malfunctions can cause your iPhone to display a completely green screen or an increased green tint. At times, the issue can appear as a flicker between normal colours and a greener tint. Some even face this issue while rebooting, as the screen gets stuck on the Apple logo with a partial green screen. Now the issue can project its symptoms in any way, but the causes are usually the same.

Source: Apple Support Community

What causes the iPhone green screen issue?

Let’s understand the common reasons behind an iPhone green screen issue. It is important to identify the cause properly, so the right solution can be applied.

An iOS glitch – If there’s a glitch or bug in the iOS version you are using, the issue can appear after an update. Alternatively, outdated iOS software can also be at the root of this issue.

A faulty third-party app – If you are facing an issue while using a specific third-party app, then be sure that there is a glitch in the app and that your device is fine.

Physical damage – If your device is physically damaged, caused by a fall or exposure to water or high temperature, it can cause the display to malfunction. The damage can be internal, like in the display connector or logic board, or in the OLED display panel. A visibly damaged screen will malfunction.

Source: Apple Support Community

Read More – iPhone Screen Freezes & Won’t Respond to Touch – What to do?

How to fix the iPhone green screen issue?

Now that you have identified the cause behind the green screen issue of your iPhone, here are the hacks that you can apply to get rid of it.

Force restart your device – Restart is a common troubleshooting tip for many iPhone issues, and that’s not without a reason. A force restart must be your first step after finding out the issue. To do it,

  • Press the volume up button and release it.
  • Press the volume down button and release it.
  • Press the Side Button until the Apple logo appears on the screen.

Check for iOS update – If the issue is caused by an outdated iOS, a software update can fix it. Go to Settings > General > Software update, and if there’s an update available, install it. If you are facing this issue after updating to a new iOS version, then there must be a bug in it. Apple usually fixes these kinds of bugs quickly with an additional update.

Update faulty apps – If a particular app is causing this issue, look for its updated version in the App Store. If an update is available, install it. To do this,

  • Go to the App Store.
  • Tap on the profile icon at the top right.
  • Scroll down the check if an update of the App is available.
  • Install it.

Check for physical damage – Check if there’s any sign of physical damage, like a crack on the screen or a dent on the body. For any kind of physical damage, internal or external, you have to consult an expert iPhone repair service provider who can fix the iPhone green screen issue. Don’t try to do it yourself as it may further damage the device.

Source: Phone Arena

It is necessary to keep your iOS updated every time a new version is available. It will reduce the chances of the green screen issue reappearing.

Got issues with your Apple Watch, iPhone, iPad, MacBook or any Apple device? Is a trustworthy repair centre not in sight? Don’t worry, the experts can help you get a free pickup and drop service and provide a bright repair solution for all your Apple woes. Call today for your iPhone screen replacement, battery replacement, and other top repair services.

whatsapp logo