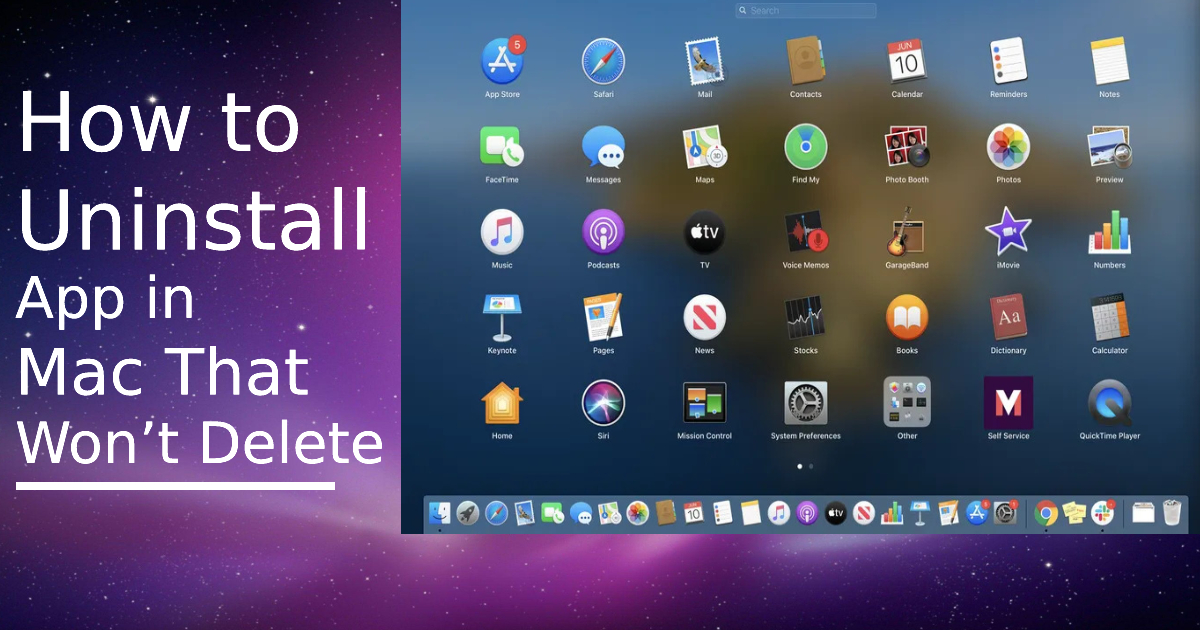
How to Uninstall App in MacBook That Won’t Delete

A Mac became Mac because of what it is and what it offers—a smooth, seamless, efficient user experience. Ask any Mac loyal and they will tell you how Mac is one of the easiest operating systems ever. It comes with a built-in App Store, which is home to millions of useful apps designed for every function. However, sometimes users can face difficulties while Uninstalling Apps on their MacBook. Sometimes, despite trying the usual way out it gets difficult to remove apps from Mac and you can scratch your head to know the safe way to uninstall apps on a Mac. If you too have faced similar issues, then this article is for you. Today, we’ll look at how to uninstall an app on Machow to delete an app on MacBook and other such associated problems, so stay tuned!

(Image source: Futureplc.com)

Why Apps Won’t Delete From the Mac?

There are many reasons for being unable to uninstall apps on Mac. If you are not sure why a particular app is not getting uninstalled, it could be one of the two reasons:

It is a System App

More often than not, users try to uninstall a system app because they aren’t aware of what it does and may mistake it to be an unwanted or spam app. System apps come preloaded with the Mac and Apple doesn’t allow users to uninstall these apps in any case.

Read – MacBook Pro Touch Bar Disappeared

The App is Still Running

You might not see an app open in the dock but it could be still running in the background. In such a case, the Mac won’t allow you to delete the app until it stops or is closed.

(Image source: imore.com)

How to Uninstall Apps from Mac

There are two answers to how you can remove applications from Mac:

Delete App through Launchpad

  • Open the Launchpad from the Application folder or by clicking on it in the Dock.
  • Look for the app or type its name in the search field.
  • Click and hold the app until the apps start to jiggle. You can also press the Option key.
  • Click on the X (Delete) button next to the app and then click on the Delete option to confirm the action.

(Image source: Apple.com)

Delete App from the Finder

  • Apps that don’t show the X (Delete) sign in the Launchpad can be deleted from the Finder. These apps are either required by the Mac or are not installed from the official App Store.
  • Find the app in the Finder or use Spotlight to find the app.
  • Move the app to the Trash bin at the bottom or choose File > Move to Trash. It will ask for a password, enter it and the app will be sent to Trash.
  • Select Empty Trash to delete the app from the Trash.

(Image source: Gadgethacks.com)

How to Delete Apps from Mac that Won’t Delete

If somehow you are unable to uninstall apps on Mac using the above two methods, then you need to find an alternate solution for deleting the app. Let’s have a look at how to delete apps on Mac.

Close the App First

  • Press the Option + Command + Esc key simultaneously from anywhere on the Mac.
  • This will open a Force Quit Application window showing all the apps that are currently running.
  • Select the app you want to delete, Force Quit it and close the window.
  • Now that the app is closed, you can perform the normal deletion process as specified above.

(Image source: YouTube)

Use the Native Installer

Some applications come with a native uninstaller that is built-in with the app bundle. You’ll mostly find this for third-party apps that are not installed from the App Store. You can use the native uninstaller to uninstall the app.

Third-party Software

There are several third-party software available online that can delete those stubborn apps. App uninstallers like CCleaner, CleanMyMac X, AppCleaner, and Remove-It are made to run on Mac Os and can come in very handy at times. Do note that some of these apps could ask you to buy them for using the complete version. It is advised to do thorough research before selecting any of them.

Use The Terminal to Force Uninstall The App

Yes, if nothing has worked so far a little force won’t harm your Mac. If the question is about getting rid or simply figuring out a way on how to uninstall an app on Mac, you can go to the terminal settings. Open the terminal app from the Utilities folder in Applications. Type the command: sudo rm -rf followed by a space, then drag the app you want to delete into the terminal window, then hit enter. You may need to enter your admin password. This command will force delete the app and all its associated files.

Conclusion

There you have it—all the processes you can use to permanently uninstall applications on Mac. Keep this guide handy for the day you too wonder, how to delete applications on Mac.
iPhone won’t Charge? Here’s why and How to Fix it

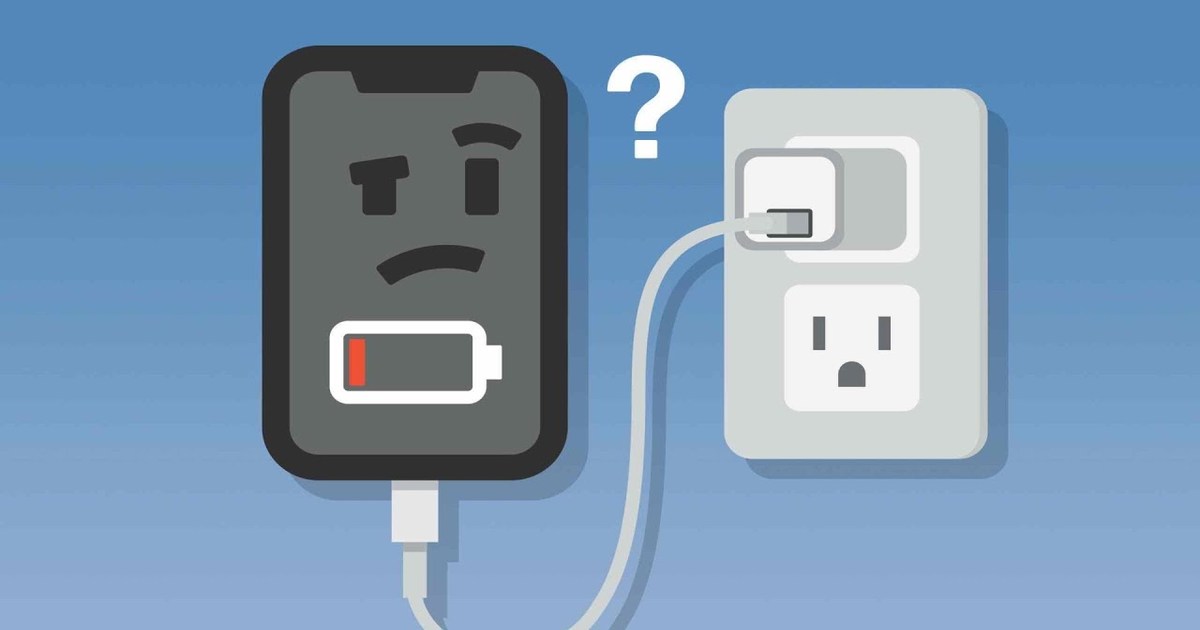
While iPhones are built with extreme precision and care, they are not immune to common issues. One of those issues is the iPhone not charging one. If you are facing this issue and thinking why my iPhone won’t charge, then there is no need to panic. There are several hacks you can try at your end to either get to the root of the issue or even solve it by yourself.

Even for a seemingly straightforward task like charging, there are several components involved that need to work properly. In this guide, we’ll take a look at everything that can cause the iPhone charging problem and eliminate possible reasons one at a time.

What Could be the Reasons Behind the iPhone not Charging Issue?

Wondering why my iPhone is not charging? Well, there could be multiple culprits behind this annoying issue. For instance, the problem could be due to an uncertified charger or a rugged case that might not be supporting Qi-wireless charging or even a scrap of lint that may have sneaked into the charging port. There can be issues with the charging adapter, a faulty software might be preventing the phone from charging or there can be an underlying hardware issue. Thus, we are going to try out all the possible solutions that can help you resolve the iPhone not charging issue.

Remove the Gunk out of Your iPhone’s Charging Port

Well, the first thing you should do is check if the lightning port of your iPhone is blocked by gunk or small particles of lint. Believe it or not, debris tends to get stuck in the port and builds up over time to prevent iPhone from charging when plugged in. So, you should clean the port frequently to ensure it can remain clean.

To clean the port of your iPhone, you need to first shut it down. Then, use a normal toothpick to remove the lint gently. Be more careful while cleaning the port as the pins may get damaged and you will have to replace the charging port.

Check Your Lightning Cable and Power Adapter

While the market is flooded with chargers, not all of them are secure and certified to power iPhones. If you are using a charger which is not Mfi (Made for iPhone/iPad/iPod) certified, you will frequently get a warning pop-up saying, “accessory may not be certified.” As part of security measures, iOS won’t let you charge the iOS device using the uncertified charger.

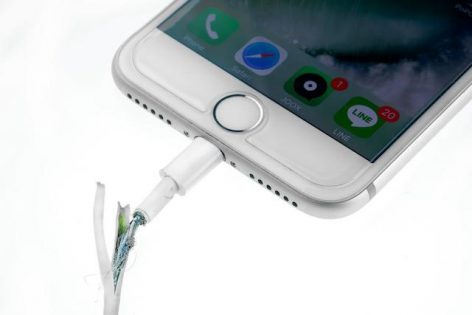
If your charger is MFi certified, ensure that both the lightning cable and power adapter aren’t damaged. Try using another cable/power adapter to charge your iPhone. If you can charge using another charger, that means your charger is at fault. While the original Apple charger can be too costly, there are several high-quality cables available online that are less expensive. You just need to make sure they are MFi certified and have the recommended 2.1 amps power capacity.

Read – ‘No Service’ on iPhone? Try These Quick Hacks

Ensure that the Case Supports Wireless Charging

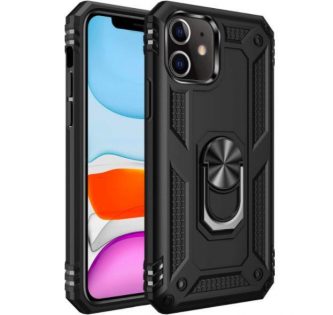
If you use a wireless charger to power up your iPhone 8 or above, ensure that the case is compatible with wireless charging. Yeah, you got that right! Not all iPhone cases support Qi-wireless charging, especially the covers that are rugged or the ones that feature metal back plates.

So, just in case you have installed a heavy-duty case or a ring holder cover, remove it before putting the iPhone on the wireless charger.

If you use Qi-enabled wireless chargers, we would recommend you use slim cases that support wireless charging. This way, you won’t have to take the pain of removing the case before putting the iPhone on the charger.

If iPhone Stopped Charging at 80 Percent

If your iPhone won’t charge beyond 80 percent, then you might have nothing to worry about. To extend the lifespan of their device batteries, Apple has started using the Optimized Battery Charging feature. It is available in every Apple device, iOS 13 and higher models.

The feature uses machine learning and temperature sensors to detect when you use your phone the most and if the phone is getting too hot while charging. It will stop charging the phone when it hits the 80 percent mark. If your phone isn’t charging beyond this point, wait for a couple of hours and charge the device again to check if there is an issue with the charging or if it was just the Optimized Battery Charging feature that kicked in to prevent the device from charging further.

Liquid Damage

While dirt and debris stuck in the charging port can prevent the phone from charging, liquid damage can also pose a big problem. If you dropped your phone in water and have kept it aside for drying, make sure it is completely dry before plugging in the charger. Even a little bit of water can cause the connections to short and lead to even more problems.

Keep your phone aside and let it dry out completely. No matter how important the data inside your phone is or how eager you are to use the phone again, you wouldn’t want to destroy it, right?

Hard Reset/Force Restart Your iPhone

Force restart aka hard reset often turns out to be a saviour, especially when dealing with common problems. So, we are going to try it out as well.

Hard reset iPhone with face ID, iPhone SE (2nd generation), iPhone 8, or iPhone 8 Plus

First off, press the volume up button on your iPhone. Then, press the volume down button. After that, hold down the side button until the Apple logo appears.

(Image credit: Apple Support)

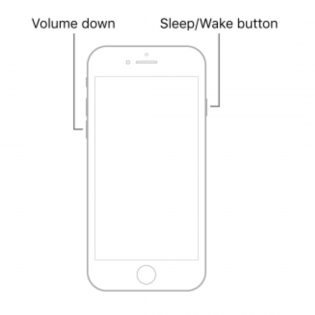
Hard Reset iPhone 7 or iPhone 7 Plus

Press and hold both the volume down button and the Sleep/Wake button simultaneously until the Apple logo shows up.

(Image credit: Apple Support)

Hard reset iPhone 6s, iPhone 6s Plus, iPhone SE (1st generation) or earlier devices

Press and hold the Sleep/Wake button and the Home button at once until you see the Apple logo.

(Image credit: Apple Support)

Software Update

More often than not, a mere software update can help you fix several issues on your iPhone and even bolster the performance. If you haven’t updated the iOS for a while, the outdated software version might be the reason why your iPhone won’t charge. So, navigate straight into the Settings > General > Software Update. Then, download and install the latest iteration of iOS without any further ado.

Restore Your iPhone

You should look at the “Restore” option as the last resort. You should try it out only when none of the basic tricks are working. Before going for this radical solution, you must always take a full backup of your iPhone as the restore process will wipe out all the existing data.

(Image credit: Apple Support)

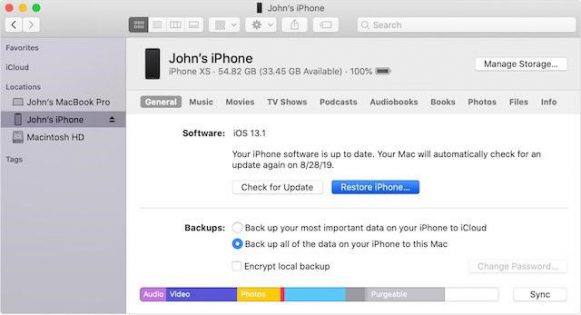
It’s worth noting that Apple has shut down iTunes for Mac with the introduction of macOS Catalina and replaced it with Finder. So, if you’re using macOS Catalina or later, you need to use Finder to restore your device. On Mac running macOS Mojave or earlier and Windows PC, you can still use iTunes to restore your device.

Simply open Finder/iTunes > select your device. Then, click on Restore iPhone.

Repair your iPhone

What do you do if you checked the cables, checked the adapter, updated your iPhone, cleaned the lightning port, even performed a complete restore, but still the iPhone is not charging? The issue now needs professional intervention and it is time for you to contact a trusted iPhone repair centre like Rapid Repair and let us tackle the problem.

After all, there can be an internal hardware issue with the device that is beyond your scope. Rapid Repair has a team of expert and experienced super techies who have worked on several iPhones and are adept at repairing iPhone charging problems fast. We use only genuine Apple parts when it comes to any replacement and provide excellent services at an affordable price. Contact us to get your non-charging iPhone fixed right away.

MacBook Pro Touch Bar Disappeared

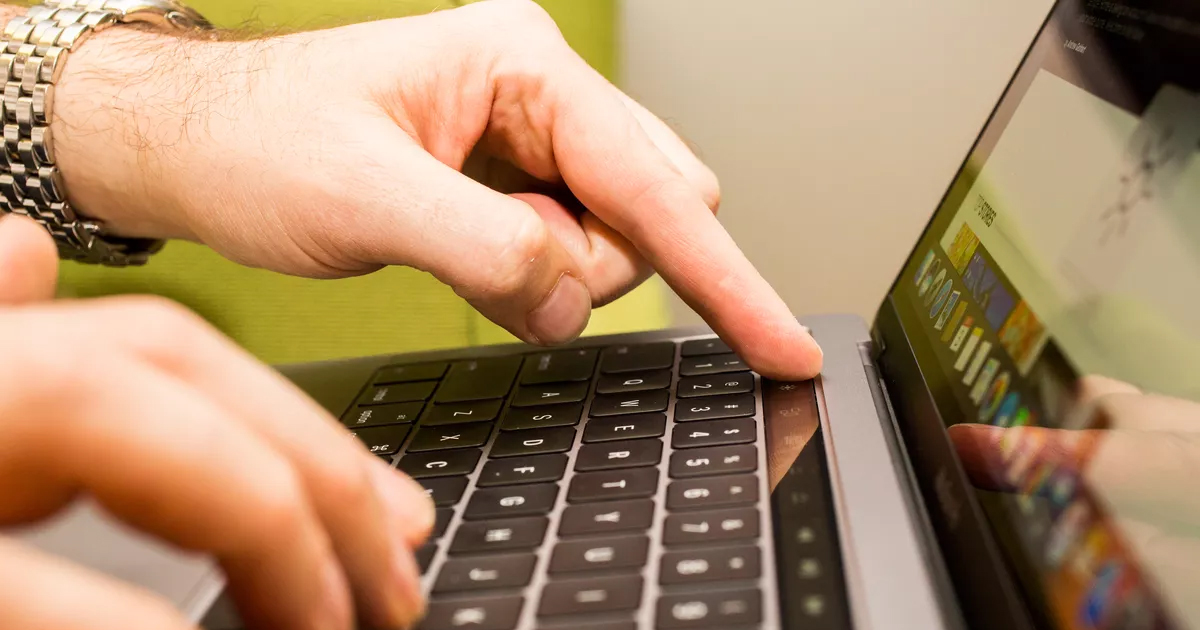
The MacBook Pro Touch Bar was a sensation when it was first introduced. It was an interactive digital strip that sat on top of the keyboard and provided functions based on the app or software a person is using. While it turned heads and increased the productivity of users, the touch bar isn’t immune to issues of its own.

A lot of users have reported issues with their Touch Bar ever since they updated their operating system to macOS Big Sur. If your Touch Bar suddenly seems to be behaving weird and unresponsive or freezing too often, and you’re trying to find something on “MacBook Pro Touch Bar disappeared”, then this article might have some answers for you. But before looking for solutions on how to turn on Touch Bar on MacBook Pro, let’s take a look at why your MacBook Pro Touch Bar is not turning on.

Why MacBook Pro Touch Bar Disappeared?

There can be several reasons why the MacBook Touch Bar is disappeared or why the Touch Bar is not showing up for some apps. Some of the common reasons are:

  • Application malfunction
  • Memory, CPU, and storage are being used heavily
  • Software glitches
  • Hardware issues
  • Water damage
  • macOS not updated

Some of these issues can be fixed at home while for reasons like hardware or water damage, you might want to contact a professional.

How to Fix MacBook Pro Touch Bar Missing?

One of the biggest reasons for the Touch Bar off on your MacBook Pro is the presence of older software. Update your system to the latest OS version as soon as it is available to see if the issue has been fixed.

Reboot your MacBook

Restarting your MacBook should be the first step you do no matter what issue you are facing with the laptop. Minor issues can occur due to bugs or software glitches that can be solved simply by restarting the device.

You can restart the laptop by heading to the Apple menu or holding down the command button while pressing the power button. Do note that this process will trigger a force restart that can cause you to lose unsaved changes. So process with caution.

Refresh the Touch Bar

You can refresh the Touch Bar through the activity monitor. The activity monitor shows all the processes currently running on your system. You can access it by going to the Utilities tab in the Applications menu. Open the Activity Monitor, search for “Touch Bar Agent” and then Force Quit the process to refresh it.

Refresh the Control Strip

Sometimes it can happen that the MacBook Pro Touch Bar options have disappeared from the control strip. You can refresh the whole control strip to see if its fixes the issue and the options appear again. Open the Terminal app and type the command “killall ControlStrip” without the quotes and hit Return. The touch bar should be visible now.

Reset the Touch Bar on MacBook Pro

Resetting the Touch Bar is a simple process but can fix the disappearing issue quickly. All you have to do is open Terminal and run the commands “sudo pkill TouchBarServer;” and “sudo killall “ControlStrip”;” without the quotes. It might ask you for the system password but after entering it, the service should restart and the Touch Bar would appear once again.

Reset the SMC of your MacBook Pro

Resetting the SMC is needed only if you have an Intel model. Follow these steps to reset the SMC:

  1. Turn off the Mac.
  2. Press and hold the Option + Control + Shift keys for a few seconds. The device might turn on at this stage.
  3. Keep holding the keys while pressing the Power button simultaneously. This would turn off your laptop if it turned back on.
  4. Hold the four buttons for roughly 7 seconds and then release them.
  5. The SMC is now reset. You can now Turn On the Mac to see if the issue is fixed.

Finally, Contact a MacBook Repair Centre

If none of the fixes stated above work for you, it is best to seek professional help. Remember that hardware issues and water damage can also cause the MacBook Pro Touch Bar to disappear. In such circumstances, you should take the laptop to the nearest Authorized Apple Service Centre or contact a trusted Macbook repair centre like Rapid Repair.

Rapid Repair uses only genuine spare parts to repair your devices and specialises in the repair of Apple devices like MacBooks, iPads, iPhones and iWatches. Our team of highly-experienced and trained technicians use state-of-the-art gadgets and the latest repair protocols to fix your devices. Contact us for reliable, absolutely hassle-free and convenient (we offer doorstep pick and delivery across India including Mumbai, Pune, Bangalore, Hyderabad, Chennai and others. and affordable repair services.

OnePlus Smartphone Screen Not Working? Here are 6 Pro Tips to Fix It!

There’s no doubt that your OnePlus smartphone is pretty cool and gets so much done for you! Which is why, if you have experienced your OnePlus screen not Working, then it is natural to feel worried. While OnePlus is known as a ‘Flagship-killer’ with top of the line specs, an amazing screen, high refresh rate and low price, it is not completely immune to problems. A number of users have complained about their OnePlus touch screen not responding properly and experiencing ‘ghost touches’ quite often. Luckily, this article talks about a few reliable solutions, using which you can easily fix your OnePlus screen not working issue. But first, let’s look at why this common hiccup occurs in most OnePlus smartphones.

Why does the OnePlus Smartphone’s Screen Become Unresponsive?

Android screens have improved a lot over the past few years, but can still exhibit problems like flickering, flashing, blinking, and unresponsive touch, now and then. As far as the latest OnePlus devices are concerned, touchscreen unresponsiveness on the OnePlus 9/9 Pro or OnePlus 8/8 Pro can ruin the whole experience. But before you call the service centre and decide to return the device, the OnePlus touch not working problem could be something other than a hardware issue. It could be due to many reasons such as a worn-out screen guard, cluttered storage or even screen damage. So, if you ever run into a touchscreen not working problem on your OnePlus device, you should take a close look at these above-mentioned aspects. Now, it’s time to check out the solutions.

Simply Restart Your Smartphone

The first thing that you should do to fix the touchscreen issues on your OnePlus device is to restart or reboot it. Many a time, a simple restart can come in super handy in resolving common problems. So, do not fail to give it a shot.

Simply hold down the power key and then choose the Power Off option. After that, wait for a few minutes and then hold down the power key again to reboot your device. Once your smartphone has restarted, check if the touchscreen has started to work normally. If it has, it’s time to get on with your life.

Simply, hold down the power key and then choose the Power Off option. After that, wait for a few minutes and then hold down the power key again to reboot your device. Once your smartphone has restarted, check if the touch screen has started to work normally. If it has, it’s time to get on with your chore.

Read – Tips to Fix OnePlus Microphone/Headphone Issue

Remove the Screen Guard

If the touchscreen continues to act erratically on your OnePlus smartphone, remove the screen protector. If the screen guard is worn out or made of cheap material, it could be creating a problem. Besides, do note that dust and smudge may also be preventing the touchscreen from working smoothly.

Clear the Cache of Your OnePlus Smartphone 

This means, wipe out all the redundant files on your device, including the photos, screenshots, videos and notes that are no longer needed. Also, do not spare the outdated and unnecessary apps, as they could be causing the problem.

Update All Apps and Games

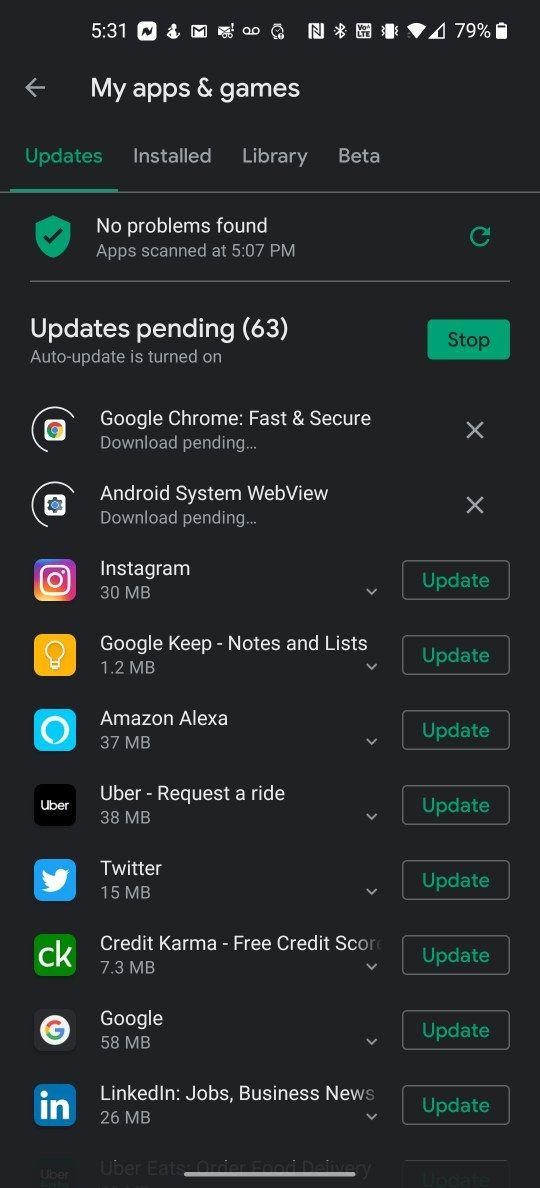
If the touchscreen tends to become unresponsive inside specific apps, the problem could be with those apps and not your device. So, try updating all the apps on your device. Head over to the Google Play Store > Profile > Manage apps and device > Updates available and then update the apps.

Hard Reset your OnePlus Device

If the touchscreen seems unresponsive even after you have wiped out all the unnecessary data, then go for a hard reset. Hard resetting a OnePlus device is quite easy and can solve the issue.

Press and hold the Power and Volume Up button to force your device to shut down. After the phone is switched off, wait for a few moments and then hold the Power button for about 15 seconds or when the phone vibrates and starts booting up. If the phone doesn’t restart on its own, then try pressing the Power button for a couple of seconds more.

Credit: AndroidCentral

Once you have all the backup, power off your device and then hold down the volume up, home and power buttons all at once until you see the OnePlus logo. Now, the Recovery mode screen will appear. Click on Wipe Data/Factory Reset and confirm—use the volume key to scroll and use the power key to confirm the action. After that, reboot the device.

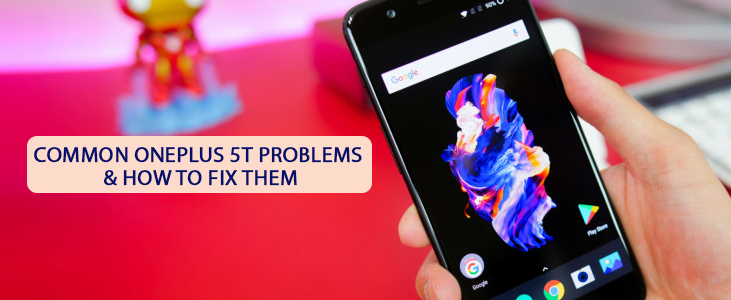
Read – 12 Common OnePlus 5T Problems & How to Fix Them

Reset App Preferences

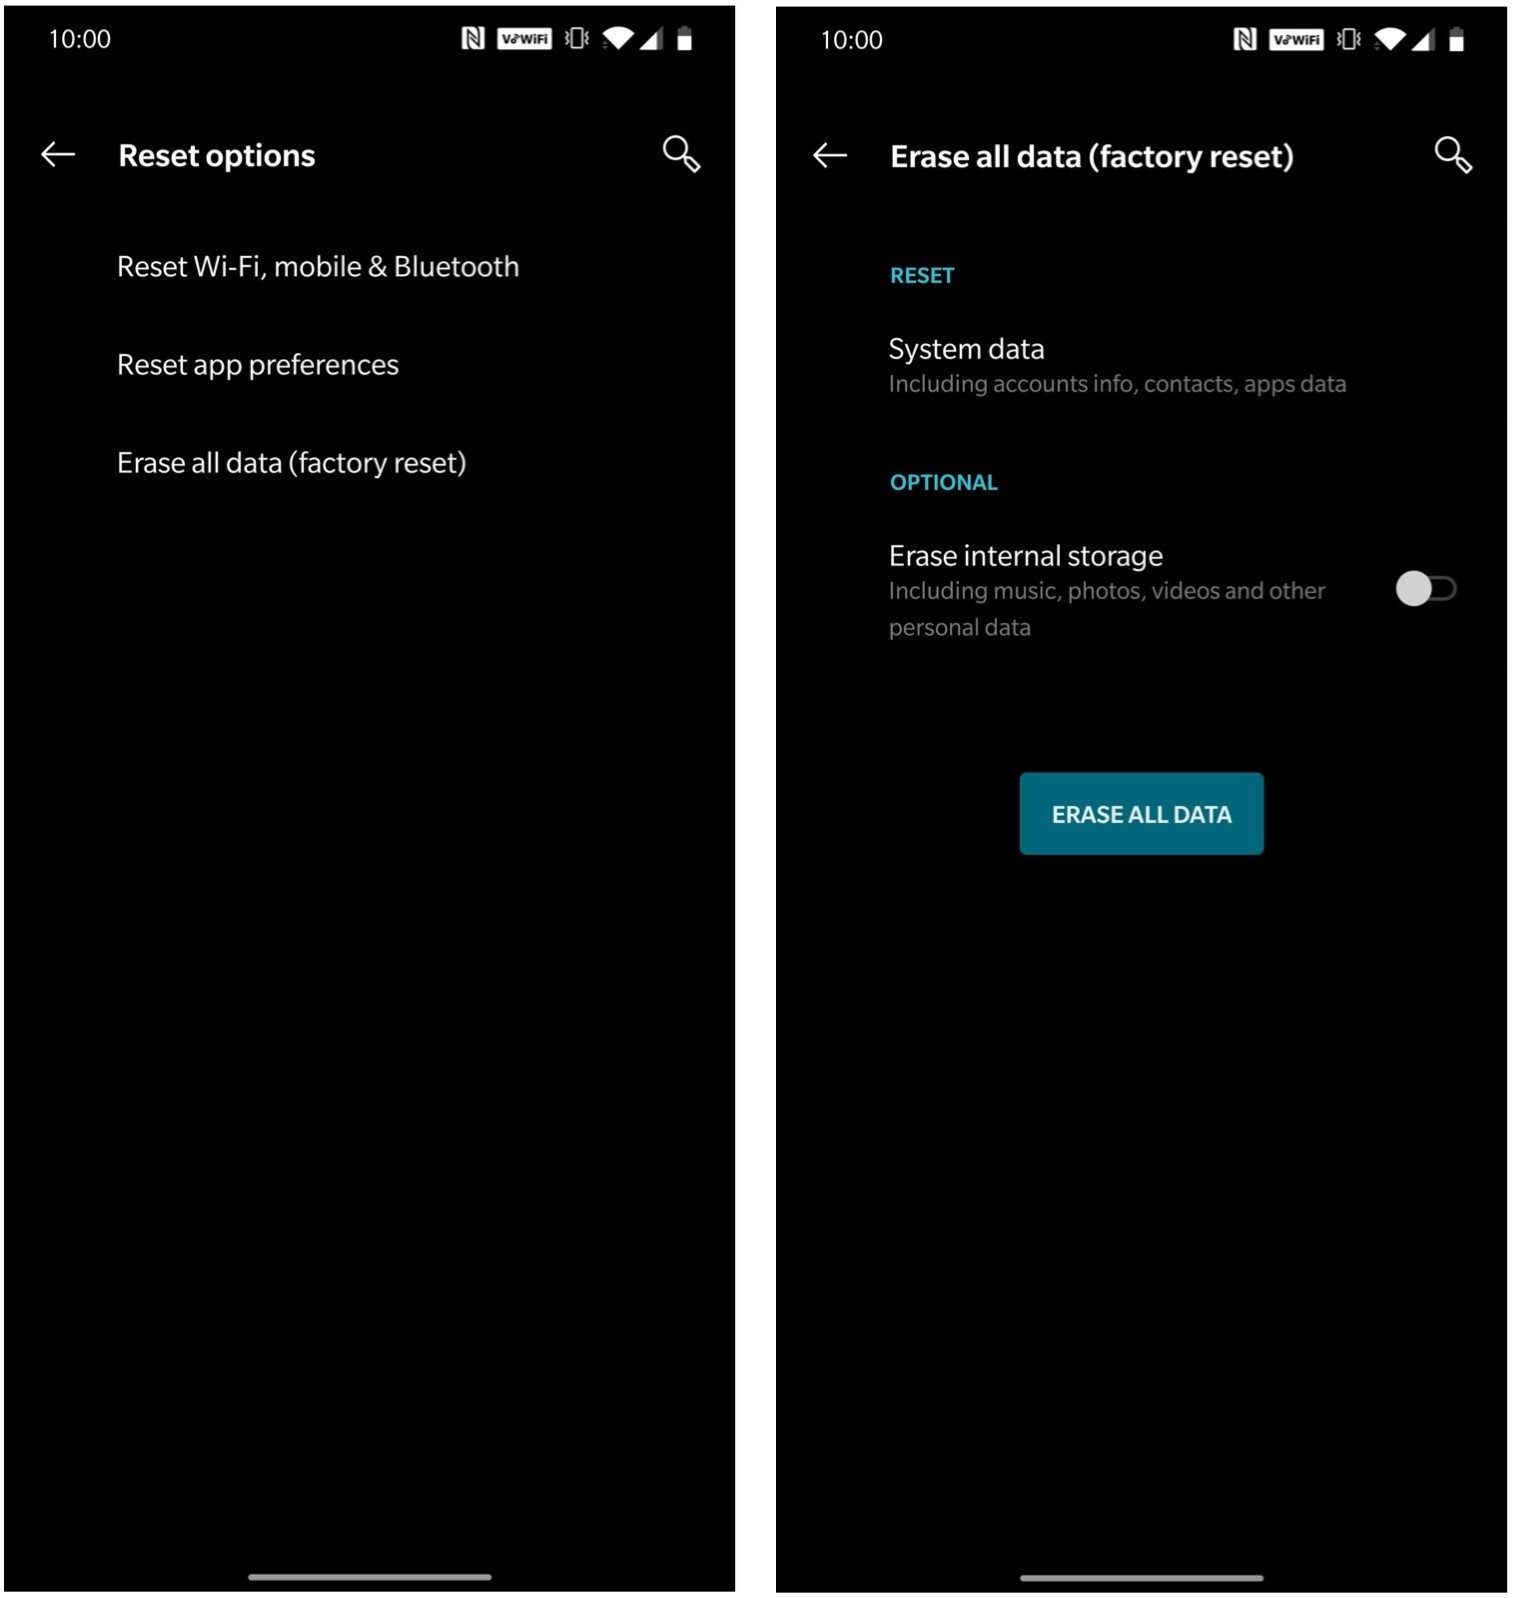
Apps and software can also be a reason behind your OnePlus screen not working. If you are unable to pinpoint which app is causing an issue, you can try to reset the app preferences to see if that fixes the issue. Here is how you can do it:

Step 1: Go to ‘Settings’

Step 2: Navigate to the ‘System’ tab

Step 3: Tap on ‘Reset Options’

Step 4: Tap ‘Reset app preferences’ and then choose ‘Reset apps’

This process doesn’t delete any personal data saved for the app, meaning you won’t lose any game progress or past chats. It will reset the app permissions, VPN configurations, clear all paired devices, reset app notifications, delete Wi-Fi passwords, etc.

If Nothing Works, Contact the Pros

All the tips mentioned above are tried and tested remedies to fix your OnePlus touch not working properly problem. While these tips work for a lot of people and fix their non-responsive touchscreens, it might not work for you. You might need a professional to check out your device, as the reason for your touchscreen not working properly can be attributed to physical screen damage. In cases like these, it is advised to contact the best OnePlus repair centre in India to fix the issue.

Rapid Repair, a prominent mobile repair service provider, is well-known around the country, thanks to expert and skilled technicians. We are a great option if you are facing the OnePlus touchscreen not working properly problem and the above hacks are not effective. We not only provide superior customer service, but also update you about every step we take to fix your precious device. You can contact us anytime to get your OnePlus device picked up, repaired, and delivered to your doorstep.

Pro Tips to Fix iPad Pro Touch Screen Not Working/Unresponsive Issue

Apple iPads have long been the gold standard for tablets. Be it their standard iPad, iPad Mini, iPad Air or the focus of this article, which is iPad Pro, all are packed with ingenious craftsmanship and premium features that beat their competition in the respective price segments.

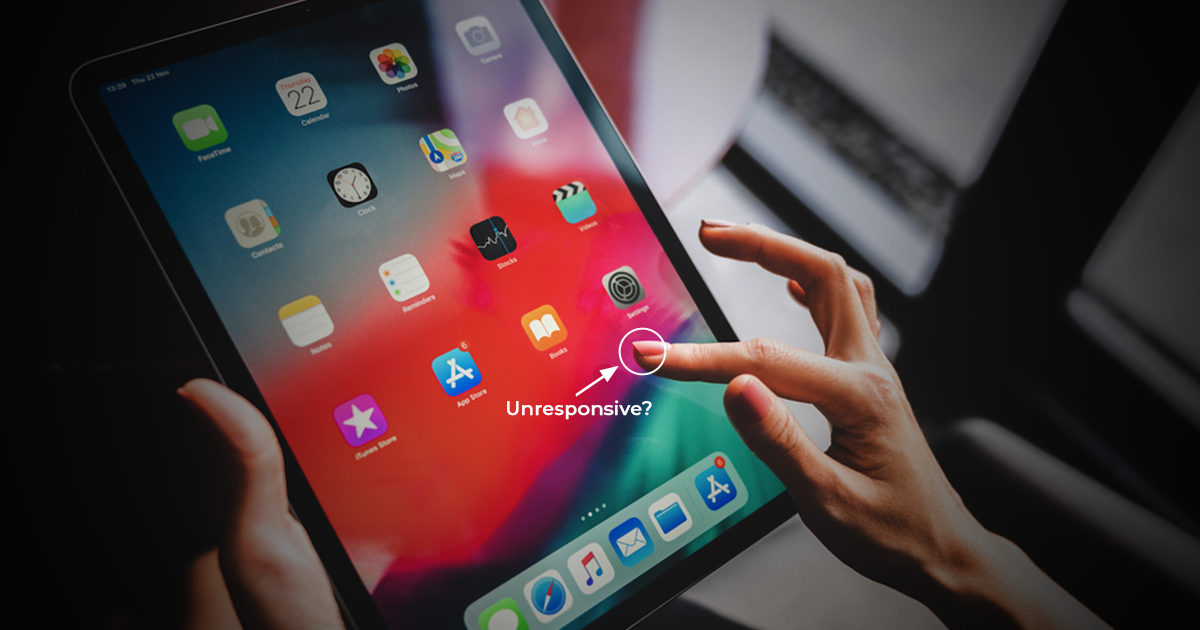
While the iPad Pro is known for a fantastic retina display and top of the line cameras, it is also prone to common issues like the iPad touch screen not working at times. A lot of users have faced this issue where the bottom of their iPad screen is not working properly and seems to be unresponsive to any kind of touch or other activity. In this blog, we’ll cover some useful tips which you can employ to fix the iPad Pro touch screen unresponsive issue on your own.

So, What Could Be the Cause Behind the Unresponsive Issue on Your iPad Pro?

While it can be a cause of concern to find your precious iPad not responding to any touches, don’t start panicking or send a scathing email to the Apple support service. What you should do instead is look for problems yourself that could be making your iPad Pro screen unresponsive.

There can be more than one reason behind the unresponsive touch issue. For instance, it could be due to the faulty screen guard or damaged screen. An issue with the touch IC of the motherboard or problem with the daughterboard in case you have a 12.9” 1st Gen iPad Pro could be the reason as well. That’s not all, even software related problems can cause the touch to be unresponsive at times.

Therefore, we are going to delve into the issue from various perspectives and offer solutions accordingly.

Force Restart/Hard Reset Your iPad Pro

Hard reset aka force restart can fix several common issues like the black screen of death, app crashing or even random screen freezing. That is the reason why we often mention it in our troubleshooting guides.

Guess what, we have included force restart in this guide as well. So, make sure to try it out first before moving onto other solutions.

Force Restart iPad Pro with Face ID: Press and quickly release the volume up button. Then, press and quickly release the volume down button. After that, press and hold the power button until the Apple logo shows up on the screen.

Force Restart iPad Pro with Home Button: Press and hold the home button and power button simultaneously until you see the Apple logo on the screen.

Once your iPad has rebooted, check out if the screen has started to behave normally. If it has, you are good to go.

Clean the Screen/Remove Screen Protector

If the force restart hasn’t fixed the unresponsive touch of your iPad Pro, simply try and clean the screen. Many times, dust and tiny particles of debris can pile up under the screen protector and become problematic. They not only make the screen sluggish, but also reduce the clarity.

So, ensure that the screen guard is free from any dust and smudge. If that doesn’t help, try removing the screen protector as it might also be creating a problem. Especially if the screen protector is cracked or coming off the edges after being in use for a long time. Furthermore, any improper contact between the actual screen and screen protector can also cause touch related issues.

Update the Unresponsive Screen/Delete the Unresponsive Apps and Reinstall Them

If your iPad Pro touch becomes unresponsive inside an app, chances are pretty high that the app might be at fault. And in this case, you should update the app to fix the issue. To do it, open the App Store on your iPad > Profile. Now, find the problematic app and update it as usual.

If the software update doesn’t sort out the sluggish Retina display of your iPad or if there is no update available for the specific app, try to delete the app and reinstall it. This way, you will be able to get rid of all the clutter related to the app and install the latest version of the same.

Turn on Touch Accommodations

One of the fixes that a lot of users have tried and were successful with is enabling Touch Accommodations in the settings. This seems to solve the random unresponsive touch screen issues in several iPad Pros. Here’s how you can do it for your device:

For iPadOS 13 or later: Go to Settings > Accessibility > Touch Accommodations > and then turn on “Touch Accommodations”

For iPadOS 12 or earlier: Go to Settings > General > Accessibility > Touch Accommodations > and then turn on “Touch Accommodations”

No other steps are required and just turning on the feature can solve the issue, which makes it worth a try.

Update the Software

If the 12.9″ retina display still becomes unresponsive randomly, check if you are using the latest version of iOS/iPadOS on your device. The reason why we recommend you to go for the latest version of iOS/iPadOS is that Apple often releases software updates with several bug fixes and performance enhancements.

So, never fail to keep your iPad updated to the latest version. To do so, fire up the Settings app on your device and choose General. Now, select Software Update and then download/install the update.

Restore Your iPad Pro as New Using Finder/iTunes

In most cases, the software update should fix the unresponsive screen. However, if you are already at the latest available version or if you are facing the issue even after updating the device, you can try to restore your iPad Pro to factory defaults.

Bear in mind that it will delete all the existing data including apps and media. So, make sure you have fully backed up your iPad before going for this radical solution.

It’s worth keeping in mind that if you have a Mac running macOS Catalina, you will need to use Finder to restore your iPad. And if your Mac is running macOS Mojave or earlier or Windows PC, you need to use iTunes to restore the iPadOS device.

Simply connect your iPad Pro to your computer and launch iTunes/Finder. After that, select the device and hit Restore iPad. Then confirm that you want to restore the device.

No Respite Yet? Faulty Screen/Digitizer

If you have reached thus far, it’s time to look at the issue from the hardware perspective. Had it been related to software, the problem could have been resolved after the software update or the restore action.

There is a handy app called “Tool Checker” which works efficiently in identifying which section of the screen is unresponsive. As it’s available for free, you don’t need to spend any bucks to use it.

If the screen is not responding at specific points, it’s a clear indication that the display is at fault.

Contact iPad Repair Centre

Issues like the iPad Pro screen becoming unresponsive or the iPad touch screen not working when charging is quite common and is often discussed on various Apple forums online. Though the main cause behind the issue is yet to be found, it doesn’t mean that you can’t fix it.

While the above is a comprehensive list of remedies that you can perform yourself to fix your iPad Pro touch screen not working problem, you might need extra help at times. If the above hacks don’t work, then the problem most likely lies with the hardware and can be a cause for concern.

In that case, you should contact your nearest Apple Service Centre or a trusted repair centre like Rapid Repair to get your tablet looked at. The iPad Pro contains a motherboard as well as a daughterboard which increases its complexity. The component called Touch IC, present in the motherboard, is responsible for the touch functionality of the iPad and could be the main offender.

Luckily, Rapid Repair can sort it out for you, as a trusted service centre for Apple devices. We are known for our team of expert professionals who can fix your iPad Pro quickly and at an affordable price.

How to Protect and Fix a Water Damaged MacBook

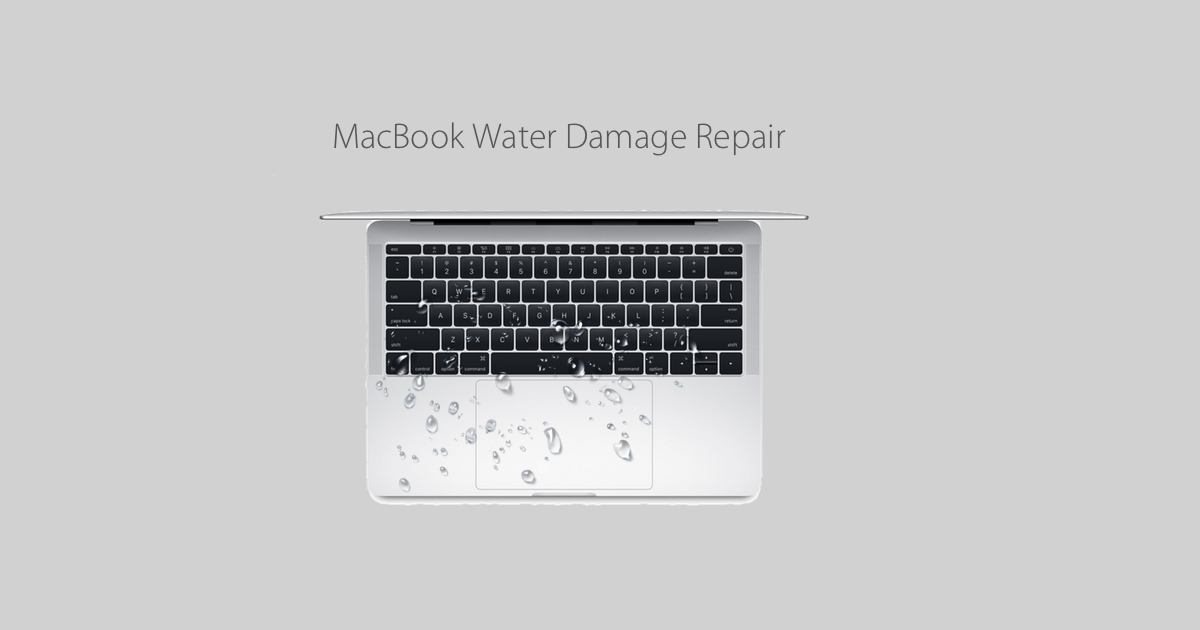
Spilled water on your MacBook? Fret not, as you are not the only one who likes to sip on something while working on their device. Water damage in a MacBook is a more common occurrence than you might think. There are a lot of people around the world who face this issue and successfully fix their devices without spending hundreds of dollars for new parts. In this article, we will take a look at some of the tips and tricks on how to fix a water damaged MacBook unless it’s so severe that you have to consult experts.

While there are ways to revive your MacBook Pro with water damage that won’t turn on, it is best to prevent this from happening in the first place. There are several precautions that you can take to prevent water spills from damaging your precious laptop.

Cover your drink: This is probably the easiest of precautions. If you want to indulge in a beverage while working, just cover the drink with a lid. This way, even if the drink tumbles, nothing will spill out.

Keep your distance: Small things like keeping water sources slightly away from your Mac can be a huge lifesaver. Water takes some time to spread completely on a flat surface and if you don’t have a drink right next to your laptop then a little distance will give you some time to grab the laptop and put it in a safe location. Even keeping your laptop over a few books or magazines gives it the much-needed vertical space for protection.

Use protective gears: Keyboard covers, silicon lids for ports, screen guards and a laptop sleeve can come in very handy to stop the spread of water even if you somehow end up spilling it over your laptop. These protectors keep every opening closed for water entry and can prevent an expensive MacBook Air water damage repair.

Water Damaged MacBook: What to do?

For starters, here are the three important things you should do immediately when trying to salvage a water damaged MacBook Pro, MacBook Air or for that matter any MacBook model.

Unplug All the Peripherals Connected to Your MacBook

The first thing you should do to safeguard your MacBook against water damage is to unplug the power adapter, if that is connected. Be extra cautious while doing this; preferably put on rubber gloves and rubber footwear. Electricity and water aren’t the best of friends!

Besides, unplug all the dongles/peripherals like the mouse, scanner or printer connected to the device. It should be done to prevent the damage from spreading to crucial components including circuit boards, connectors, and battery.

Note:

  • If you have older MacBook models like 2009 MacBook Pro 15”, you can remove its battery. While the process of removing the battery on older Mac notebooks may seem straightforward, it must be done with care. So, do not fail to take the help of experts, if you need assistance.
  • Do note that the newer MacBook models like 2015 MacBook Pro 15″ have batteries that are glued inside the framework. Therefore, you can’t remove the batteries on the newer models of the Mac notebooks yourself.

Shut Down the MacBook and Leave It for a minimum of 48 hours

Another thing you should do without any delay is to shut down the MacBook (if it’s not already turned off) and leave it for at least 48 hours. Yes, it’s strictly recommended by experts, so make sure not to turn on the device before it has clocked the recommended time.

Just in case your MacBook is not responding, press and hold the power button at least five seconds until the notebook shuts down.

If the notebook is not shutting down by holding the power button, then your keyboard might already be damaged and is unable to send the “Force Shutdown” command on a software-level to the logic board of your MacBook. In this case, you need to shut down the laptop by another method.

Use tissues or a paper towel to soak any water still present on the keyboard surface, touchpad as well as the screen. Close the lid now to activate the hardware-level sleep sensor. This sends a signal from the logic board to disconnect power to the screen SSD drive, CPU and other supporting circuits. It stays in a shallow sleep mode for some time and then transcends into the deep sleep mode if the lid is closed for a significant amount of time. In deep sleep, all power to the memory chips is disconnected, thereby protecting the RAM, CPU, SSD drive and screen of your laptop.

Place Your MacBook (Non-Retina Model) into a Tent Position to Drain the Water

After shutting down the MacBook, flip your notebook into a tent position to drain the water. But wait a minute before flipping your laptop into the tent position!

Bear in mind that the tent method works only on the pre-2018 MacBook Air or a Pre-2013 MacBook Pro with a non-retina screen. These notebooks feature watertight screens, thanks to the front aluminium frame (available on the MacBook Air) or a front protective glass (available on MacBook Pro with a non-retina screen). Therefore, they are equipped to prevent water from entering inside.

However, to make the laptops thinner and lighter, Apple removed the protective glass and aluminium frame from their newer MacBook models containing retina display. These laptops aren’t as water-resistant as the previous generations due to the lack of protective layering inside. So, do not place your MacBook with retina display in a tent position, as it will help the water to sneak inside – causing damage to the screen.

To help MacBook models with retina display to drain water safely, keep them in a 90-degree position against a table edge very carefully and let them dry out. Keep a paper towel underneath the MacBook’s screen to protect it from scratches, prevent it from falling over, and soak any water dripping from the screen.

Image credit: Mac Tech Easier

Things You Shouldn’t Do When Dealing with Liquid/Water Damaged MacBook

There are three important things you must not do with a liquid-damaged MacBook.

Don’t Try to Dry your MacBook Using a Hairdryer

Using a hairdryer to dry a wet MacBook is an absolute no-no. So, you must avoid doing it as it can cause more damage to the device, helping the liquid to sneak into the innards.

Don’t Shake the Wet MacBook

Shaking a wet MacBook is a blunder as it will help the water to get inside even those parts where it wouldn’t go normally. If the water is already present in the hinge section, shaking it can cause the water to spread into more delicate components such as the CPU, BGA balls, or the backlight film of the screen, causing more damage than before. Hence, make sure not to shake it.

Don’t Try to Turn on the Device

Another important thing worth keeping in mind is to avoid turning the device on as it can further jeopardize components like circuit boards and battery. Keep the lid closed for as long as you can to give your MacBook the best chance to dry out completely.

What About Using Rice to Dry the MacBook?

This guide would be incomplete without the mention of the rice trick. According to this popular legend, users can put a wet MacBook inside a bagful of uncooked rice to dry it out. While this old-fashioned trick might partially work on a liquid damaged iPhone, chances of it working on a MacBook is quite slim. So, we wouldn’t suggest it.

Do note that the rice or its tiny particles may get inside the ports of the notebook, which could cause additional damage. Therefore, avoid doing it.

Contact a Trusted MacBook Repair Center, If Basic Tricks Don’t Work

All the tips, tricks, hacks and workarounds mentioned above are basic in nature when it comes to treating MacBook water damage. So, if all the above tricks fail, then it is highly likely that the hardware of your MacBook has been damaged and would require professional help for any repair or replacement.

Contacting a reliable and well-known MacBook repair centre is the safest bet for MacBook water damage repair in that case. Rapid Repair, with its team of supertechies and years of experience in treating damaged or faulty Apple devices, can fix your water damaged MacBook Air or Pro at a cost-effective price.

How to Check Hardware Issues on iPhone Using Panic.ips

So, maybe due to a nasty impact or an unknown issue, your iPhone seems to have run into a serious problem. And you can’t figure out what’s ailing your smartphone. We understand it can be super frustrating since you love your prized device and can’t bear to see it in anything but the perfect shape. Worry not, as there is a pretty straightforward way to check hardware issues on iPhone using panic.ips file. Let us guide you through it!

Wondering What is Panic.ips and How Can It Let You Diagnose Your iPhone?

iOS comes with a built-in diagnostic feature that allows users to find hardware issues on the iPhone. For those unfamiliar with it, the diagnostic feature, which has derived the name from Kernel, is a crucial component of any OS.

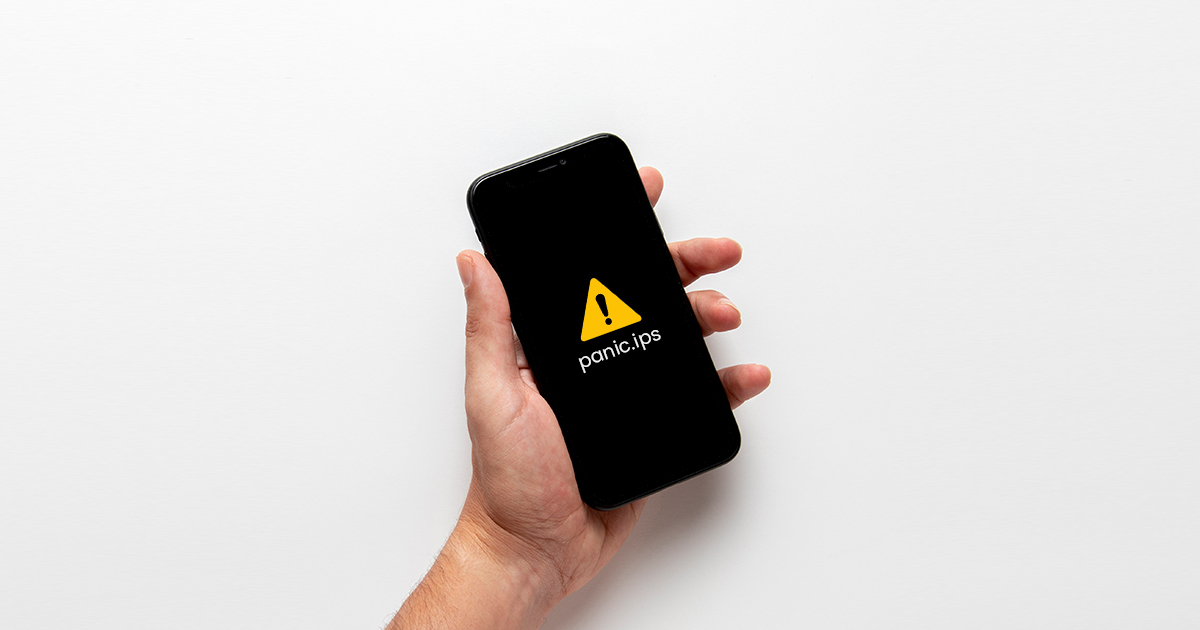
When the Kernel encounters an issue or an error while loading, the problem is termed as Kernel Panic, indicating that something critical has happened to Kernel and even stopped it from loading properly. When it happens, Kernel puts the entire diagnostic information in a file named panic.ips.

With the help of panic.ips file, it becomes a lot easier to get to the root of the problem. And once you have checked the hardware issues on your iPhone with panic.ips file, finding the right solution to the issue becomes relatively straightforward. That’s probably the reason why this hack never fails to impress both DIY lovers and the die-hard supertechies at Rapid Repair.

Figure Out If Your iPhone has Hardware Issues

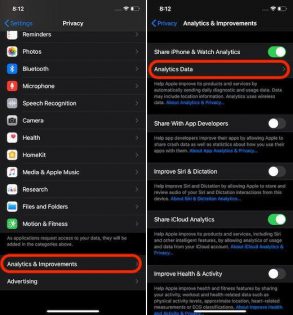
iOS comes with a very helpful feature called “Analytics & Improvements” which lets you check if your iPhone has hardware issues. Moreover, it’s available even on old iOS versions like iOS 10, 11, or 12. So, irrespective of whether you are using an old iPhone or daily driving the iPhone 12 Series, you can use this diagnostic tool to figure out if your iOS device is facing a hardware problem.

To get started, head over to the Settings app on your iPhone > Privacy > Analytics & Improvements > Analytics Data.

Note: In iOS 10 or 10.2, navigate to Settings > Privacy > Diagnostics & Usage.

On the next screen, you should see a lot of logs related to analytics. Now, scroll through the entire list to find an entry named panic-xxx.ips. The file can be either panic-base or panic-full.

If you see any panic file, that means something very serious has happened to your iOS device, which prevented it from starting properly. Though it’s mostly an indication of a hardware failure which requires expert diagnosis and a repair to fix the issue, in some cases, it could be due to software crash as well.

Read – ‘No Service’ on iPhone? Try These Quick Hacks

Pro Tip:

  • Though the “Analytics and Improvements” data doesn’t take much space, it’s considered better to remove them from time to time just to keep the device clutter-free.
  • Luckily, it’s quite straightforward to wipe out the diagnostics information. To get it done, open the Settings app on your iPhone General >Reset > Reset Location & Privacy. Next up, you will need to enter your passcode to continue. Finally, tap on “Reset Settings” in the popup to confirm.
  • It’s worth mentioning that the process of resetting location and privacy is slightly different in iOS 15 and later. Head to the Settings app -> General -> Transfer or Reset iPhone -> Reset. Now, choose Reset Location & Privacy in the popup that shows up from the bottom.

If the problem occurs less frequently or seems to be minor, the first thing you should do is restore your iPhone as new. You can get it done right from your iPhone. But be warned that it will wipe out all the existing data. So, don’t forget to back up the device beforehand via iCloud (Settings app -> profile -> iCloud -> iCloud Backup -> Back Up Now) or iTunes/Finder.

After you have taken the backup, head over to Settings app > General > Reset > Erase All Content and Settings (works in iOS 14 or earlier).

Do note that the process of erasing the iPhone has slightly changed in iOS 15 or later. You need to navigate to the Settings app -> General -> Transfer or Reset iPhone -> Erase All Content and Settings. Then, you will need to enter your device passcode to confirm that you want to wipe out your entire iOS device.

Once you have successfully erased your device, set it up as new. During the setup process, you will get the option to restore the device from a recent backup.

Besides, you can also use the Finder or iTunes to restore your device. But before going for the restore, do not fail to back up your entire device as it will wipe out all the existing data.

Side Note:

  • In macOS Catalina or later, you will need to use Finder to restore the device. In macOS Mojave or earlier or Windows PC, you will need to use iTunes to restore the device.

After you have successfully restored your iPhone, check if the problem is gone. If it has, you are ready to go.

After you have successfully restored your iPhone, check out if the problem is gone. If it has, you are ready to go. But what if the issue persists? In this case, you should contact a reliable iPhone repair centre. With several years of excellent track record, Rapid Repair has come to be known as one of the best iPhone repair centres. Contact us to get your iPhone repaired fast.

MacBook Pro Dead and Not Turning on? Quick and Easy Fixes

Nothing can be more terrible than finding your MacBook Pro dead or being stuck with a black screen and on occasions like those you’re wondering why your MacBook Pro is not powering on? While Apple’s notebook excels in delivering top-notch performance, it also has a history of being embroiled in stubborn issues. But fret not; this is where our pro tips come in handy. Whether your MacBook Pro refuses to turn on or seems to get stuck at the Apple logo, these viable solutions can help you in fixing your ill-functioning device.

So, What Could Be the Reason Behind the Issue?

Well, if your MacBook Pro would not turn on, then it could be due to more than one reason. For instance, it could be due to a faulty charging cable, a damaged power adapter or a software or hardware problem with the device. Some reasons might be very similar to what might be the case for a MacBook Air not starting but a few may be specific to the MacBook Pro not powering on.

There can be several issues that could be preventing your MacBook Pro from starting up normally. Let us take a look at the possibilities and see how you can resolve them easily.

Read – Mac Won’t Update: 7 Best Tips to Fix macOS Update Issues

Check the Power Supply

First thing first, check your MacBook Pro’s charging cable and adapter. Make sure that the Magsafe charger is fitting properly in the jack and is not loose. Also, ensure that the cable is not damaged. A faulty cable can not only cause issues with charging but can also damage the charging port, and even the battery in some cases.

Apart from the charging cable, double-check the adapter and make sure it is not getting too hot while charging. If possible, try to use a different power adapter and cable to charge your dead MacBook Pro and see if it is taking charge and if it boots up.

If using a new or a different power adapter does not help then there is a strong chance of the problem being at the other end of the connection and not with the cable. A faulty DC/Charging Jack or a service battery might be preventing your device from starting up. In this case, it is best to contact a reliable MacBook repair service centre to help you with diagnosing and fixing the issue accurately.

Reset the SMC

Resetting the SMC (System Management Controller) can often fix certain issues related to battery, power, fan and some other features too. So, if you are still unable to turn on your MacBook Pro or your Apple notebook appears to have gotten frozen at the Apple logo, it would be apt to give this solution a try.

To get going, plug in the power cable and then press the Shift + Ctrl + Option/Alt keys and the power button simultaneously and hold them for at least 10-12 seconds. Next, release all the keys and then press the power button to try and restart your MacBook. If there was a minor issue with power or battery which was preventing your device from booting up, that should get resolved and the MacBook should start up successfully.

Important:

  • Please note, M1-powered MacBooks do not come with SMC. It means you do not need to bother about resetting SMC on your M1MacBook Pro.

Reset the PRAM / NVRAM

Another reliable solution for fixing a dead MacBook Pro or solving the ‘MacBook Pro Won’t Turn On’  issue is resetting the PRAM/NVRAM. For those unfamiliar with the terms, NVRAM (Non-volatile Random-Access Memory) and PRAM (Parameter RAM) are the areas in the memory of the device that store data such as volume settings, startup disk selection, screen resolution and even kernel panic information. Resetting them often fixes several minor issues which may be preventing your device from starting up.

To get going, hold down Command, Option (Alt), P, and R, keys at once and turn on the device. Make sure to hold down the keys until the MacBook restarts again. Better still, let it restart twice. Then, release the keys at once. Now, your MacBook should restart normally if the issue was with the NVRAM/PRAM.

Important:

  • Though the M1-powered MacBook Pro does come with NVRAM, it works a bit differently on the device. Notably, Apple’s M1-equipped MacBooks feature parameter memory where you can view and customise settings with the terminal command NVRAM. However, they don’t allow resetting NVRAM.

(Credit: Apple Support)

Run Disk Utility in Recovery Mode

If your MacBook is not completely dead but has been stuck with a white, blue or grey screen then you can try the below step to run the Disk Utility to fix any issues with your disk drive, which could be preventing it from booting up properly.

  1. To get started, hold down the Command and R keys at once. Make sure to hold down the Cmd + R keys while your notebook is booting up.
  2. When your MacBook starts in Recovery Mode, you will have access to Utilities. Now, click on the Disk Utility and find the notebook’s drive (Macintosh HD) and select it.
  3. Next, click on First Aid. Now, Disk Utility will track down the errors with your disk. Once it has found the errors, it will ask for your permission to repair them.

Image credit: Apple Support

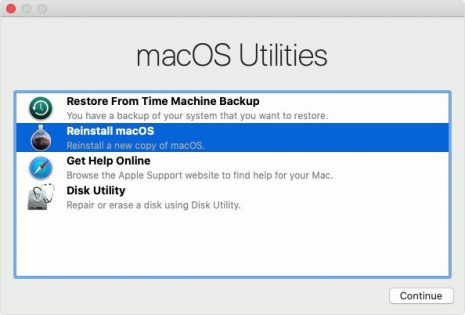
In the Recovery Mode, you can also restore your MacBook from a Time Machine backup or install/reinstall macOS. Once you have restored your MacBook from the latest backup, the issue should be behind you.

Check for Updates

Make sure your MacBook Pro is running the latest version of macOS. Go to the Apple menu > System Preferences > Software Update to check for and install any available updates. Connecting to a power source and keeping your MacBook Pro on charge for 15 minutes or more may help and you must try that before proceeding for a final repair solution.

Disconnect External Devices

If you have any external devices connected to your MacBook Pro, such as USB drives, printers, or external displays, disconnect them and try turning on your MacBook Pro again. There have been instances where it was noted that a MacBook is not starting when connected to a particular device, which was causing the problem.

Contact MacBook Repair Centre

Hopefully, you were successful in fixing your MacBook Pro which was not turning on or was facing the dead issue. Since the above-mentioned methods have helped many users, we expect them to work for you as well.

However, if your device is still not fixed despite trying the above-mentioned tricks, then there are high chances of some issue with the motherboard that needs Level 4 repair, which of course cannot be done by you at home.

In such a case, contact a MacBook repair centre. Having offered top-notch yet cost-effective service for several years, Rapid Repair is one of the most trusted MacBook repair centres in India. Contact us at the earliest to help you bring your MacBook Pro back to life.

You can also contact the best repairs in town for all problems related to a MacBook not starting or anything specific technical or physical issue with your MacBook Air or MacBook Pro. The top repair experts arrange for easy doorstep pickup and drop services and are a reliable means to get your iPad, MacBook, iPhone, and Apple Watch fixed. Get in touch with them today wherever you are in India. Serving to 33+ pin codes and expanding every day.

12 Common OnePlus 5T Problems & How to Fix Them

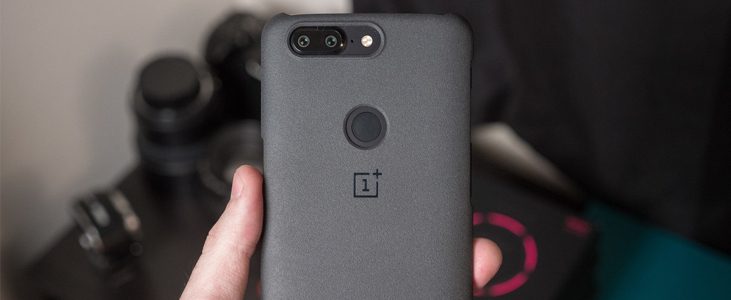
Boasting high-end specs coupled with a top-notch Snapdragon processor, the OnePlus 5T has got everything it needs to be a flagship killer. However, the smartphone isn’t without flaws. Many users have reported several issues like random freezing and unexpected battery drain that they have faced on the 5T. After taking those issues into account, we have decided to discuss the 12 common OnePlus 5T problems and their possible solutions.

Basic OnePlus 5T Problems and Their Solutions

First, we are going to talk about the basic OnePlus 5T issues and then we will offer viable pro tips to troubleshoot them.

  1. Wi-Fi Problem

    There have been numerous complaints about the Wi-Fi, such as signal drops causing reduced speed and poor connectivity. Though OnePlus released a couple of OxygenOS updates to fix the issue, some users are still not satisfied with the performance. We recommend heading to the Settings > System Updates > Check for update and verifying if there is any update available for your phone.

    If yes, it is advisable to install the latest available update. Using the latest update will help your device to stay in sync with the Wi-Fi connectivity requirements. Another step includes turning it off and on again. It’s a good suggestion because this way the device gets to reconnect with the hotspot again. You can also reset your Wi-Fi settings and then connect your OnePlus 5T again. Do remember, you will have to reconnect will all Wireless devices after resetting Wi-Fi settings.

  2. Digital Camera Problem

    This is the second most common OnePlus 5T Problems. Here again, we recommend installing the latest available update for your phone. The newest update has a night mode, better recording features, and HDR mode. Some Snapchat users complain of app crash on OnePlus when using the camera.

    Here is what you can do if your OnePlus 5T camera is not working – go to Settings, and navigate to App Manager, then Snapchat, and clear the cached data and then press force stop. This will wipe out the cache, which will not only help you to troubleshoot the OnePlus 5T camera problem, but also retrieve some precious storage space.

    Read – Tips to Fix OnePlus Microphone/Headphone Issue

  3. Face Unlock Issue

    The speed of the OnePlus 5T face unlock is normally fast and instantaneous. However, it often causes problems for some users. An easy solution is to delete the registered face identity and redo the recognition process.

    Make sure to scan your face in a well-lit room, since that allows great recognition, and makes for an ideal setting. Since this trick has worked for several users, we hope it helps in fixing the OnePlus 5T face unlock issues for you as well.

  4. Bluetooth Issues

    A number of users have complained about OnePlus 5T problems for Bluetooth connectivity issues. This is mainly a OnePlus 5T Oreo update issue. Therefore, we would recommend you to unpair all the devices, delete all existing connections, and start over. This also works if your device has received several software updates and the Bluetooth has started acting up after the updates. You can also try to update to the latest Android Pie to fix this issue.

  5. Fingerprint Scanner Problem

    Though fingerprint scanning in OnePlus 5T is incredibly fast, it sometimes gets false readings when the phone is in your pocket. Here is a hack that will stop the phone from turning on when in the pocket. Delete all the saved prints and reset again. After that, add a fingerprint again.

    Once you have added a new fingerprint, check out if you have been able to fix the issue. If you have finally got the better of the fingerprint scanner not working issue on your OnePlus 5T, you are good to go!

  6. Mobile Charging Issue

    This is one of the most common issues with any smartphone these days, and not just OnePlus 5T. Usually a faulty charger or the actual charging port can be the leading cause of this OnePlus 5T problems. To find out whether the issue is with the charger, simply try charging with a new one or someone else’s charger. If the phone is charging, the issue is with your charger.

    If it is still not charging, the issue may be with the charging port itself. You can visit a the nearest reliable OnePlus repair centre and get them to check your charging port as it might need replacement.

    Complex OnePlus 5T Problems and Their Solutions

  7. Mobile Turns On, But There is No Display

    If you find that your phone’s status indicator is switched on and the ringer slider is vibrating, but there is nothing on the screen, then the system has turned on without a display, and it might be an issue with the display itself. Here is what you can do:

    • Reboot the phone in recovery mode – Press and hold both the Volume button and Power button until the recovery screen appears.
    • Choose Wipe Cache and Factory Reset Phone – be careful while doing this step if your data is not backed up on Google Drive as all local data not backed up will be lost

    The issue might also be because of actual hardware failure. The best way to tackle such a problem is to seek help from professionals. If you are using the OnePlus 5T mobile, we strongly recommend taking the smartphone to a centre in Delhi.

    Read Also – OnePlus 7T: Common Problems and How You Can Fix Them

  8. Freezing Issue

    Another major OnePlus 5T problem is OS corruption. There are times when the phone starts booting but gets stuck and freezes. There can be several things that can go wrong with a smartphone. You can try fixing some of the freezing and booting issues by pressing and holding the power button for ten seconds. But if that doesn’t work, it’s best to take your device to a mobile repair centre.

    The experts at a OnePlus service centre will assist you in fixing your device, even when it is out of warranty. They will have all kinds of tools and equipment that are required to identify or diagnose the issue in your system. Whether it is a nasty software fault or a severe hardware problem, professional technicians will handle it accordingly and repair your system within the time they promise. This way, you can save a lot of time, hassle, and get the best solution for your smartphone.

  9. Overheating

    Sometimes, an overheated graphics card or processor can be the main cause behind a blue screen or a sudden phone crash. The heat emanating from the smartphone can easily help you in identifying if the device is overheating. We also recommend downloading some temperature monitoring tools that can help you detect whether your phone has overheating issues or not.

    Visiting a trusted service centre can help you get more information and basic troubleshooting tips regarding the heating issue. The experts at such a service centre will know about quick, exact, and reliable solutions to almost all kinds of problems. They will have all the tools and programs needed to diagnose any issue. This will save both your time and money.

  10. Battery Gets Drained Too Quickly

    If you find your battery getting depleted faster than it should, you must take a look at the applications or software that are running in the background. The easiest route for solving the OnePlus 5T battery-draining fast issue is checking the background battery use.

    Go to Settings > System > Battery Saver> Battery Use. The Battery Use will give you a list of all the applications that are running in the background and consuming the battery. If you find an unnecessary application that shouldn’t be there, click on it and turn off the application from running in the background. In case the problem persists, plan a visit to the nearest OnePlus repair centre to get a more advanced diagnosis for your issue.

  11. OnePlus 5T Feels Rather Sluggish

    A number of OnePlus 5T users have reported that their smartphones have become rather slow. Though OnePlus devices are known for fast and smooth performance, they are not immune to sluggishness.

    To fix your slow-moving OnePlus 5T, get rid of all the redundant files. If you haven’t deleted the unnecessary screenshots and files on your 5T, there is a high chance that the problem could be due to the pile of clutter. So, clean them up and you may be able to sort out the issue right away!

  12. Random App Crashing

    A handful of OnePlus 5T users have also complained about random app crashing. While some have said that apps tend to crash at the launch itself, others have reported that apps unexpectedly crash while being active.

    Image credit: Gotta Be Mobile

    The best way to troubleshoot the unexpected app crashing problem on OnePlus 5T is to update the apps. Yeah, you read that right! App crashing mostly occurs due to the outdated version of the software. So, make sure to update all the problematic apps. If that doesn’t help you, delete those outdated apps and reinstall them.

    Read – Top Issues with OnePlus 7 and 7 Pro Their Possible Solutions

Choosing a Mobile Service Repair Centre

There is no denying that the number of people using computers and smartphones on a daily basis has shot up over time. However, the number of problems a mobile device can face has gone up too. So, it is not surprising if once in a while you need experts to solve your phone’s software and hardware issues. While you can go online to choose a repair centre, remember that the internet is also a breeding place for fraudulent people and cheats, who can dupe you. Hence, it is important to choose an authorized OnePlus service centre in Delhi NCR/Gurgaon. Keep the following things in mind while making a selection:

  1. The reputation of the centre- It is essential to check whether the repair centre has a good reputation and whether the experts there are known for satisfactory OnePlus repairing and services. You can gather as much information as you can by conducting some research, checking Google reviews, and watching out for any negative reviews.
  2. Types of services offered- All service centres might not be able to tackle issues with OnePlus devices. So, make sure you pick one that can. It is also vital to check whether the support centre provides both onsite and remote support for all your hardware-software related problems.
  3. Knowledge and expertise of the technical staff- When it comes to repairing your OnePlus 5T, the technicians handling it should have the right training and proper understanding of the problem. Authorized service centres always offer advanced training to their technicians and engineers so they can do flawless jobs.

While choosing a service centre for your OnePlus 5T problems, find out how much time they will take and what they will charge. Compare quotes with other centres and then take a decision. Or you can simply choose Rapid Repair, to be on the safe side.

Backed by several years of expertise, Rapid Repair is a leading OnePlus repair centre in Delhi and also across the major cities in India, including Mumbai, Bangalore, Pune, Hyderabad, and more. So, just in case your OnePlus smartphone continues to malfunction, reach out to us to get the device fixed at the earliest.

Chrome Vs Safari: Which One is Better for Your Devices?

Though the market is flooded with web browsers, Google Chrome and Apple Safari are way ahead of the curve. While the former rules the roost across platforms, the latter has a dominating presence on Apple devices. And rightly so, as they both are feature-packed and highly user-friendly. No wonder, the Chrome vs Safari faceoff is one of those things that Apple users are most curious about in 2021. So, which is better – Google Chrome or Safari? Well, that’s what we are going to find out after a direct showdown.

So, how have we figured out whether Google Chrome is the best browser or Apple has got the crown as the most preferred web browser? In order to arrive at a fair verdict, we have compared Apple Safari with Google Chrome on 6 major fronts – Design, Customization, User Experience, Efficiency, Security & Privacy, and Compatibility. Moreover, we have also declared the winner of each round, thereby making it straightforward for you to know which one of these two leading browsers has earned the most points. So, let’s get started.

Design and Feature-Set: Chrome Leaves Safari Behind

While Safari sports an impressive design language, Chrome is more intuitive and easier on the eyes. If you wish to get the most out of your browser without having to spend much time on the learning curve, Chrome is the way to go. On the other hand, Safari requires plenty of learning curves. Thus, it takes a while to master Apple’s browser.

Image credit: ZDNet

In terms of features, both Safari and Chrome are feature packed. However, Google’s offering comes with a more efficient bookmark manager, tabs organizer, and is also comparatively more flexible. That’s the reason why Google’s offering easily wins over Apple’s famed browser on the ease-of-use front.

Customization: Chrome is a Way Better Bet

If top-of-the-line features coupled with a host of customizations are what you are after, you shouldn’t look beyond Google Chrome. Moreover, Google’s offering boasts a massive library of extensions that open the gate for limitless customization. Whether you want to deck the user interface, expand the functionality of the Chrome browser, or keep a tab on plagiarism, extensions have got you fully covered.

On the other hand, Safari is not known for full-on customization. Due to a lot of restrictions, you can’t personalize the browser beyond a certain point. That’s not all, Apple’s browser also doesn’t have a large store of extensions, which could be a huge disappointment for folks who love to use a variety of web extensions.

User-Experience: Safari and Chrome Go Neck-to-Neck

The comparison between these two leading browsers goes well beyond the couple of well-known pros highlighted above. Probably the best part about Chrome is the deep integration with G-Suite, including Gmail, Google Calendar, Google News, Google News, YouTube, Google Drive, Google Photos, and more.

With the power of G-Suite, a Chrome user doesn’t have to run here and there to carry out tasks that require the use of Google’s famed apps like Google Drive and Gmail. And this is where it scores pretty high on the user-experience front.

Furthermore, Chrome offers a versatile bookmark manager, seamless sync across platforms. Not just that, most modern websites look better on Google’s browser than on Safari as Apple’s web browser is still unable to handle some modern image formats that most new websites prefer to use.

Being part of the Apple ecosystem, Safari is deeply integrated with macOS, iOS, and iPadOS. Thus, you can seamlessly switch between iPhone/iPad and Mac. Thanks to the iCloud sync and the super handy Handoff feature, you will have an intuitive browsing experience. Add to that the incredibly secure AutoFill feature and it becomes very hard to look beyond Safari, especially if you are locked inside the Apple ecosystem.
So, on the user-experience front, the battle between Google Chrome and Apple Safari is even-steven.

Efficiency and Battery Consumption: Safari Edges Out Chrome

It’s no secret that Google Chrome is resource-hungry by nature. That means if your device is not sufficiently capable, Chrome may not run smoothly. Due to its massive resource-hogging nature, it not only tends to slow down a device, but also causes the battery to drain, which could prove to be a living nightmare.

As for Apple Safari, it’s better optimized to get the most out of MaciPhone, and iPad. Thus, it requires way fewer resources to run, resulting in smooth performance and far less battery consumption. And if better performance ranks right on top of your priority list, Apple’s offering is the right way to go.

Security and Privacy: Apple Safari Defeats Google Chrome

When it comes to security and privacy, Safari has an upper hand. Aside from the trusted policy to safeguard users’ data, Safari comes with a range of features to block data trackers.

Though Chrome does come with an Incognito mode ( Press ⌘ + Shift + n) which works like Safari’s Private Browsing to let users surf the web privately by not saving or sharing users’ personal information, Google’s browser often fails to live up to that expectation.

Just recently, a study conducted by Vanderbilt University in Nashville, Tennessee, discovered that Google continues to collect users’ data even in Incognito mode. Following the sensational revelation, a $5 billion class-action lawsuit has been filed against the search engine giant in the US.

The revelation just exposes the dark reality that we have to live with today. Despite the tall claims about preserving the privacy of users, very few companies are able to walk the talk. While a good chunk of tech companies harness users’ data unabashedly, others siphon data in the disguise of offering a personalized experience.

Unlike other tech companies, Apple’s stance on privacy has been relatively clear right from the word go. Recently, the Cupertino giant has introduced a host of security and privacy features, including the ability to let users stop apps from tracking across apps and websites owned by other companies and the detailed privacy reports with a detailed list of data trackers.

No wonder, this massive crackdown has infuriated a number of tech companies including Google and Facebook that heavily rely on advertisements for earning money. These moves are being seen as a well-timed shot in the arm for end-users who need a strong safeguard against privacy intruders like never before.

The Safari vs Chrome story doesn’t look quite different on iPhone and iPad either. While Apple’s offering boasts seamless integration coupled with the more optimized interface, Google’s browser provides way more customization along with the power of G-Suite.

Despite the stiff competition, Safari edges out Chrome on macOS, iOS, and iPadOS on three crucial fronts: Performance, Security and Privacy, and Less Resource-Hogging. Considering people love smooth browsing on mobile devices, Apple’s browser steals the show as far as performance is concerned.

As for security and privacy, it’s a no-brainer. Apple has always taken security and privacy very seriously. Though the Cupertino-based company collects users’ data, the volume is comparatively quite less than the data harvested by other tech giants like Google and Facebook.

Even in terms of ad and tracker blocking, Safari overthrows Chrome. Thus, you get a more private web browsing experience in Safari. It’s worth noting that Google heavily relies on ads, so it has to gather more data to offer personalized ads.

That’s not the case with Apple as it’s primarily a hardware company that earns money through the sale of iPhone, iPad, Mac, and Apple Watch. So, if safeguarding your data matters the most to you, Safari is a better choice.

Compatibility: Chrome – The Runaway Winner

Available on multiple platforms, including Windows, Linux, macOS, iOS, iPadOS, and Android, Chrome offers a seamless web browsing experience by syncing important data like bookmarks, history, and even passwords. So, it doesn’t matter whether you are deep into the Apple ecosystem, rocking Windows devices or on Android devices, you will be able to make the most of Chrome.

Comparatively, Safari is available only on macOS, iOS, and iPadOS. That means if you aren’t into the Apple ecosystem, you won’t be able to use Apple’s browser. That’s a shame, to say the least!

On the compatibility front, Google Chrome wins the battle hands down.

Google Chrome vs Apple Safari Verdict: Chrome Beats Safari By 3-2

Having put Google Chrome and Apple Safari in a neck-to-neck fight, we have identified a deserving winner. And that is Chrome! Of course, what works for one may not work for everyone. So, ultimately it all boils down to your personal preference and what suits your taste and needs better. However, Google’s offering runs away with the crown as the best browser from a larger perspective.

What’s your take on these two popular web browsers? Share your thoughts and also never fail to contact our repair centre for MacBook repairiPhone repair, or iPad repair, if your device ever runs into an issue.

whatsapp logo