It feels frustrating indeed when your iPhone gets disabled suddenly and you find yourself locked out of the device. However, just like any other issues such as iTunes sync error 54 and No Service, it also has a quick fix. If you are on the lookout for helpful solutions to get rid of this annoying problem on your device, we’ve got you covered. Let’s get to the root of the problem and fix the ‘iPhone is disabled connect to iTunes’ error!
Why is the “iPhone is disabled. Connect to iTunes” Error appears
Before trying to resolve the “iPhone is Disabled” error, it would be apt to briefly discuss the reasons that might lead to this problem for a better understanding.
As part of the security feature designed to safeguard your data, iOS automatically disables your iPhone if wrong passcode attempts are made more than five times.
To be more precise, when you enter the wrong passcode six times, your iPhone is disabled for one minute. From then onwards, the time increases with every wrong passcode attempt.
When you input the wrong passcode 10 times, your iPhone gets completely disabled, and you are asked to connect to iTunes to restore the device.
Error Messages that Appear After each Wrong Passcode Attempt – iTunes iPhone Disabled
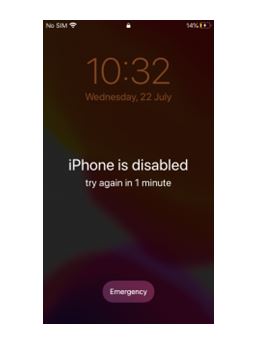
- 6 failed passcode attempts: iPhone is disabled. Try again in 1 minute
- 7 failed passcode attempts: iPhone is disabled. Try again in 5 minutes
- 8 failed passcode attempts: iPhone is disabled. Try again in 15
- 9 failed passcode attempts: iPhone is disabled. Try again in 60 minutes
- 10 failed passcode attempts: iPhone is disabled. Connect to iTunes
Side note:
- You need to keep in mind that if you have enabled Erase Data setting in the Face/Touch ID section (Settings > Face/Touch ID), all your data will be wiped out when you enter the wrong passcode 10 times.
Another reason why the ‘iPhone is disabled’ error occurs is the screen damage. If the screen is damaged either physically, or sometimes even internally, it tends to develop ghost touch, which causes various sections of the screen to be pressed automatically. As a result, the wrong passcode is entered multiple times, which results in the iPhone getting disabled.
What are the solutions to resolve the iPhone is disabled error?
If your iPhone is disabled due to the entry of wrong passcodes multiple times, you can solve the problem by using these three methods.
- Restore the iPhone using Recovery Mode
- Use iCloud.com to recover the iPhone
- Use the Find My App on Other Apple Device
Note:
- If the screen of your iPhone is damaged and it often develops ghost touch. So, you need to repair the screen.
- Backed by several years of experience, Rapid Repair is a noted iPhone repair centre. So, contact us to get the screen repaired fast at a reasonable cost.
How to recover disabled iPhone using iTunes
Step 1. To get started, connect your iPhone to your computer and open Finder or iTunes. In macOS Catalina or later, open Finder on your Mac. In macOS Mojave or earlier or Windows, launch iTunes.
Step 2. Now, put your iOS device in Recovery Mode.
On iPhone 14 and 14 Pro Series
Do you have the latest iPhone 14 series and does your iPhone say it is disabled connect to iTunes? Follow these steps:
- Connect your disabled iPhone 14 or iPhone 14 Pro to the device you last synced via iTunes. Once you do this, iTunes should launch automatically.
- Go to iTunes and tap your device icon. Next, tap on Summary, and choose Restore.
- Follow the instructions on the screen of the device to complete the unlocking process.
On iPhone 13 and iPhone 13 Pro
The iPhone disabled connect to iTunes solution can also work for your iPhone 13, iPhone 13 Pro, and iPhone 13 Pro Max.
- Connect your disabled iPhone 13 to the device you last synced via iTunes. Once you do this, iTunes should launch automatically.
- Go to iTunes and tap your device icon. Next, tap on Summary, and choose Restore.
- Follow the instructions on the screen of the device to complete the unlocking process.
On iPhone XR & iPhone 11
How to connect to iTunes when iPhone is disabled – iPhone XR and iPhone 11 Series –
- First turn off your iPhone XR, even if it has a disabled connection to iTunes screen. Press and hold both the Side button and either Volume button until the slider comes up. Drag the slider you normally did to power it off.
- Keep holding the side button and get a USB cable to connect your iPhone with the computer. Don’t release the Side button until it displays the recovery mode screen.
- Launch iTunes or Finder, and when the prompt comes up, choose Restore.
On iPhone 8 and later models, including SE 2020
- Hold down the Side button and Volume Up/Down buttons at once and then slide to power off.
- Next, press and hold the side button until the recovery screen shows up.
iPhone 7, iPhone 7 Plus, and iPod touch (7th gen)
- Hold down the sleep/wake button and then drag the power off slider to shut down the iPhone.
- Next, press and hold the volume down button until you see the recovery mode screen.
iPhone 6s or earlier
- Hold down the sleep/wake button until the power off slider appears. Then, drag the slider to turn off your iOS device.
- Now, hold down the home button until the recovery mode is activated.
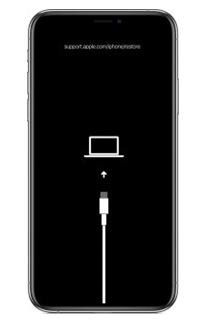
(image credit: Apple Support)
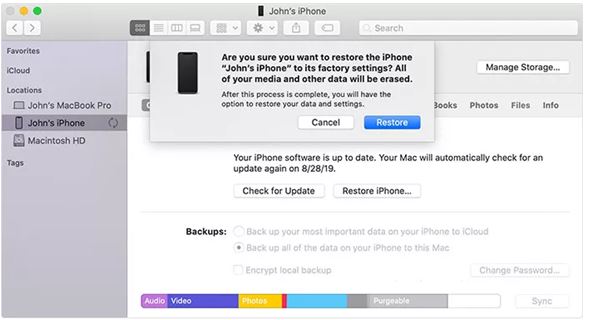
Step 3. Next, select your iOS device and click on Restore iPhone. Now, iTunes/Finder will start downloading the relevant iOS version for your iPhone.
Note: Post restoration, you will be prompted for your Apple ID and Password or your device passcode. If you do not have your Apple ID or Passcode, or don’t remember it, visit icloud.com and reset your password before attempting recovery. Otherwise, your device will be stuck at activation and there will be no way to bypass it except by entering the correct Apple ID and Password.
Also, your data on the device will be lost after recovery as the phone is reset to factory defaults. You can restore data either from iCloud or from iTunes, if you have taken a backup of your phone.
How to fix iPhone is Disabled error without iTunes/Finder
Step 1. Navigate to iCloud.com and sign in with the help of your Apple ID and password. After that, click on Find iPhone.
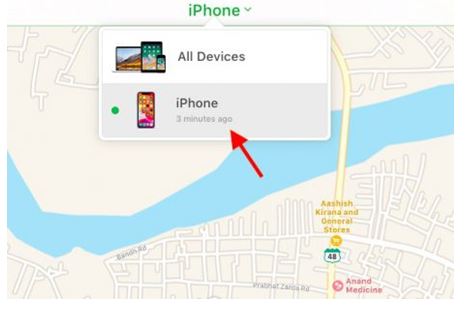
Step 2. Next, click on All Devices and choose your iPhone.
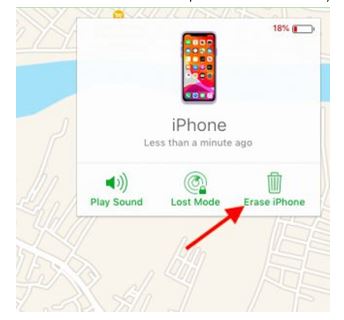
Step 3. Click on the Erase button to wipe out all the data of your device.
Now, you can take the help of the setup assistant to set up your device. Along the way, iOS will offer you the option to restore the device from the backup. Once you have restored the device, set up a new passcode which you can remember.
Use the Find My App on Other Apple Devices
Save this hack for those times when you don’t have access to your computer, and you wish to take the help of a friend who has an iPhone, iPad or Mac.
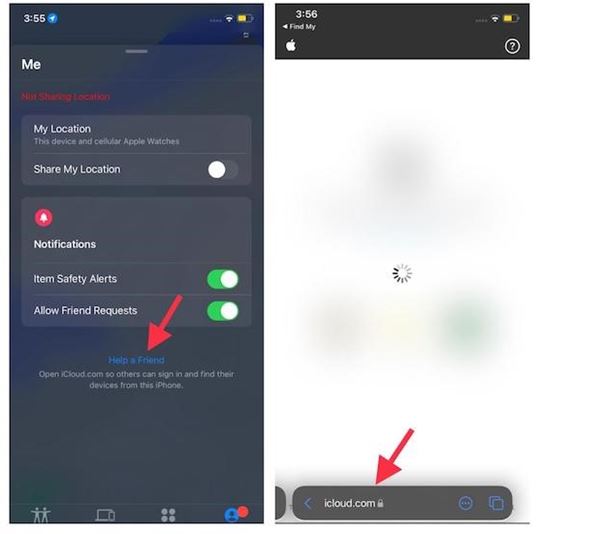
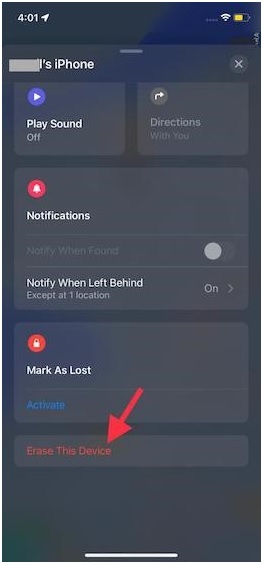
- Launch Find My App on your other Apple device such as an iPhone, iPad, or Mac. In this guide, we are going to use another iPhone. Tap on the Me tab and then choose Help a friend. Then, sign into your iCloud account.
2. After that, tap Devices. Next, choose the disabled iPhone.
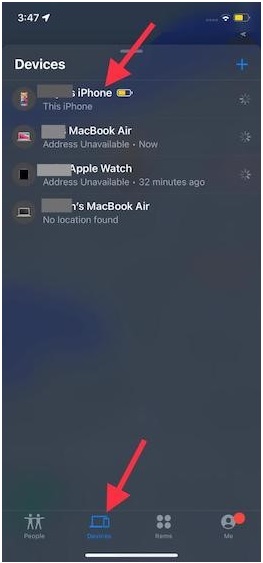
3. Next, scroll down and hit Erase This Device. Then, go through the instructions to erase your device.
Once your iPhone has been erased, follow the setup process to set up the device.
Resetting iPhone When ‘iPhone Is Disabled Connect To iTunes’ is Not Working
While we have a certain step to connect each iPhone to iTunes when it is disabled, sometimes the ‘iPhone is disabled connect to iTunes’ option is not working. What to do then?
Reset Disabled iPhone with iPhone Unlocker
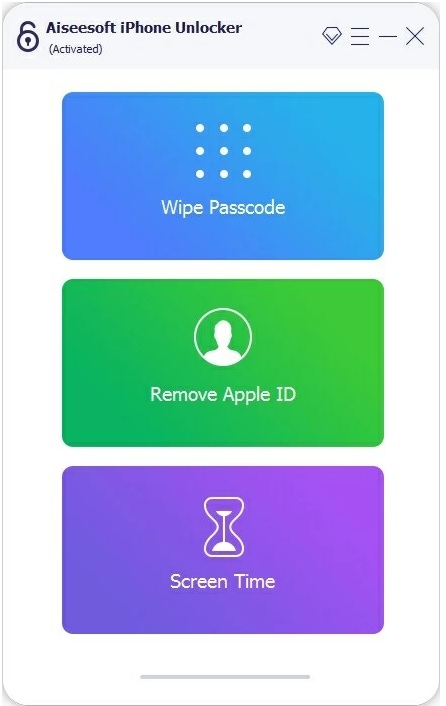
iPhone Unlock is a lightweight unlocking application for Apple iOS devices, capable of unlocking any model of iPhone, iPad and iPod quickly if you have forgotten the screen passcode. It can do much more than just remove the passcode for you; it can also bypass iCloud activation lock and reset Screen Time passcode with a few clicks.
The Steps:
- Connect the iPhone with your computer but don’t click on iTunes.
- Launch iPhone unlocker from your desktop. Select ‘Wipe Password’.
- Check the device information and click to download iOS software.
- This will remind you of restoring factory settings. Enter 0000 to continue.
- Click Unlock and you’re there.
Bottom Line
That’s all there is to it! Hopefully, you will be able to successfully fix the “iPhone is disabled connect to iTunes not working” issue with the above hacks. So, which one of the above solutions did you finally try to solve the problem? Make sure to share your feedback or let us know any related questions you might have.
And remember, well-known for resolving both complex software and hardware issues, Rapid Repair, India’s most preferred Apple repair centre, is just a call away if you need help. So, if your iPhone or iPad ever runs into any problem, do not fail to seek help from our super techies.
