

Your MacBook’s SSD is doing the heavy lifting behind every fast boot-up, every smooth multitasking session and every project you’ve saved without a second thought.
But even the most reliable tech has an expiration date, and when your SSD starts to fail, it doesn’t just quit overnight. It sends signals first.
Learning to catch the early signs that your MacBook SSD is failing can be the difference between a quick backup and losing everything.
Here’s the full breakdown: how to spot it, what causes it, and what to actually do about it.
Signs Your MacBook SSD Is Failing: Pay Attention to These
Your SSD isn’t going to fail without warning; it will drop hints first. Here’s what to look out for:
1. Random Freezes and Crashes
Does your Mac randomly freeze mid-task, especially when opening apps or trying to save something? That’s not just happening randomly, that’s your Mac trying to tell you something. It usually means a section of your drive or logical partition is struggling to read and write data properly.
2. Apps Taking Forever to Open
Even basic apps like Safari or Mail loading slowly, even right after a restart? That’s not just “old Mac syndrome”; it’s often a slowing drive.
3. Files Disappearing or Getting Corrupted
Documents vanishing, refusing to open, or showing garbled content is a strong sign something’s wrong at the storage level.
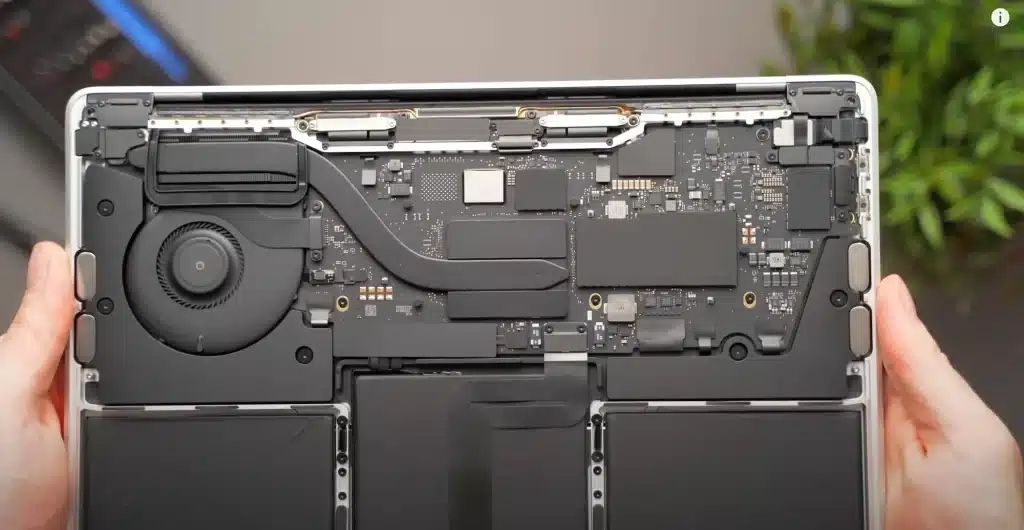
Image Credit: 9to5mac.com
4. The Spinning Wheel of Doom, On Repeat
Occasional lag is fine. But if that spinning beach ball is showing up for literally everything you try to do, your SSD’s read/write speed is probably tanking.
5. MacBook SSD Not Detected
This one’s serious. If your Mac won’t boot and shows a folder with a question mark, or Disk Utility straight up can’t find your internal drive, the SSD may have fully failed or is not getting detected by the Operating System.
6. Kernel Panics
Random restarts that display a gray “your computer needs to restart” message typically indicate a more serious issue, coupled with other symptoms they strongly suggest issues with storage or memory.
7. Disk Utility Keeps Throwing Errors
If First Aid in Disk Utility keeps flagging errors it can’t fix, that’s your Mac telling you the drive is degrading.
How to Check MacBook SSD Health Before It’s Too Late
Don’t just assume the worst; check first:
- Disk Utility: Select your internal drive and run First Aid. It will flag file system errors.
- System Information: Apple menu > About This Mac > System Report > Storage (or NVMExpress). Look for S.M.A.R.T. Status, it should show “Verified” if things are good.
- Third-party Tools: Beyond macOS, apps such as DriveDx or Smart Utility provide a true health check by displaying wear level and reallocated sectors.
- Activity Monitor: Constant high disk activity for no clear reason can mean the drive is quietly compensating for bad sectors.
If any of these come back with warnings, back up your data immediately. Don’t wait around for the drive to give out completely.
Read Also – MacBook Turns On, but the Screen Stays Black? Here’s What Might Happening
What’s Actually Causing Your MacBook SSD to Fail?
SSDs don’t have moving parts like old-school hard drives, so they are built differently, but “different” doesn’t mean invincible. Here’s what usually causes them to fail:
- Write cycle wear: Every SSD has a lifespan measured in write cycles. Years of daily use will eventually wear
itdown the memory cells; it’s just physics.
- Overheating: Heavy workloads like video editing or gaming with poor airflow puts real stress on the drive’s controller.
- Random power cuts: Force-quitting your Mac constantly, or your battery dying mid-save, can corrupt data or logical file system in the process.
- Manufacturing defects: Sometimes a drive is just built wrong, and the issue may not show up for months or years.
- Liquid damage: A spill that reaches the logic board can wreck the SSD, especially since it’s soldered directly onto the board in newer models.
- Software or firmware glitches: Occasionally, a buggy macOS update can throw errors that mimic hardware failure.
What to Do If Your SSD Has Already Failed
If your MacBook SSD isn’t detected, won’t boot, or Disk Utility just can’t fix it:
- Boot into Recovery Mode (Command + R at startup) and try Disk Utility repairs from there. However, do not attempt repair utilities again and again.
- Try booting from an external drive to check if the issue is really the internal SSD.
- Stop restarting repeatedly once you notice failure signs it can make data loss worse.
- Get professional MacBook SSD data recovery help instead of trying random DIY software fixes on a drive that’s physically failing. Newer MacBooks have the SSD soldered onto the logic board, so it’s not a simple swap-it-out situation.
This is where a lot of people get stuck. On most current MacBooks, the SSD isn’t removable, it’s built into the logic board itself. That means, often, real recovery needs micro-soldering expertise and specialized tools, not a YouTube tutorial and a screwdriver.
Final Thoughts: Catch It Early & Save Yourself from the Stress
SSD failure rarely happens without zero warning. The signs are usually there – freezes, slow apps, missing files, that endless spinning wheel. You just have to catch them in time.
Catching them early is the difference between a quick backup and a full-blown data recovery emergency where you’re scrambling to save years of photos, work, and files. If your MacBook’s been showing any of these red flags, don’t risk it and don’t wait for it to get worse.
This is exactly where Rapid Repair comes in.
As an Apple device repair specialist, our technicians deal with logic-board-level SSD issues like these all the time, backed by free 32-step diagnostics, genuine spare parts with a lifetime warranty, doorstep pickup and drop, and a turnaround that’s usually under 24 hours.
Whether your Mac won’t boot, you’re dealing with an SSD not detected error, or you just want peace of mind with a health check, contact Rapid Repair today for a free diagnostic.
You can also check out our MacBook repair services to see exactly how we handle everything from storage issues to full logic board fixes.
Read – MacBook Screen Flickering? Causes and Fixes You Should Try First
