iPad Camera Not Working? Here’s How to Fix Before You Visit a Repair Center

iPad Camera Issues: Common Fixes Before You Repair It

Whether you’re attending a video call, scanning documents, or capturing memorable moments, a faulty iPad camera can be frustrating. Don’t worry if your iPad camera not working all of a sudden. Often the issue can be fixed with a few simple troubleshooting steps.

In this guide we’ll take a look at common reasons your camera may be acting up, how to fix it, and when to get professional help.

Why is my iPad camera not working?

Here are some reasons why your iPad camera is not working. This can be Software related, Wrong setting or Hardware damage due to accidental drop.

Some of the common symptoms are:

  • You see a black screen in the Camera app.
  • The iPad camera app isn’t working.
  • iPad’s front camera not working during FaceTime or video calls.
  • iPad rear camera not working while taking photos.
  • Camera unexpectedly freezes or crashes.

Let’s have a look at the solutions one by one

Restart Your iPad

Restarting the device should address temporary software glitches with the camera.

To restart your iPad:

Hold down the power button (or power and volume button for newer models).

  • Slide to power off.
  • Wait for about 30 seconds.

Turn the iPad back on and open Camera app.

If the issue was caused by a temporary bug, the camera should work normally again.

Force Close the Camera App

If the iPad camera app not opening or keeps freezing, force closing it may help.

  • Swipe up from the bottom (or double-press the Home button).
  • Find the Camera app.
  • Swipe it away to close it.
  • Reopen the Camera app.

This refreshes the application, but not your data.

Check Camera Permissions

Some third-party apps require permission to access the camera.

Go to:

Settings > Privacy & Security > Camera

Make sure the necessary applications have permission.

If it only appears in one app, reinstalling that app could also help.

Update iPadOS

System updates are used to correct software bugs.

To check for updates:

  • Open Settings
  • Tap General
  • Select Software Update

Make sure to install all updates and retest camera after.

Read – Why iPad Charging Ports Fail Before the iPad Does

Remove any protective case or camera cover

Sometimes bulky cases or camera protectors partially block the lens, making it appear as if the iPad rear camera not working.

Open the case, wipe the camera lens with a microfiber cloth, then take another picture.

 Also, check if camera lens (Front and/or back) has moisture or liquid residue on it, If yes, it is a clear sign of liquid damage. Time to seek best available professional help immediately in this case.

Fix an iPad Camera Black Screen

If you are experiencing iPad camera black screen, switch between front and back camera a few times.

You can also:

  • Restart the device.
  • Close all background apps.
  • Ensure that the device is not overheating.
  • Reset all settings if necessary.

When the screen is black after restart, it may be due to hardware problems.

Check the front and rear camera

Sometimes only one camera stops working.

If the iPad front camera is not working, use FaceTime or video calling app to test.

If the iPad rear camera not working, open the Camera app and switch between photo and video.

The camera module that is not functioning may need expert inspection if it is not working.

Reset All Settings

Resetting settings may be a solution when none of the above options are successful since it resets the settings but does not remove any of your personal files.

Go to:

Settings > General > Transfer or Reset iPad > Reset > Reset All Settings

Once the reset has been done, see if the camera works as normal.

When Do You Need Professional Repair for Your iPad?

If you have done all the troubleshooting steps and still your camera is not working, then the problem may be due to:

  • Damage due to dropping.
  • Exposure to water or liquids
  • Faulty camera module
  • Damaged internal connectors
  • Motherboard-related issues

These problems need to be diagnosed and repaired by a professional.

Rapid Repair has a team of professionals who can examine your iPad and determine the specific problem and then provide the best repair solution. Rapid Repair is an independent iPad repair centre, that uses top quality replacement parts and cutting edge diagnostic equipment to get your device back to you quickly.

If your problem is not just a camera, you can also try to use the iPad repair service provided by Rapid Repair for the display, battery, charging, and other hardware issues.

Final ThoughtsA

If your iPad camera not working, it doesn’t necessarily mean that your iPad has to be replaced. The problem usually can be fixed easily by restarting the iPad, updating iPadOS, or checking the permissions, or resetting the settings.

If the rear or front camera is not working, or you are experiencing iPad camera black screen or camera apps that just won’t respond, however, then professional repair is the safest choice.

Need expert help? Call Rapid Repair today for quick and dependable iPad diagnostics and repair services. From camera problems to any other hardware issue, the team is equipped to help you get your iPad up and running again.

Read – Why Your iPad Keeps Restarting and Gets Stuck on the Apple Logo

MacBook SSD Failure Signs: Causes and Recovery

Warning Signs of MacBook SSD Failure

Your MacBook’s SSD is doing the heavy lifting behind every fast boot-up, every smooth multitasking session and every project you’ve saved without a second thought.

But even the most reliable tech has an expiration date, and when your SSD starts to fail, it doesn’t just quit overnight. It sends signals first.

Learning to catch the early signs that your MacBook SSD is failing can be the difference between a quick backup and losing everything.

Here’s the full breakdown: how to spot it, what causes it, and what to actually do about it.

Signs Your MacBook SSD Is Failing: Pay Attention to These

Your SSD isn’t going to fail without warning; it will drop hints first. Here’s what to look out for:

1. Random Freezes and Crashes

Does your Mac randomly freeze mid-task, especially when opening apps or trying to save something? That’s not just happening randomly, that’s your Mac trying to tell you something. It usually means a section of your drive or logical partition is struggling to read and write data properly.

2. Apps Taking Forever to Open

Even basic apps like Safari or Mail loading slowly, even right after a restart? That’s not just “old Mac syndrome”; it’s often a slowing drive.

3. Files Disappearing or Getting Corrupted

Documents vanishing, refusing to open, or showing garbled content is a strong sign something’s wrong at the storage level.

Image Credit: 9to5mac.com

4. The Spinning Wheel of Doom, On Repeat

Occasional lag is fine. But if that spinning beach ball is showing up for literally everything you try to do, your SSD’s read/write speed is probably tanking.

5. MacBook SSD Not Detected

This one’s serious. If your Mac won’t boot and shows a folder with a question mark, or Disk Utility straight up can’t find your internal drive, the SSD may have fully failed or is not getting detected by the Operating System.

6. Kernel Panics

Random restarts that display a gray “your computer needs to restart” message typically indicate a more serious issue, coupled with other symptoms they strongly suggest issues with storage or memory.

7. Disk Utility Keeps Throwing Errors

If First Aid in Disk Utility keeps flagging errors it can’t fix, that’s your Mac telling you the drive is degrading.

How to Check MacBook SSD Health Before It’s Too Late

Don’t just assume the worst; check first:

  • Disk Utility: Select your internal drive and run First Aid. It will flag file system errors.
  • System Information: Apple menu > About This Mac > System Report > Storage (or NVMExpress). Look for S.M.A.R.T. Status, it should show “Verified” if things are good.
  • Third-party Tools: Beyond macOS, apps such as DriveDx or Smart Utility provide a true health check by displaying wear level and reallocated sectors.
  • Activity Monitor: Constant high disk activity for no clear reason can mean the drive is quietly compensating for bad sectors.

If any of these come back with warnings, back up your data immediately. Don’t wait around for the drive to give out completely.

Read Also – MacBook Turns On, but the Screen Stays Black? Here’s What Might Happening

What’s Actually Causing Your MacBook SSD to Fail?

SSDs don’t have moving parts like old-school hard drives, so they are built differently, but “different” doesn’t mean invincible. Here’s what usually causes them to fail:

  • Write cycle wear: Every SSD has a lifespan measured in write cycles. Years of daily use will eventually wear it down the memory cells; it’s just physics.
  • Overheating: Heavy workloads like video editing or gaming with poor airflow puts real stress on the drive’s controller.
  • Random power cuts: Force-quitting your Mac constantly, or your battery dying mid-save, can corrupt data or logical file system in the process.
  • Manufacturing defects: Sometimes a drive is just built wrong, and the issue may not show up for months or years.
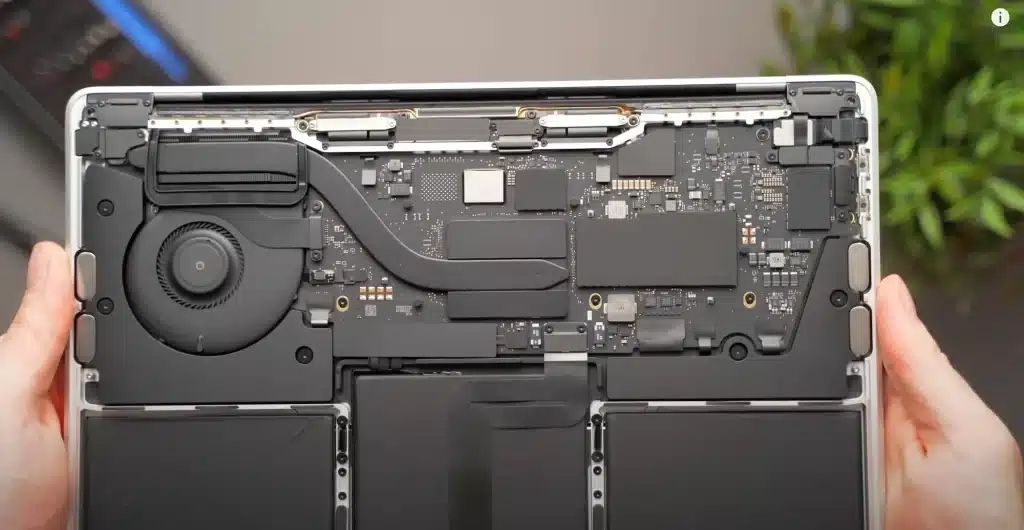
  • Liquid damage: A spill that reaches the logic board can wreck the SSD, especially since it’s soldered directly onto the board in newer models.
  • Software or firmware glitches: Occasionally, a buggy macOS update can throw errors that mimic hardware failure.

What to Do If Your SSD Has Already Failed

If your MacBook SSD isn’t detected, won’t boot, or Disk Utility just can’t fix it:

  • Boot into Recovery Mode (Command + R at startup) and try Disk Utility repairs from there. However, do not attempt repair utilities again and again.
  • Try booting from an external drive to check if the issue is really the internal SSD.
  • Stop restarting repeatedly once you notice failure signs it can make data loss worse.
  • Get professional MacBook SSD data recovery help instead of trying random DIY software fixes on a drive that’s physically failing. Newer MacBooks have the SSD soldered onto the logic board, so it’s not a simple swap-it-out situation.

This is where a lot of people get stuck. On most current MacBooks, the SSD isn’t removable, it’s built into the logic board itself. That means, often, real recovery needs micro-soldering expertise and specialized tools, not a YouTube tutorial and a screwdriver.

Final Thoughts: Catch It Early & Save Yourself from the Stress

SSD failure rarely happens without zero warning. The signs are usually there – freezes, slow apps, missing files, that endless spinning wheel.  You just have to catch them in time.

Catching them early is the difference between a quick backup and a full-blown data recovery emergency where you’re scrambling to save years of photos, work, and files. If your MacBook’s been showing any of these red flags, don’t risk it and don’t wait for it to get worse.

This is exactly where Rapid Repair comes in.

As an Apple device repair specialist, our technicians deal with logic-board-level SSD issues like these all the time, backed by free 32-step diagnostics, genuine spare parts with a lifetime warranty, doorstep pickup and drop, and a turnaround that’s usually under 24 hours.

Whether your Mac won’t boot, you’re dealing with an SSD not detected error, or you just want peace of mind with a health check, contact Rapid Repair today for a free diagnostic.

You can also check out our MacBook repair services to see exactly how we handle everything from storage issues to full logic board fixes.

Read – MacBook Screen Flickering? Causes and Fixes You Should Try First

Can Data Be Recovered from a Water-Damaged iPhone?

iPhone Water Damage Data Recovery: Complete Guide

Your iPhone got wet. It may have fallen in the sink, got wet in the rain or been dropped into a bucket by mistake. Once the first panic is over, one question remains: Is there a way to recover my photos, messages, contacts, and other important data? The good news is that iPhone data recovery after water damage is possible, but a lot depends on how fast you move.

Act quickly, avoid common pitfalls and know how water impacts your device. This can be the difference between losing your data forever and getting it back.

What Water Does to Your iPhone

Water itself won’t destroy the data on your iPhone. What it actually does, if not treated at the earliest, is that it will start to rust and short the components on the logic board. These short circuits stop your phone from powering on, which makes it look like your data is gone. But in many cases, the data is still sitting right there on the chip, waiting to be accessed.

The bigger problem is corrosion. Once water gets inside your phone, it reacts with the metal components and starts corroding the circuit board. This is what makes recovery harder as time passes.

Data Recovery for iPhone: What You Should Do First

The first thing you need to do is turn off your iPhone if it is still on. Do not try to unlock it, do not plug it in, and absolutely do not try to charge it. Charging a wet phone causes a short circuit that can permanently damage the logic board and make data recovery impossible.

Do not shake the phone to try to remove water; the movement can lead to water ingress into parts of the phone from where it might not drain out. Wipe off the water from all sides with a cloth. Then keep the phone upright, with the charging port facing down, and leave it somewhere dry. Some people reach for rice, but rice is not actually effective at drawing out moisture from inside a sealed device. A silica gel pack works better if you have one. Also, do not try to blow-dry the phone, as sudden high temperatures are not conducive to the battery. Your real goal here is to stop corrosion from spreading before you get it to a professional.

Why Consider the Backup First Approach

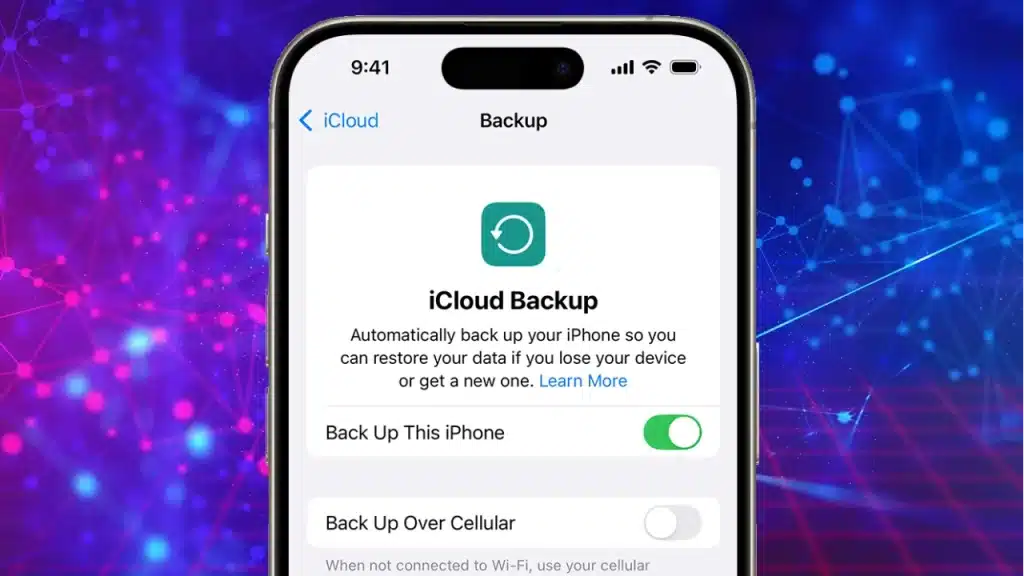
If you had a recent iCloud backup or had synced your phone with iTunes, this is not a crisis at all. You restore the backup onto a new or repaired phone, and your data is right there. This is by far the simplest path.

(Credit: Apple; issaro prakalung / Shutterstock / pcmag.com)

If your iCloud backup is current, you do not even need to recover data from the damaged phone. Just check your iCloud storage at iCloud.com from another device, confirm your last backup date, and proceed from there.

Read – How Often Should You Back Up Your Devices?

iPhone Water Damage Repair: Professional Recovery Options

If your phone will not turn on and you have no backup, professional data recovery is your best bet. In India, you will find a range of service providers, from local mobile repair shops to specialised data recovery labs.

Professional recovery usually involves cleaning the logic board with isopropyl alcohol to remove corrosion, then attempting to power on the device in a controlled environment. If the chip itself is intact, technicians can sometimes read data directly off the NAND flash storage chip.

This is called chip-off recovery, and it is the last resort when nothing else works.

Data Recovery for iPhone: What Affects Recovery Rate

A few things decide whether recovery will work for your specific phone.

  • How long the device was in water matters a lot. A quick splash is very different from sitting in a full tub for hours.
  • Saltwater is worse than freshwater because salt speeds up corrosion significantly.
  • If the phone was powered on when it went into the water, that typically causes more immediate circuit damage.
  • The iPhone model also matters. Phones from the iPhone 7 onwards come with varying levels of water resistance. iPhones rated IP67 or IP68 can handle short submersion, but that resistance degrades over time as seals wear out. So, an older iPhone 11 that has been dropped before may have compromised seals and suffer worse internal damage than expected.
  • Lastly, the data recovery rate also depends on the skill of the technician at work. A trained and seasoned expert will know what and how to respond after checking the extent of rusting and corrosion on the components and connectors. Hence, make sure you reach out to the best available professional help at the earliest.

Conclusion

Not all water-damaged iPhones mean you will lose data forever. Water-damaged iPhone data recovery is often possible, particularly if you act quickly and avoid common mistakes like charging the device or repeatedly trying to turn it on. The sooner your phone is evaluated, the better the chances of recovering your valuable photos, messages, contacts and other important files.

If your iPhone has been damaged by water, do not risk your data.

At Rapid Repair, our experienced technicians use the latest diagnostic and recovery technology to give your device the best possible chance of having your data restored while we repair it. Whether it’s a little splatter or a big liquid mishap, we’re here to help you get back what matters most.

Water-damaged iPhone? Need professional help? Contact Rapid Repair today for quick, reliable iPhone diagnostics, repair and professional data recovery services.

Best Apple Repair Service in Gurugram: What to Look for Before You Choose

Read this guide to choose a trusted Apple repair service in Gurugram. Learn how to compare repair quality, pricing, reviews, and warranty.

MacBook suddenly stops working,  iPhone screen gets cracked, or a battery that only lasts a few hours? Have you been in such situations? Devices might have glitches at any time, when they do the biggest challenge isn’t just fixing the issue, it’s finding someone you can trust with your valuable device.

With so many repair shops claiming to offer the best Apple repair service in Gurugram, how do you know which one will actually deliver quality repairs instead of creating bigger problems? Before you make your choice, here are the key things you should look for to ensure your Apple device is in safe hands.

Let’s get started!

1.  Look for Experienced Apple Repair Technicians

Compared to standard laptops and cellphones, Apple gadgets are constructed differently. Because of their proprietary parts, sophisticated hardware, and small interior design, Apple products require highly qualified technicians.

Prior to choosing a repair facility, consider:

  • Skilled Apple repair specialists
  • proficiency in fixing iPhones, MacBooks, iPads, and Apple Watches
  • The capacity to identify problems at the motherboard and hardware levels

Instead of just changing parts needlessly, a skilled technician will find out the underlying issue and solve it.

2.   Check Whether They Use Latest Repair Tools and Technology

With almost every device launch, Apple offers new parts, hardware, and repair methods. Because of this, fixing the newest iPhone, MacBook, or iPad frequently calls for specific tools, advanced diagnostic software, and updated repair protocols.

Investing in the newest equipment allows a professional repair company to be ready for new Apple models as soon as they are introduced. This guarantees that repairs are completed precisely, safely, and without affecting the functionality of your equipment.

3.  Verify the Company’s Certifications

Spend a few minutes making sure that you are working with a legitimate company before giving them an expensive Apple device.

A professional service provider should possess the appropriate business credentials and certificates, in contrast to small, unregistered repair shops, such as:

  • CPCB Authorisation for Responsible Electronic Waste Disposal
  • Registration by the Ministry of Corporate Affairs (MCA) as a legally registered firm
  • Trademark registration establishes the legitimacy of the brand.

The majority of these facts can be confirmed through the Government portals such as MCA, giving customers more assurance that their devices are in secure and accountable hands.

4.  Understand the Quality of Replacement Parts and Warranty

This is one of the most significant considerations while picking an Apple repair service in Gurugram.

Apple devices are intended to work seamlessly with OEM (Original Equipment Manufacturer) components. While Apple does not manufacture every component, genuine OEM-quality parts are designed to match Apple’s standards and are more likely to restore your device’s original performance, compatibility, and functionality.

Inquiring about the warranty is equally crucial. Compared to inexpensive aftermarket substitutes, genuine OEM-quality parts typically have longer and more dependable warranty coverage.

Before starting any repairs, a reliable repair company should thoroughly explain the kind of parts being used and the warranty that comes with them.

5.  Don’t Just Look at the Star Rating – Read the Reviews

A repair provider is frequently selected solely based on its overall rating. However, the evaluations themselves frequently contain the most insightful information.

Take some time to read one-star and three-star reviews in addition to five-star ones. Sincere customer experiences typically detail particular repair problems, turnaround times, communication, and the company’s response to unforeseen circumstances.

You can get a more balanced picture of a service provider’s dependability and client happiness by looking at evaluations from several platforms.

6.  Evaluate Turnaround Time and Customer Support

Fixing equipment is only one aspect of a good repair business; another is giving customers a seamless experience.

The whole process, including doorstep pickup and delivery, should ideally be finished in a few hours for routine repairs like screen or battery replacements. More complicated repairs, like motherboard or chip-level problems, should be handled in a day.

Equally crucial is the customer service experience. Before scheduling a repair, try contacting the company by phone or WhatsApp. Knowledgeable human support agents who can confidently answer technical queries demonstrate a well-trained service staff.

If the firm has a Meta Verified Blue Tick WhatsApp Business Account, it adds another layer of credibility and reassures customers that they are dealing with the official corporation.

Final Thoughts

Selecting the appropriate repair partner can greatly increase the lifespan of your Apple iPhone while maintaining its functionality, making it a profitable investment.

Consider aspects like technician experience, authentic parts, warranty coverage, turnaround time, and customer feedback when choosing a repair shop instead of just price.

If you’re looking for a trustworthy Apple repair service in Gurugram, Rapid Repair provides a convenient and transparent repair experience that is focused on client happiness.

You may have your Apple device fixed with confidence thanks to skilled professionals and doorstep service.

Does your Apple device need an urgent repair?  just contact Rapid Repair on WhatsApp and get it the same day!

Protecting Your iPhone and MacBook from Water Damage in Monsoon Season

How to Prevent Water Damage on iPhone & MacBook During Monsoon

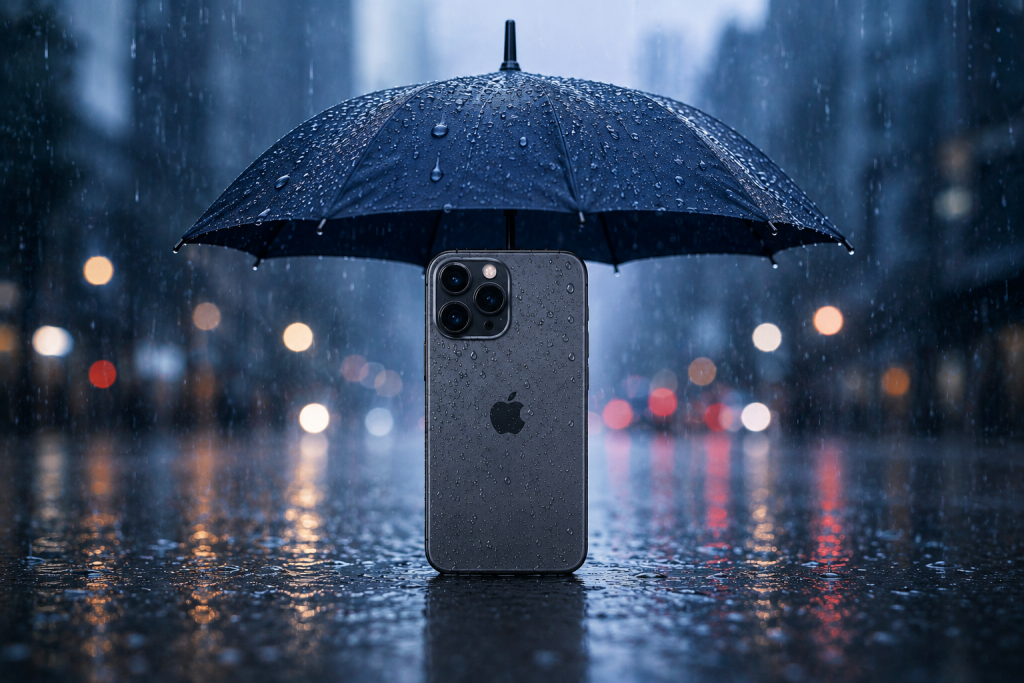
Monsoon season calls for one very important form of protection, aside from your health. It calls for protecting your device from the moist weather and never-ending drizzle. When it comes to costly devices like the iPhone and MacBook, water protection becomes non-negotiable. Here is a bunch of information on how to protect your iPhone from water damage, some easy Apple device maintenance tips, and different ways to save your MacBook from water damage.

Why is it important to handle iPhones carefully during monsoon?

Even a small amount of water can significantly damage your devices. iPhone is not entirely waterproof yet; it’s water-resistant. The updated models from the iPhone 12 to the 17 series carry an IP68 rating, which allows them to withstand accidental splashes or rain up to 6 meters for 30 minutes (depending on the model). Nevertheless, below are some issues you will face when your iPhone contacts water:

  • Temporary screen blackout- Water can seep into iPhone display connectors, which can lead to temporary screen blackout. This can happen even if the phone is running.
  • Irresponsive screen- Water on the iPhone’s display can interfere with its touch sensors, causing the screen to become unresponsive or slow to respond to touch.
  • Foggy display – Condensation trapped between the internal layers of the iPhone and the screen creates a foggy, hazy look that persists even after wiping the surface.
  • Phantom touch- This refers to your phone registering touches you never made, such as opening apps or typing on its own.

4 Ways to protect iPhone from water damage

Prevention is always better than finding or testing a cure. The following four ways to protect your iPhone from water damage will save you from monsoon trouble: 

  • Use Ziplock Bags: Slide your iPhone into a sealed Ziplock bag when stepping outside during monsoon days. This is a low-cost, one of the most effective iPhone water-damage tips.
  • Use a Water-resistant Case: Invest in good water-resistant cases. It adds a physical barrier against splashes and light rain. A good case protects your charging port and buttons from moisture exposure as well.
  • Lookout for Moisture Detection Alert: Most modern iPhones can automatically detect moisture in the charging port via a sensor and will alert you before you plug in the cable. Never ignore these moisture detection warnings.
  • Check iPhone SIM Tray: The SIM tray in an iPhone is the common entry point for water. After any exposure to rain, check that the tray area is dry before reinserting your SIM. Also, make sure that the rubber gasket on the SIM tray is intact., it should not be worn out or missing.

5 Effective iPhone care tips in monsoon

Beyond the basics, you need a few extra precautions to avoid a close call and a costly repair bill. These iPhone care tips in monsoon are easy to build into your daily routine:

  • Add a Waterproof Case- A waterproof case offers extra peace of mind, especially if you commute daily during heavy rains.
  • Carry Dry Bags- Keep a small microfiber cloth or a dry pouch in your bag to wipe your phone the moment it gets wet.
  • Avoid Charging Wet Devices- Never plug in a charger if your phone shows any sign of moisture. Let it dry completely before plugging in. This can be frustrating at low battery levels, but important to avoid damage.
  • Using a Hydrophobic Screen Protector- Hydrophobic protectors repel water droplets and keep your touchscreen responsive even when it is damp.
  • Turn it Off- If your iPhone is completely wet, switch it off immediately. This is the best way to prevent short circuits and reduce any internal damage.
  • Avoid home remedies – If your device has been exposed to water, avoid spending time on home remedies like blow/air drying or putting device in rice. Seek professional help immediately.

MacBook Water Damage Prevention: Tips and Tech Tricks

MacBooks are more vulnerable than iPhones because of their open keyboards and vents. Repairing a MacBook can get far more expensive, so a little extra care goes a long way. Here’s how your MacBook monsoon care routine should look:

  • Disconnect/Shutdown- If your MacBook comes into contact with water, disconnect it from power immediately and shut it down. Do not restart your device while it is wet. Also unplug accessories if any.
  • Introduce a Waterproof Sleeve – Carry your MacBook in a waterproof sleeve or padded case when commuting during the monsoon.
  • Clean Workspace- Keep your desk clean and free of damp umbrellas, wet raincoats, and water bottles. Accidental spills can cause huge damage.
  • Positioning- Avoid placing your MacBook near open windows or balconies where rain can easily reach it.

Bonus: iPhone Maintenance Tips

iPhone or MacBook monsoon care isn’t just about using Ziplock bags and saving it from rain, it is also about smart, everyday habits that reduce risk all season long:

  • Use Bluetooth Devices- Reduce how often you plug in wired accessories during the monsoon. Introducing Bluetooth earphones and speakers will minimize port exposure and any moisture-related problems.
  • Introduce Silicone Port Plugs- Small silicone plugs for charging ports and headphone jacks add a layer of protection against any dust and water.
  • Avoid Sunlight- After your device gets wet, do not dry it under the sun or with a hairdryer. Excessive heat damages the device internally.
  • Backup- Regularly back up your iPhone and MacBook data. This is the best precautionary step you can take.

To Wrap Up

Monsoon does not have to be stressful if you follow a few mindful habits- from using a water-resistant case to knowing what to do when your device gets wet. The above-mentioned Apple device maintenance tips are simple and go a long way in saving you from expensive repairs.

That said, accidents can happen; you might forget a Ziplock bag. If your iPhone or MacBook has already suffered water damage, don’t wait for the problem to get worse. Reach out to  Rapid Repair today and get an expert diagnosis. A professional repair service is what you need to get your device back to full health before the rain catches you off guard again.

Read – Is It Worth Fixing a Water-Damaged iPhone? Factors to Consider

whatsapp logo