Apple Watch Battery Replacement Cost

Replacing the battery of an Apple Watch is essential to maintain its performance and longevity. The cost of battery replacement depend on factors such as the model of your device and whether you choose an official service provider or a third-party repair center.

Typically, official battery replacement costs range from ₹3,500 to ₹8,500, depending on the model. This guide provides a clear overview of expected pricing, battery health insights, and tips to extend battery life.

Apple Watch Battery Replacement Costs 2024 – With Model Detail

The cost to replace a battery in the Apple Watch depends on the service provider, the quality of the part and the level of service they provide for battery replacement for Apple Watch. The following estimates are based on OEM-quality parts and independent repair benchmarks.

Know the Battery Health in Apple Watches

Keeping your Apple Watch battery healthy is important for long-term performance. Like all rechargeable batteries, capacity decreases over time.

  • A healthy battery = close to 100% capacity
  • Lower percentage = reduced charge holding ability
  • Significant drop = time for replacement

How to Check Battery Health on an Apple Watch

Checking the battery health on your Apple Watch is a straightforward process. Here’s how you can do it:

  1. Press the Digital Crown to get to your watch face.
  2. Open the Settings app.
  3. Scroll down and tap on Battery.
  4. Look for Battery Health and tap it. You’ll see the Maximum Capacity as a percentage.

This percentage tells you how much charge your battery can hold compared to when it was new. A healthy battery will be close to 100%. If the number is much lower, it might be a sign it’s time to consider a replacement to keep your Apple Watch running smoothly all day.

Battery Capacity (mAh) by Apple Watch Model

Explore the battery capacities, measured in milliampere-hours (mAh), across different Apple Watch models to understand their power storage capabilities

ModelBattery (mAh)Voltage
Series 3 – 38MM2623.1V
Series 3 – 42MM3523.8V
Series 4 – 40MM2253.8V
Series 4 – 44MM2923.8V
Series 5 – 40MM2453.8V
Series 5 – 44MM2963.8V
Series 6 – 40MM2653.8V
Series 6 – 44MM3033.8V
Series 7 – 41MM2843.8V
Series 7 – 45MM3093.8V
Apple Watch Ultra – 49MM5423.8V

Factors Affecting Apple Watch Battery Life

Several factors can affect the battery life of your Apple Watch, impacting how long it can operate before needing a recharge. Here are some key factors:
Hardware and Software Optimization: Apple’s continuous improvements in hardware and software are designed to enhance battery efficiency

  • Hardware & Software: While Apple constantly strives for efficiency, there’s always room for improvement. Both hardware and software updates can impact battery life.
  • Display Mania: The bright and beautiful Apple Watch display is also a battery hog. Turning down the brightness and limiting screen time can make a big difference.
  • App and Notification Overload: Background app refresh and a constant stream of notifications can silently drain your battery. Consider customizing these settings to find a balance.
  • Location & Connectivity: GPS for workouts or navigation and using cellular data can significantly shorten battery life. Use them wisely!
  • Temperature Tantrums: Extreme temperatures, especially cold weather, can take a toll on your battery’s performance. Keep your watch in moderate conditions.
  • Aging Battery: Like all batteries, your Apple Watch’s capacity naturally decreases over time. This means it holds less charge, leading to shorter usage times.
  • Power-Hungry Activities: Workouts, frequent alerts, and music streaming all require more processing power, which drains the battery faster.

Tips to Extend Apple Watch Battery Life

  • Reduce screen brightness
  • Disable unnecessary notifications
  • Limit background app refresh
  • Use low power mode when needed
  • Avoid extreme temperature

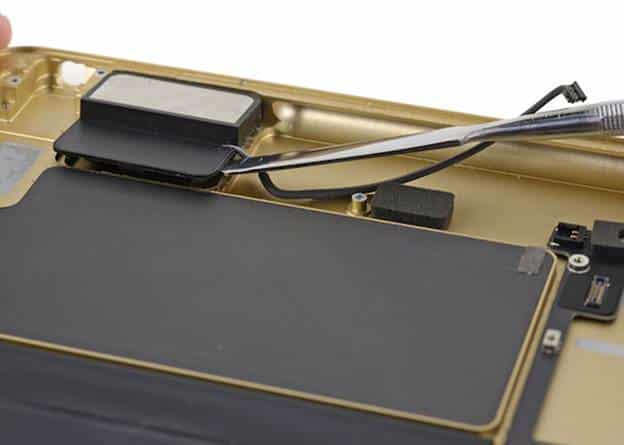
Apple Watch Battery Replacement Process

Battery replacement is a same-day service (2–3 hours total):

  • Diagnosis: ~30 minutes
  • Repair & Drying: 2–2.5 hours
  • Delivery: Same-day return

How to get Apple watch Battery replacement at Rapid Repair

If your Apple Watch is often tethered to the charger, it might be time to address a waning battery. Don’t let a fading battery interrupt your routine. Here’s where we can help!

Our Apple Watch battery replacement service is designed to get your watch back to peak performance quickly and conveniently.

The entire process typically takes just 2-3 hours, ensuring you won’t be without your watch for long. Here’s a breakdown:

  1. Quick Diagnosis (30 minutes): Our experts will thoroughly assess your Apple Watch to confirm a battery replacement is the best solution.
  2. Expert Repair & Drying (2-2.5 hours): With skilled technicians and high-quality parts, we’ll replace your battery efficiently. Following the repair, a dedicated drying period ensures optimal performance.
  3. Same-Day Return: That’s right! You’ll get your Apple Watch back on the same day, fully charged and ready to go.

Ready to ditch the charger and reclaim your watch’s power? Here’s how to get started:

  1. Contact Us: Simply call or WhatsApp our tech experts at +918130609004. Let them know your Apple Watch model.
  2. Get a Quote & Schedule Pickup: Our team will provide a quick repair cost and time estimate, and schedule a convenient pickup of your watch from anywhere in India.
  3. Relax and Recharge (Literally): Once you approve the repair, we’ll handle the rest. You’ll get your Apple Watch back in top shape, delivered safely to your chosen location.

Don’t let a weak battery slow you down. Get your Apple Watch back in the game with our fast and reliable battery replacement service!

Read – Apple Watch Screen Repair Cost – Things to watch out for

Apple Watch Screen Replacement Cost 2026 – (Updated Guide)

Apple Watch screen replacement cost typically starts from ₹4,000, depending on the model and type of damage. Factors like warranty status and the choice of repair provider also influence the overall cost.

Ignoring a damaged Apple Watch screen can lead to further issues and affect performance. Whether it’s a minor scratch or a severe crack, timely repair is essential to maintain functionality and aesthetics.

This guide outlines the expected costs and what you should know before getting your Apple Watch repaired.

Apple Watch Screen Replacement Cost Highlights

  • Price Range: ₹4,500 to ₹28,000+ depending on model and damage
  • Cost Variation: Based on model (Series 1 to Ultra), damage type, warranty, and repair provider
  • AppleCare+: Can significantly reduce repair costs for accidental damage
  • Location Impact: Costs may vary by city due to labor and part availability
  • DIY Repairs: Cheaper but risky and may void warranty

Apple Watch Screen Replacement Cost Breakdown by Model Type

Here’s a general estimate of the repair costs for different Apple Watch models:

Apple Watch ModelScreen Replacement Cost
Apple Watch Ultra 49mmINR 55900
Apple Watch Series 8 (45mm)INR 37900
Apple Watch Series 8 (41mm)INR 37900
Apple Watch Series 7 (45mm)INR 37900
Apple Watch Series 7 (41mm)INR 37900
Apple Watch Series 6 (44mmINR 37900
Apple Watch Series 6 (40mm)INR 37900
Apple Watch Series SE 2 (44mm)INR 24990
Apple Watch Series SE (44mm)INR 23900
Apple Watch Series SE (40mm)INR 23900
Apple Watch Series 5 (44mm)INR 37900
Apple Watch Series 5 40mmINR 37900
Apple Watch Series 4 (44mm)INR 37900
Apple Watch Series 4 (40mm)INR 37900
Apple Watch Series 3 (42mm)INR 21500
Apple Watch Series 3 (38mm)INR 21500

Factors Influencing Apple Watch Screen Replacement Cost

Several factors contribute to the cost of repairing an Apple Watch screen:

  1. Model of Apple Watch: Different models have varying screen sizes and complexities, which can affect the cost. For instance, the newer Series 7 and Apple Watch Ultra models may cost more to repair than older Series 3 models.
  2. Type of Damage: Whether it’s a small crack, unresponsiveness, or water damage plays a significant role in determining the iwatch screen replacement cost. Severe damages usually require more extensive repairs and higher costs.
  3. Warranty Status: If your Apple Watch is still under warranty or covered by AppleCare+, repair costs can be significantly reduced or even free, depending on the type of damage.
  4. Repair Provider: Costs can vary depending on whether you choose an authorized Apple service center, a third-party repair service. Authorized centers typically charge more but third party Apple watch repair provide same services and warranty at affordable cost.
  5. Geographical Location: Repair costs may vary based on location due to differences in labor rates and the availability of parts. Urban areas with higher living costs might see higher repair charges.

Saving on Apple Watch Screen Replacement Costs

  1. AppleCare+:
    • Benefits: Covers most accidental damage repairs at a reduced cost. Purchasing AppleCare+ can significantly reduce repair expenses over the device’s lifespan.
  2. Insurance Options:
    • Coverage: Some device insurance plans cover accidental damage, including screen repairs. Check with your provider for details.
  3. Promotional Discounts:
    • Savings: Keep an eye out for seasonal or promotional discounts from repair services, which can help lower iwatch glass replacement costs.

How to get Apple watch screen Repair at Rapid Repair

It’s a 2-3 hours job for any Apple watch glass replacement services. Yes, the first step is Diagnosis and it does not take more than 30 minutes and then the post repair drying off period shall be another 1 hour. 

All of this is done the very same day. To help us achieve that, you just need to follow 3 simple steps:

Contact one of our tech experts at +918130609004 via call or Whatsapp and let them know your iPad model.

Post your first call, they will quickly get repair cost and time estimate along with scheduling the pickup of your iPad from any location in India.

Once you agree to the estimate, our Ops team will contact you to work out the schedule for your iPad repair session. You may choose different location and time slots for the pickup as per your convenience, once done it will be safely delivered back to you as new as it could be. 

Read also – Apple Watch Battery Replacement Cost

iPad Water Damage: What to Do Immediately to Save Your Device

Water and electronics have never been good companions. Even though modern devices are built with tighter seals and better internal protection, iPads are still vulnerable to moisture. A spill on the desk, a drop near the sink, or rain getting into a bag can quickly lead to problems.

If your device has been exposed to liquid, the first question is usually what to do if the iPad gets wet. Acting quickly and correctly can sometimes prevent long-term damage. Acting the wrong way can make things worse.

Apple support discussions and official troubleshooting guidance consistently emphasise one thing: the first few minutes after liquid exposure matter the most.

First Step: Turn the iPad Off Immediately

If the iPad is still powered on, shut it down right away. Electricity flowing through wet circuits can cause short circuits, which often permanently damage internal components.

Turn the iPad off immediately. On most modern models, press and hold the top button together with either volume button, then slide to power off. Do not try to keep using the device to see if it still works.

Remove Accessories and Disconnect Everything

Take off anything attached to the device:

  • Charging cable
  • Keyboard accessories
  • Apple Pencil
  • Protective case

Moisture can remain trapped under cases or around connectors. Removing these allows the device to dry more effectively.

Dry the Exterior Carefully

Use a clean, dry cloth to wipe the outside of the device. Pay attention to areas where water can collect, such as the charging port, speakers, and buttons.

Avoid heat sources like hair dryers or heaters. Excess heat can damage internal components and warp adhesives inside the device.

Do Not Charge the Device

After water exposure, many people instinctively try to plug the iPad in to see if it still charges. That is one of the worst things you can do.

Charging forces electrical current through internal circuits that may still be wet. This can cause severe damage.

Wait until the device is completely dry before attempting to power or charge it again.

Source: Fireebok

Read More – iPad Speaker Not Working? Common Causes and Practical Fixes

Skip the Rice Trick

You might have heard that placing a wet phone or tablet in rice can absorb moisture. This method is unreliable. Rice particles can enter charging ports and speakers, creating additional issues.

Let the Device Dry Properly

Place the iPad in a dry environment with good airflow. A room with moderate temperature and ventilation works well. Avoid sealed containers because trapped moisture slows drying.

Allow at least 24 to 48 hours before attempting to turn the device back on.

Patience here can prevent more serious damage.

Check for Warning Signs After Drying

Once the device has had enough time to dry, power it on and observe its behaviour.

Signs of possible liquid damage include:

  • Alerts for liquid detection
  • Screen flickering or discolouration
  • Touchscreen not responding correctly
  • Distorted speaker sound
  • Charging issues
  • Unexpected shutdowns

If any of these appear, the internal components may have been affected.

At this stage, professional iPad water damage repair may be required to prevent corrosion from spreading across the circuit board.

Source: Apple Support

Why Water Damage Sometimes Appears Later

Liquid damage is tricky because problems don’t always appear immediately. Moisture can slowly corrode internal components over days or weeks.

Even if the device seems fine at first, it’s worth monitoring for unusual behaviour. Early iPad water damage treatment can prevent larger failures later.

Water exposure does not automatically mean your iPad is beyond saving. Quick action, turning the device off, and allowing it to dry properly can significantly improve the chances of recovery.

The key is avoiding panic decisions. Charging the device, using heat, or trying unreliable drying methods often causes more harm than the water itself.

Taking calm, careful steps immediately after exposure gives your device the best chance of surviving the accident.

Read More – How to Pick the Best Apple iPad for You

FAQs

Can an iPad survive water damage?

Yes, sometimes it can. If the device is turned off quickly and allowed to dry properly, it may continue working normally. However, internal corrosion may still develop later in some cases.

Should I put my wet iPad in rice?

Most technicians and Apple support discussions discourage using rice. Rice dust can enter ports and openings, causing additional problems.

How long should I wait before turning my iPad on?

It is usually recommended to wait at least 24 to 48 hours after drying before powering the device on.

What happens if I charge a wet iPad?

Charging a wet device can cause short circuits in internal components. This can permanently damage the logic board or battery system.

Can water damage appear days later?

Yes. Liquid exposure can cause corrosion that develops slowly. The device might appear normal initially and show problems later.

Does Apple warranty cover water damage?

Liquid damage is typically not covered under Apple’s standard warranty. Apple technicians can inspect the device and determine the extent of damage if needed.

MacBook Screen Flickering? Causes and Fixes You Should Try First

A MacBook display is supposed to be smooth, stable, and predictable. When the screen starts flickering, even slightly, it can make simple tasks uncomfortable. Text becomes hard to read. Videos look choppy. Sometimes the brightness seems to pulse on and off.

If you are facing a MacBook screen flickering issue, the good news is that the cause is often something simple. In many cases, it can be fixed without replacing any hardware. Apple support experts usually recommend checking software settings first before assuming the worst.

Let’s look at the most common reasons behind this problem and what you can do to fix it.

What Does Screen Flickering Usually Look Like?

Different users describe flickering differently. Some notice quick flashes. Others see horizontal lines or brightness jumping randomly.

Typical signs include:

  • Screen brightness is fluctuating by itself
  • Horizontal lines appear briefly
  • Display flashing when opening apps
  • Flickering while adjusting brightness
  • The screen behaves normally after restarting, but the flicker returns later

Understanding the pattern helps identify whether the problem is software-related or hardware-related.

Source: Apple Support Communities

Restart Your MacBook First

It sounds basic, but restarting the system often solves temporary glitches.

Sometimes macOS graphics processes get stuck or overloaded. Restarting clears memory and reloads the display drivers.

Steps:

  1. Click the Apple logo in the top-left corner
  2. Select Restart
  3. Wait for the system to boot again

If the flickering disappears afterwards, it was likely a temporary system process issue.

Check macOS Updates

Display problems sometimes appear after a buggy update or when your system is outdated.

Apple frequently releases updates that fix graphics driver issues.

To update macOS:

  1. Open System Settings
  2. Click General
  3. Select Software Update

Install any available update and restart the system afterwards. Many users on Apple support forums report that display glitches disappear after updating.

Read More – How Long Do MacBooks Last?

Turn Off Automatic Graphics Switching

MacBook Pro models with dual GPUs sometimes flicker when switching between integrated and dedicated graphics.

You can test this by disabling automatic switching.

Steps:

  1. Open System Settings
  2. Click Battery
  3. Select Options
  4. Turn off Automatic graphics switching

If the flicker stops, the issue may be related to GPU switching behaviour.

Source: Apple Support

Adjust True Tone and Night Shift

Display features like True Tone and Night Shift constantly adjust colour temperature based on lighting conditions. Occasionally, these adjustments may look like flickering.

To test this:

  1. Open System Settings
  2. Click Displays
  3. Turn off True Tone
  4. Disable Night Shift

Observe the screen for a while. If the flickering stops, one of these features may have been triggering the behaviour.

Reset NVRAM or PRAM

Apple recommends resetting NVRAM when you experience unusual display behaviour.

NVRAM stores display settings, brightness preferences, and graphics configurations.

To reset it on Intel MacBooks:

  1. Shut down the Mac
  2. Turn it on and immediately press Option + Command + P + R
  3. Hold the keys for about 20 seconds
  4. Release them and let the Mac start normally

After this reset, check whether the MacBook display flickering problem continues.

Boot in Safe Mode

Safe Mode loads macOS with only essential system extensions. If the flickering stops in Safe Mode, a third-party app or background process may be responsible for the issue.

Steps:

  1. Shut down your Mac
  2. Turn it on while holding the Shift key
  3. Release the key when the login screen appears

If the display behaves normally in Safe Mode, recently installed apps or system extensions might be interfering with the graphics system.

Check External Displays and Cables

If you use an external monitor, flickering may come from:

  • faulty HDMI or USB-C cables
  • incompatible display adapters
  • refresh rate mismatches

Try disconnecting the external display temporarily. If the MacBook screen becomes stable, the issue might be with the external setup rather than the laptop itself.

Source: Mac World

When It May Be Hardware Related

If none of the software solutions work, hardware may be involved.

Possible causes include:

  • display cable wear from repeated lid movement
  • graphics chip issues
  • panel damage after drops or pressure
  • ageing display components

In such cases, running Apple Diagnostics can help identify internal faults.

To run diagnostics:

  1. Shut down the MacBook
  2. Turn it on while holding the D key
  3. Follow the on-screen instructions

Apple Diagnostics can detect certain hardware issues that may cause flickering.

Display flickering does not always mean the screen is failing. Many cases of MacBook display flickering problems are caused by software conflicts, display settings, or graphics switching behaviour. Trying these troubleshooting steps often resolves the issue without any repair.

However, if the flickering continues even after system resets and updates, it may indicate a deeper hardware problem that needs professional inspection.

Read More – MacBook Screen Problems: Common Issues and Fixes

FAQs

Why is my MacBook screen flickering randomly?

Random flickering often occurs due to graphics driver glitches, automatic graphics switching, or display settings such as True Tone or Night Shift. Updating macOS or restarting the system often fixes it.

Can software cause screen flickering on a MacBook?

Yes. macOS bugs, incompatible apps, and graphics driver conflicts can cause display instability. Booting in Safe Mode can help determine if software is responsible.

Does overheating cause screen flickering?

In some cases it can. When the system overheats, the graphics processor may behave unpredictably, which can affect display stability.

Is MacBook screen flickering a hardware issue?

Not always. Many flickering issues are software-related. Hardware problems are usually suspected only after software troubleshooting fails.

Can resetting NVRAM fix flickering?

Yes. Resetting NVRAM restores display and graphics settings to default values, which sometimes resolves display glitches.

Should I replace the screen if it flickers?

Only if troubleshooting confirms a hardware fault. Always rule out software causes first before considering display replacement.

iPad Speaker Not Working? Common Causes and Practical Fixes

An iPad is often used for watching videos, attending online meetings, listening to music, or following tutorials. When the sound suddenly disappears or becomes distorted, the device quickly becomes frustrating to use.

If you are facing an iPad speaker not working problem, the cause is not always a hardware failure. In many cases, the issue comes from settings, temporary software glitches, or small blockages in the speaker grills. A few basic things must be checked before assuming the speakers need repair.

Let’s go through the most common reasons and what you can do to fix them.

Check the Volume and Mute Settings

It sounds obvious, but this is often the first thing Apple technicians recommend checking.

Press the volume buttons and make sure the volume slider moves upward. Also, check the Control Center to confirm that the device is not muted.

To check quickly:

  1. Swipe down from the top-right corner to open Control Center
  2. Look at the volume slider
  3. Make sure it is not set to zero

Sometimes the device may appear silent simply because the system volume was lowered accidentally.

Disconnect Bluetooth Devices

Your iPad may still be connected to wireless headphones, speakers, or a car audio system. When that happens, audio gets redirected away from the iPad speakers.

To check:

  1. Open Settings
  2. Tap Bluetooth
  3. See if any device is connected

Disconnecting the Bluetooth device often restores sound through the built-in speakers.

Restart the iPad

A quick restart can resolve temporary software glitches that affect audio output.

To restart most modern iPads:

  1. Press and hold the top button together with either volume button
  2. Slide to power off
  3. Wait a few seconds
  4. Turn the device back on

Many users report that audio problems disappear after a restart because the audio system processes are reset.

Source: MacRumors Forum

Read More – How Do I Know What iPad I Have?

Check the App Causing the Problem

Sometimes the issue is limited to a specific application. A video player or streaming app may temporarily malfunction.

Try this simple test:

  • Play audio from a different app
  • Open Apple Music or a system sound
  • Play a notification tone

If sound works in other apps, the original application may need to be updated or reinstalled.

Inspect the Speaker Grills

Dust, lint, or debris can block the small openings in the speaker grills. When this happens, sound may become muffled or extremely quiet.

Use a soft, dry brush or a clean microfiber cloth to gently remove dust around the speaker area. Avoid using sharp objects or liquids.

iPad users are generally advised to keep speaker openings clean because even small particles can affect audio clarity.

Check for Software Updates

Apple frequently releases updates that fix system bugs, including audio-related glitches.

To update your device:

  1. Open Settings
  2. Tap General
  3. Select Software Update

Installing the latest iPadOS version can sometimes resolve audio instability.

Reset All Settings

If the sound problem continues, resetting system settings may help. This will not erase your data, but it will restore default settings for Wi-Fi, sound preferences, and display options.

Steps:

  1. Open Settings
  2. Tap General
  3. Select Transfer or Reset iPad
  4. Tap Reset
  5. Choose Reset All Settings

After restarting, test the speakers again.

Source: MacRumors

When Hardware Might Be the Problem

If none of the above steps works, the issue may be hardware-related. Possible causes include:

  • Internal speaker damage
  • Water exposure
  • Loose internal connections
  • Physical damage from drops

In such cases, professional iPad speaker repair may be required. A technician can inspect the device internally and replace faulty speaker components if necessary.

Audio issues on an iPad can have many causes, and not all of them require repairs. Often, the problem is as simple as a Bluetooth connection, software glitch, or blocked speaker grill. Trying the basic troubleshooting steps first can save time and effort.

However, if the issue persists after these checks, a deeper inspection may be needed to identify the exact iPad audio issue solution and restore clear sound.

Read More – How to Remove an iPad App Without Overthinking It

FAQs

Why is my iPad speaker suddenly not working?

The problem could be caused by muted settings, Bluetooth connections, software glitches, or debris blocking the speaker grills.

Can restarting fix iPad speaker problems?

Yes. Restarting resets system processes and can resolve temporary audio glitches.

How do I check if Bluetooth is causing the issue?

Go to Settings → Bluetooth and see if the iPad is connected to headphones or speakers. Disconnecting them can restore sound to the device.

Can dust block iPad speakers?

Yes. Dust or lint inside the speaker openings can muffle sound or reduce volume.

Does updating iPadOS fix audio problems?

Sometimes it does. Apple software updates often include bug fixes that resolve audio and system stability issues.

When should I consider professional repair?

If none of the troubleshooting steps works and the speakers still produce no sound or distorted sound, the device may need internal inspection and repair.

20 Most Common iPhone Problems in 2026 (Based on Real Repair Cases)

iPhone problems and solutions

When it comes to delivering smooth and seamless performance, iPhones undoubtedly stand out from the rest. But that doesn’t mean Apple’s much-talked-about smartphone hasn’t had its fair share of issues. Luckily, there are some handy tips and tricks that can fix the iPhone’s common problems that occur every then and now.

Some issues appear repeatedly: battery draining too fast, charging problems, overheating after updates, cracked screens, and Face ID failures. Others are less common but still frustrating, like the phone getting stuck on the Apple logo or apps crashing randomly.

The good news is that many iPhone problems can be fixed with a few simple steps. And when the issue turns out to be hardware-related, getting it repaired early can prevent bigger damage later.

Below is a list of the 20 most common iPhone problems we see today, ordered by how frequently users report them in 2025–2026.

Most Trending iPhone Problems in 2026

1. iPhone Battery Draining Too Fast

Battery drain is easily the most common complaint among iPhone users today. Many people notice that their phone that once lasted all day suddenly starts dropping from 100% to 20% within a few hours.

In most cases, this happens because the battery has aged or because certain apps are constantly running in the background.

What usually causes this

  • Battery health dropping below 80%
  • Too many background apps running
  • High screen brightness and location services
  • iOS updates temporarily affecting battery performance

What you can try first

Start by checking your Battery Health under Settings. If the maximum capacity is below 80%, the battery may simply be worn out.

You can also try:

  • Turning off Background App Refresh
  • Reducing screen brightness
  • Closing unused apps
  • Updating to the latest iOS version

If none of these help and your battery keeps draining unusually fast, the issue is likely a degraded battery that needs replacement.

2. iPhone Overheating

Another issue that has become increasingly common in recent years is iPhone overheating. Many users notice their phone becoming unusually warm while gaming, charging, or even during normal usage.

Sometimes the device may even display a message saying “iPhone needs to cool down before you can use it.”

Common reasons this happens

  • Heavy apps like games or video editing tools
  • Charging the phone while using it
  • Hot environments or direct sunlight
  • Software bugs after iOS updates

How to reduce overheating

If your iPhone starts overheating, try these quick fixes:

  • Remove the phone case temporarily
  • Close heavy apps running in the background
  • Stop using the phone while it is charging
  • Move the device to a cooler environment

Occasional warmth is normal, but frequent overheating may indicate a battery or hardware issue.

3. iPhone Not Charging Properly

Few things are more frustrating than plugging in your iPhone and realizing that it isn’t charging at all.

Surprisingly, the issue is often much simpler than people think. In many cases, the charging port becomes clogged with dust and pocket lint, preventing the cable from connecting properly.

Common causes

  • Dust or debris in the charging port
  • Damaged Lightning cable
  • Battery problems
  • Faulty charging adapter

What you should try

First, inspect the charging port carefully. If you see debris inside, clean it gently with a wooden toothpick or compressed air.

Then test the phone with:

  • A different charging cable
  • A different power adapter
  • Another power outlet

If your iPhone still refuses to charge, the charging port or battery may need professional repair.

4. Cracked or Broken iPhone Screen

A cracked screen remains the most common hardware repair worldwide.

Even with stronger glass in newer models, a simple drop onto concrete can easily damage the display.

Many people continue using their phone with a cracked screen, but this can lead to bigger problems later.

Why you shouldn’t ignore it

  • Cracks can spread over time
  • Touch responsiveness may stop working
  • Glass shards can cause injury

In most cases, the safest solution is professional screen replacement. DIY repair kits exist, but they often damage delicate components like Face ID sensors if handled incorrectly.

5. iPhone Storage Always Full

Storage issues are becoming more common as people take more photos, videos, and large app downloads.

When storage is nearly full, the iPhone may start behaving strangely.

Signs your storage is overloaded

  • Apps crashing frequently
  • Camera refusing to save photos
  • iOS updates failing
  • Phone becoming noticeably slower

How to free up space

Start by reviewing what is taking up the most storage.

You can:

  • Delete duplicate photos and videos
  • Remove apps you rarely use
  • Clear Safari browser cache
  • Move photos to iCloud or external storage

6. iPhone Running Very Slow

Over time, many users notice that their iPhone starts feeling sluggish. Apps take longer to open, animations lag, and even basic tasks like switching between apps feel slower than usual.

This usually happens when the device storage is nearly full or when too many apps are running in the background.

What usually causes this

  • Low available storage
  • Too many background apps
  • Outdated iOS version
  • Aging battery affecting performance

What you can do

Start by freeing up storage space. Delete unused apps, old screenshots, and large videos that you no longer need.

Restarting the phone and installing the latest iOS update can also improve performance. If the device still feels slow after cleaning storage, the battery may be degraded and affecting overall speed.

7. Apps Freezing or Crashing Randomly

Another issue many iPhone users experience is apps suddenly freezing or crashing.

This is usually not a hardware problem. In most cases, it happens because the app itself is outdated or incompatible with the current iOS version.

Possible reasons

  • Outdated apps
  • Software conflicts
  • Insufficient storage space

How to fix it

Open the App Store and update all apps to the latest version. If the problem continues, try deleting the problematic app and installing it again.

Restarting the device often resolves temporary software glitches as well.

8. Face ID Not Working

Face ID is extremely convenient, but when it stops working it can be frustrating. Some users notice that the phone suddenly cannot recognize their face even in normal lighting conditions.

Common reasons

  • Dirt or smudges on the front camera
  • Changes in appearance (glasses, masks, etc.)
  • Software glitches

Things you can try

Clean the front camera area gently with a soft cloth. Then go to Settings → Face ID & Passcode and reset Face ID.

If the issue still persists, the TrueDepth sensor may have been damaged due to a drop or water exposure.

9. Wi-Fi Not Connecting or Disconnecting Frequently

Wi-Fi problems can make browsing, streaming, or downloading apps very frustrating.

Sometimes the iPhone shows a Wi-Fi connection but internet access still doesn’t work.

Common causes

  • Router issues
  • Network configuration errors
  • Software glitches

Simple solutions

Try turning Wi-Fi off and back on again. Restarting both the router and the phone often resolves connection issues.

If the problem continues, reset the network settings by going to Settings → General → Transfer or Reset iPhone → Reset Network Settings.

10. Cellular Network Problems

Sometimes the iPhone suddenly shows “No Service” or struggles to maintain a stable mobile network.

Possible reasons

  • Temporary network outage
  • SIM card issues
  • Network configuration errors

What you should check

Remove the SIM card and insert it again to ensure it is properly seated. If the issue persists, try resetting network settings.

If the phone still cannot detect a network, contacting your mobile carrier may be necessary.

11. iPhone Stuck on Apple Logo

One of the more alarming issues occurs when the iPhone gets stuck on the Apple logo during startup.

This often happens after an iOS update, system crash, or failed restore attempt.

The quickest solution

A force restart usually fixes the problem.

For newer iPhones:

  • Press and release the Volume Up button
  • Press and release the Volume Down button
  • Hold the Side button until the Apple logo appears

If this doesn’t work, the phone may need to be restored through recovery mode.

12. Camera Not Working Properly

The iPhone camera is one of its most important features, so it can be frustrating when it suddenly stops working.

Sometimes the camera app opens but shows a black screen or refuses to capture photos.

Possible causes

  • Temporary software glitch
  • Camera app crash
  • Hardware damage

What you can try

Close the camera app and reopen it. Restarting the device can also fix many camera problems.

If the camera still doesn’t work, the lens or internal camera module may require repair.

13. Bluetooth Connectivity Issues

Bluetooth is used for connecting AirPods, speakers, car systems, and many other accessories.

Occasionally the iPhone refuses to pair with devices it previously connected to without problems.

Simple fixes

Turn Bluetooth off and back on again. If the device still won’t connect, forget the device in Bluetooth settings and pair it again.

Resetting network settings can also solve persistent Bluetooth issues.

14. iPhone Black Screen

Some users experience a situation where the iPhone appears to be on, but the screen remains completely black.

This problem is sometimes referred to as the “Black Screen of Death.”

Possible causes

  • Software crash
  • Battery drained completely
  • Display hardware damage

What to try

Perform a force restart first. If the screen remains black even though the phone vibrates or makes sounds, the display may need replacement.

15. Water Damage

Water exposure remains one of the most common causes of smartphone damage.

Even though newer iPhones are water-resistant, they are not completely waterproof.

Immediate steps to take

  • Turn the phone off immediately
  • Do not charge it
  • Dry the device with a soft cloth

Avoid using heat sources like hair dryers, as they can damage internal components.

If the phone stops working after water exposure, professional repair is usually required.

16. Touchscreen Not Responding

Sometimes the touchscreen becomes unresponsive or reacts slowly to touches.

Possible reasons

  • Screen damage
  • Software glitches
  • Faulty screen protector

Quick fixes

Restart the device and remove any screen protector that might interfere with touch sensitivity.

If the display still does not respond properly, the screen may need replacement.

17. iPhone Speaker Not Working

If your iPhone speaker suddenly becomes quiet or stops working entirely, it can make calls and media playback difficult.

Possible causes

  • Dust blocking the speaker grill
  • Water exposure
  • Software glitches

What you can try

Clean the speaker area gently with a soft brush and restart the phone.

If sound problems continue, internal speaker damage may be the cause.

18. iPhone Randomly Restarting

Some users report their iPhone restarting unexpectedly during normal use.

Possible causes

  • Software bugs
  • Faulty apps
  • Battery problems

Solutions

Make sure the device is updated to the latest iOS version. Removing recently installed apps can also help identify the source of the problem.

If random restarts continue, the battery may need replacement.

19. iCloud Backup Not Working

iCloud backup is designed to keep your data safe, but sometimes backups fail unexpectedly.

Common reasons

  • Insufficient iCloud storage
  • Weak internet connection
  • Backup settings disabled

What to check

Ensure you are connected to a stable Wi-Fi network and have enough iCloud storage available.

You can also try signing out of iCloud and signing back in.

20. iPhone Update Failed

Some users encounter errors when trying to install a new iOS update.

Possible causes

  • Insufficient storage
  • Unstable internet connection
  • Server issues during updates

What you can do

Free up some storage space and ensure the phone is connected to a stable Wi-Fi network.

If the update still fails, installing the update through a computer using Finder or iTunes may resolve the issue.

When Should You Seek Professional iPhone Repair?

While many minor issues can be fixed with simple troubleshooting, some problems require professional attention.

If your iPhone has screen damage, battery problems, charging issues, water exposure, or camera failures, it’s best to get it checked by experienced technicians.

At Rapid Repair, we provide professional repair services for iPhones, including:

Getting your device repaired early can prevent further damage and extend the life of your iPhone.

whatsapp logo